
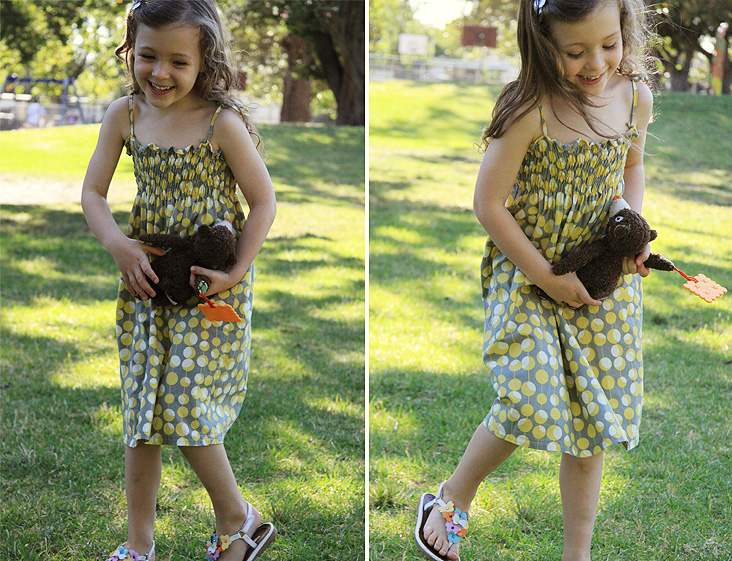
Case in point: lovely Amy Butler Midwestern Modern fabric that was bought maybe three years ago has left the cosy but somewhat stifling world of the stash cupboard, and is now a pretty darn spiffy dress that Grumbles adores, and which filled in a very pleasant Sunday afternoon.
I'm also loving that bizarre sort of logic that allows you to think that you made something for free even though you obviously paid good money for it some time in the past. Still, if you don't have to fork over the moolah immediately before sitting down to the sewing machine, it does feel like a freebie! Everybody wins!

Project Details
Fabric: 70cm Amy Butler Midwestern Modern cotton print
Pattern: Shirred Dress from Japanese sewing book "Handmade Girls Wears", ISBN 4579110544 / 9784579110544
Notions: Shirring elastic
Fabulously easy dress to whip up in next to no time. The only mistake I made (probably because I didn't follow the directions, so really it's my own fault) was not hemming the neck edge before commencing shirring. As a result you can see another row of stitching (from the hem) above the shirring rows. Still, it's a minor detail, and the sort of thing that few will notice but myself. Grumbles certainly doesn't give a fig!
Also, I was talking to Nichola who has made some for her girls, and her splendid advice was to reinforce the elastic after shirring. To do this I shirred the front and back first, then stitched the side seams together (reinforcement no. 1) and then overlocked the side seams (reinforcement no. 2). Seems to have done the trick.
Lovely dress. Thanks for the shirring tips - might just have to giv it another go - my last one was a disaster.
ReplyDeleteGorgeous!! She looks taller in these photos. See you tomorrow Grumbles?
ReplyDeletelovely dress and print.
ReplyDeleteLoved our full week of Jorth...by the way :)
ReplyDeleteCharmingly cute dress on your beautiful daughter!
ReplyDeleteWhat a beautiful little dress. And the shirring tip is handy too.
ReplyDeleteI would love to try shirring ... but I am not sure if I can get away with it on pre-schooler boys' clothes?
Beautiful dress and fabric, I made a peasant dress for my 3yo out of this in the pink colourway, and we get so many comments, good fabric obviously stands out from the crowd! I totally agree with you on the feeling like you got a freebie from your stash- I made my niece a dress for Christmas from my (very small) stash, and it felt GOOD!
ReplyDeleteGreat job, looks beautiful.
ReplyDelete