Showing posts with label Vintage. Show all posts

Monday, September 21, 2020

Simplicity 8130

Long time readers of this blog will remember how much sewing I used to do for my girl. Pretty much everything she wore was made by me! But as the years went on she eschewed my sewing efforts, and was content in RTW tees and denim shorts.

So you can imagine how thrilled I was when she requested I sew her a top. No matter that it had to be exactly the same as the one on the pattern envelope - I was in!


Thankfully, she LOVES it! She even gave me a 2pm deadline to get it finished today, so she could wear it to see her friend whilst they did their government allowed 2 hour walk, but such was my joy at actually getting to sew for her that I didn't mind in the least!


This was a quick and easy make - I especially enjoyed putting the bias edging onto the band section. I'd never done bias edging like that before, but it was super easy. Now I just want to edge EVERYTHING!


I left the boning out of the lining, as she wants to wear this to school, and the boning wouldn't have been very comfortable. And I'm not risking sewing her anything that might be deemed uncomfy - she might never ask for anything else again!


Project Details:

Pattern - Simplicity 8130, view A

Fabric - Cotton gingham fabric and plain black cotton fabric from The Cloth Shop

Notions -  5 buttons


Tuesday, April 14, 2020

Vintage Vogue S-4957


GreenVintageVogue11


In times such as this, it pays to have a brand new dress in the wardrobe. Admittedly, it can't be worn out and shown off (damn you, stupid corona virus!), and it may be quite some time before it can be taken out for a twirl on a dance floor, but having a freshly made, gorgeous vintage dress in the perfect shade of green in awfully good for moral - and frankly, we all need all the boosts we can get at the moment!

And the best bit - fabric and pattern were all from the stash, so it didn't cost me anything since our new straightened financial circumstances came about. Phew!


GreenVintageVogue03


GreenVintageVogue10


GreenVintageVogue02


I made a muslin of the bodice first, and I'm very glad I did, as the front overlay gather gave me some grief. The instructions called for the centre seams to be pleated, then sewn together, then gathered up. Maybe you need the muscles of Thor to achieve this task, for my puny hands simply could not muster the strength to gather all those pleats up. In the end I compromised, and made a cord which I threaded through the seam allowances (which I had sewn flat), and gathered the overlay centre in that way. It looks the part, and saved me a lot of cursing and unpicking!

I also interfaced the bodice, and boned it for extra support. I'm really glad I did, as it sits beautifully. I'm a big fan of boning these days - if I can bone a dress, I will! (Please excuse the dubious nature of that sentence).

The skirt was meant to be much longer, with gathered sections at the back, but alas - fabric restrictions applied, so I redrafted it to be a simple circle skirt. Trust me, there's enough fabric in that thing as it, and I didn't really fancy gathers sitting over my derriere and subsequently making it look much larger than it really is!


GreenVintageVogue01


The fabric, which truly is the most divine green I've ever come across in fabric form, is a viscose from Draper's Fabric. I bought it without a project in mind, but when you see that green you've got to snaffle it up as soon as you can! It's lovely fabric, but much slinkier than I'm used to sewing, and does have a tendency to catch easily on things, so this will be a special occasion dress only.

Except for twirling about in my bedroom. Hey, a girl's gotta fill her days somehow!


GreenVintageVogue23


GreenVintageVogue20


Project Details:
Pattern - Vogue S-4957, circa early 1950s.
Fabric - Viscose from Draper's Fabrics.
Notions - Iron on interfacing, boning, invisible zipper.


Monday, May 06, 2019

Vintage Simplicity 3069


Simplicity 3069 #07


What do you get if you cross a vintage pattern from the early 1960s with cool faux leather coated woolen fabric? One totally rock'n'roll dress!


Simplicity 3069 #02


Simplicity 3069 #06


Simplicity 3069 #02


I didn't' actually expect this dress to turn out so sassy, but when I first made it the skirt was ginormously long! So I cut a wide swath off. Then I decided that it needed to be shorter still. So another swath was cut. Then I tried it on again and realised... um, totally showing a bit of leg now, Jorthy girl. But the deed was done, and I felt a bit rebellious in my new short skirt, so that is the length it has stayed. And I LOVE IT!

This was a pretty easy pattern to sew, but I did need to do quite a bit of fitting adjustments. I think I ended up taking the bodice in about 8cm, and to be perfectly honest it could still go in some more, but I like to have a bit of room to move about! I really am digging the belt feature - it makes the dress, and I would definitely consider making another version of this frock but in a lighter coloured fabric, just to do the belt again! It cleverly is joined to the front bodice inside the darts, then fastens upon itself at the back. Very very cool design detail!


Project notes:
Pattern - Vintage Simplicity 3069
Fabric - 1.5m coated wool from The Fabric Store.
Notions - 45cm invisible zipper

Monday, April 15, 2019

Vogue 9100 and vintage Simplicity 3470 mash up

Before we start, I would just like to say that no dresses were harmed, splashed with salt water or got flecked with sand during this shoot.

Vogue 9100 #07

Ok, ok, maybe a little. But gee, wasn't it worth it for the fun and pure child-like delight of splashing about in the ocean in a fancy dress!


Vogue 9100 #06


I say that this dress is a mash up, but what I really did was use the bodice from Vogue 9100, and then run with the concept of the skirt from Simplicity 3470. I wanted an insanely full skirt, so I made the skirt 3 metres wide before gathering, and made the frill 6 metres wide. When I was actually gathering all those miles of fabric together I did wonder if I had taken leave of my senses, especially since gathering fabric of one of my least favourite sewing jobs, but the end result was worth the sore fingers from pulling those gathering threads tighter and tighter. No pain, no gain!

Another change I made was to make the shoulder straps 2cm shorter on each side. I've made Vogue 9100 3 times now (see version one and version two), and the shoulders do tend to slip a little, so by shortening them I bypassed that wear issue.

All in all, I love this dress! It took a lot of work, as the lace was underlined (so each piece was underlined before I began sewing any pieces together), and then the dress itself was fully lined, but I'm glad I put the work in - this is going to be part of my forever wardrobe for sure!


Vogue 9100 #01
Vogue 9100 #04


Vogue 9100 #11


Project Details:
Patterns - Vogue 9100 and vintage Simplicity 3470.
Fabric - Navy blue lace and cotton for both underlining and lining from The Fabric Store.
Notions - 35cm invisible zipper.

Monday, April 23, 2018

Vintage McCalls 7920

I took my daughter to the doctor recently, in order to have a pesky wart on her knee burnt (stay with me - it does have relevance to all things sewing, I promise!). Yet lo and behold, a few weeks later the wart that had turned black and supposedly fallen off was back, looking just as good, if maybe a smidge smaller, than before.

So back to the doctor we went. I love my doctor. She is smart, sassy and never makes you feel like a dumbo when you ask her millions of questions. She took once look at the Lazarus wart, then ran off to get the liquid nitrogen. Just as she was about to attack the wart, she declared in her usual no-nonsense manner "I will NOT be defeated by a wart!"

I have the same sentiments about this pattern. McCalls 7920, ye shall not defeat the mighty Jorth!

McCalls7920


The version of this dress that you see in the pictures is actually attempt number 2. Attempt number 1 was what I believe the experts call a seriously massive unqualified disaster. I know what you are thinking - jeez, Jorth, it doesn't look so hard! That's what I thought, my friends, but then...

1 - My fabric (a gorgeous green silk/cotton blend) decided stretching and sagging was its new jam, and boy oh boy did it stretch and sag with panache. If I hadn't have been so upset, I might have admired it's stretching verve.

2 - I could NOT get the triangular section in the bodice to line up perfectly, no matter how many attempts I made. In the end it sat about 1mm out - enough to annoy me by drawing my eye to it every time I glance at the bodice, but probably not enough for anybody else to notice. I might have attempted one more go at getting it right, but I'd unpicked the fabric so many times by that stage that my seam allowance was not so much fabric as a cute fraying fringe.

3 - The zip insertion, due to the above mentioned stretching of the fabric, was a hot mess, if your version of hot messes come in (a) green and (b) are made of silk.

So in the end I gave it all up as a bad, bad job and consigned the whole darn thing to the bin. Back I went to my trusty cotton, and this time it came up a dream. Except...

ROOKIE MISTAKE! The fabric I choose for version 2 was a light and soft Cotton + Steel cotton which I fell in love with the minute I saw it, but alas! The dark colour of the fabric means that you can't see the design features of the bodice very well. The gathering on the bust is visible, but the long side darts and the triangular bodice piece seams may as well be invisible. Waaaaah!

However, having now moaned and groaned, I do quite like this dress. It didn't turn out the way I was hoping, but it's still pretty cute. I just need to find the perfect fabric that will not only behave itself but will also show off the bodice detailing and I can call myself the Master Of McCalls 7920. In the meantime, I do have a cute new dress to add to the summer wardrobe, and I have learnt a few valuable sewing lessons in the meantime.

McCalls 7920 #1

McCalls 7920 #3

McCalls 7920 #5

McCalls 7920 #6


PS More thoughts on future versions of this dress: I think I'll actually connect the straps to the bodice back, as I'm not really a big fan of halter necks. Also, that skirt can definitely afford to be shortened by a few inches, although the length it currently sits is rather elegant.

Project Details:
Pattern - McCalls 7920
Fabric - 3m Cotton + Steel cotton lawn from GJ's Discount Fabrics
Notions - 35m invisible zipper

McCalls 7920 #2

Monday, February 19, 2018

Butterick 4792 (plus my Year of Vintage Sewing)

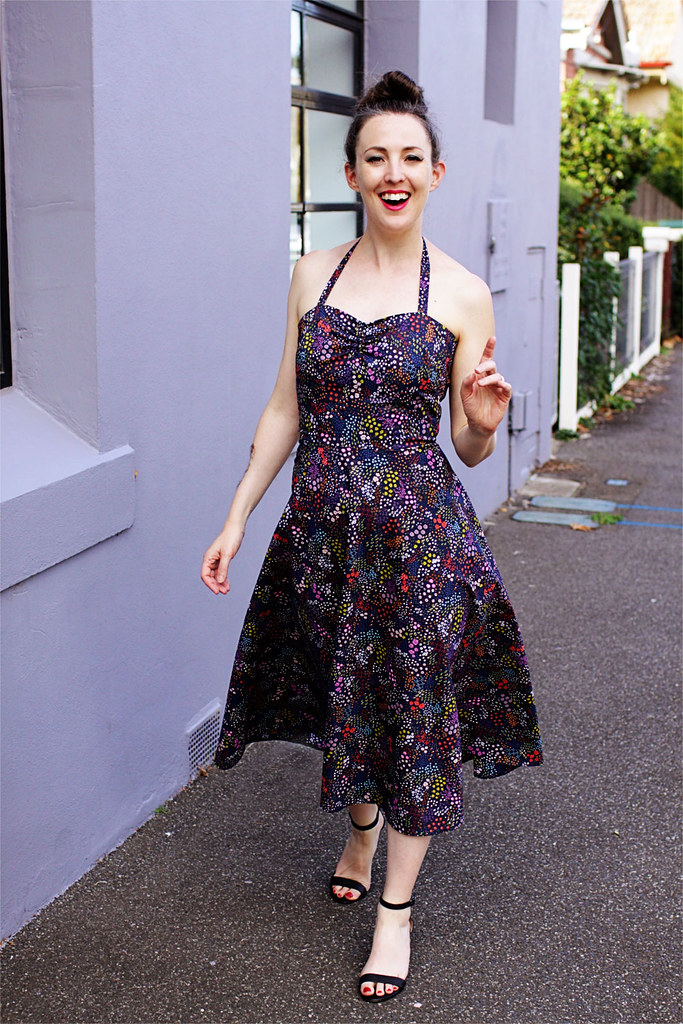
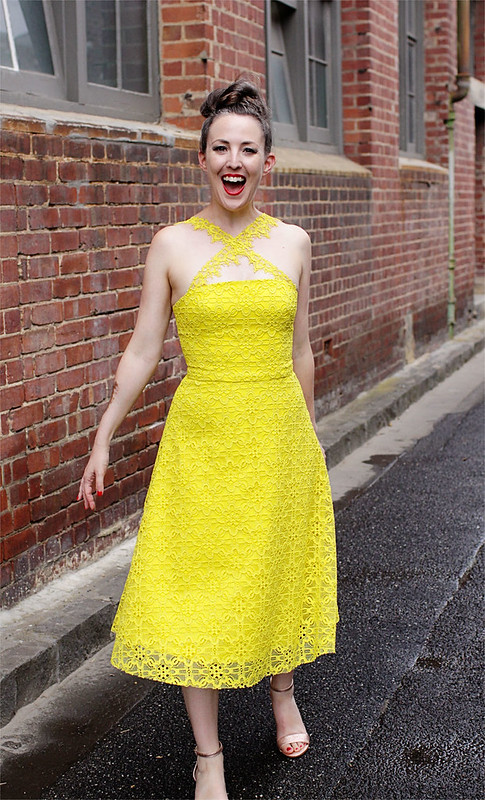
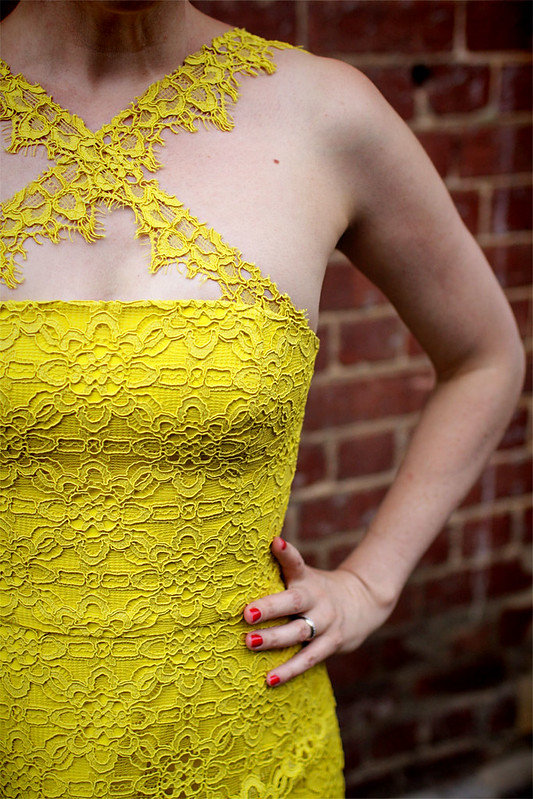
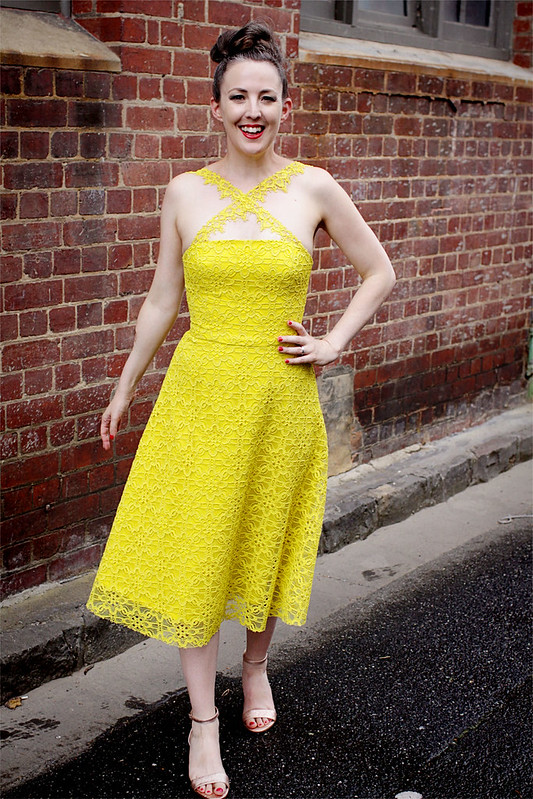
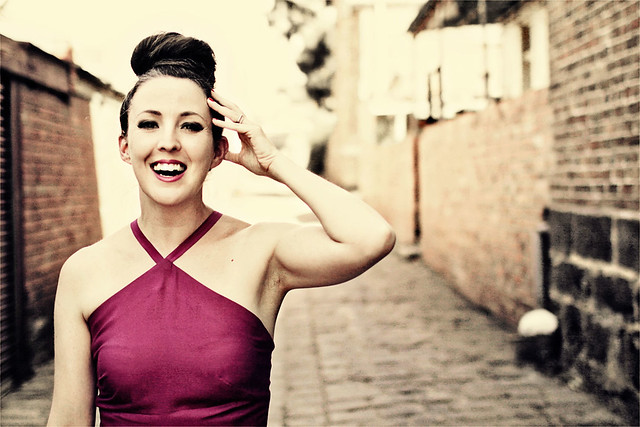
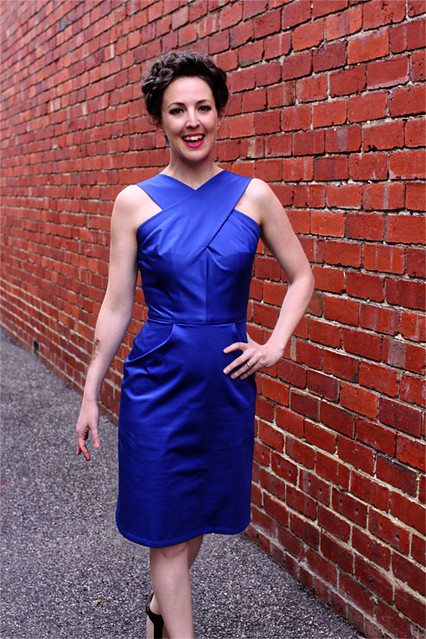
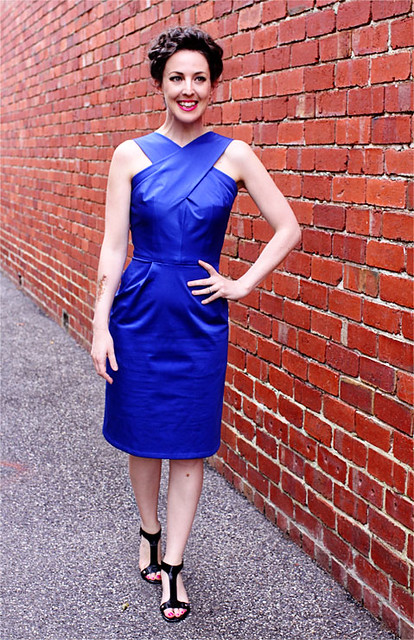
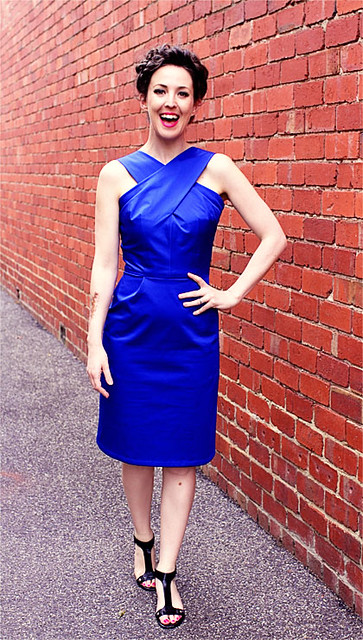
Now, it may look to the untrained eye that I am standing in some random Melbourne laneway, looking awfully dressed up with nowhere to go, but nothing, my friends, could be further from the truth. For I have embarked upon a Year of Vintage Sewing - anything I make for myself needs to be from a vintage pattern (original, reproduced or reissued, just as long as the original design is at least 30 years old), and this is my very first vintage make of the season. Sewing pals, the below pictures you see are me totally fulfilling my FASHION DESTINY!!!

Blue Halter #3


Sorry about the caps - I'm just pretty darn excited about this year long experiment, and sometimes it comes bursting out! I've always been a sucker for vintage glamour. Personally, I blame the 'Midday Movie' - when I was but a wee lass growing up in the country, we only had two channels on the television. I know - poverty, right?!? Anyway, one of these stations always showed a movie at 12 noon, and I presume they chose really old movies from the 1930s through to the 1950s because the showing rights were as cheap as chips. I don't recall many of the film titles or names, but I do recall that whenever a lady strolled onto the scene she usually looked incredibly glamorous (unless she was the housekeeper. That poor dear usually just got saddled with an apron), and from there, methinks, the love of vintage glamour was planted within me.

Fast forward to my present day. I don't own a television (and haven't for 19 years now!), so I have no idea if the Midday Movie is still a thing, but what I do own is an awfully impressive pile of vintage patterns, so this is my year to celebrate them!

Blue Halter #5


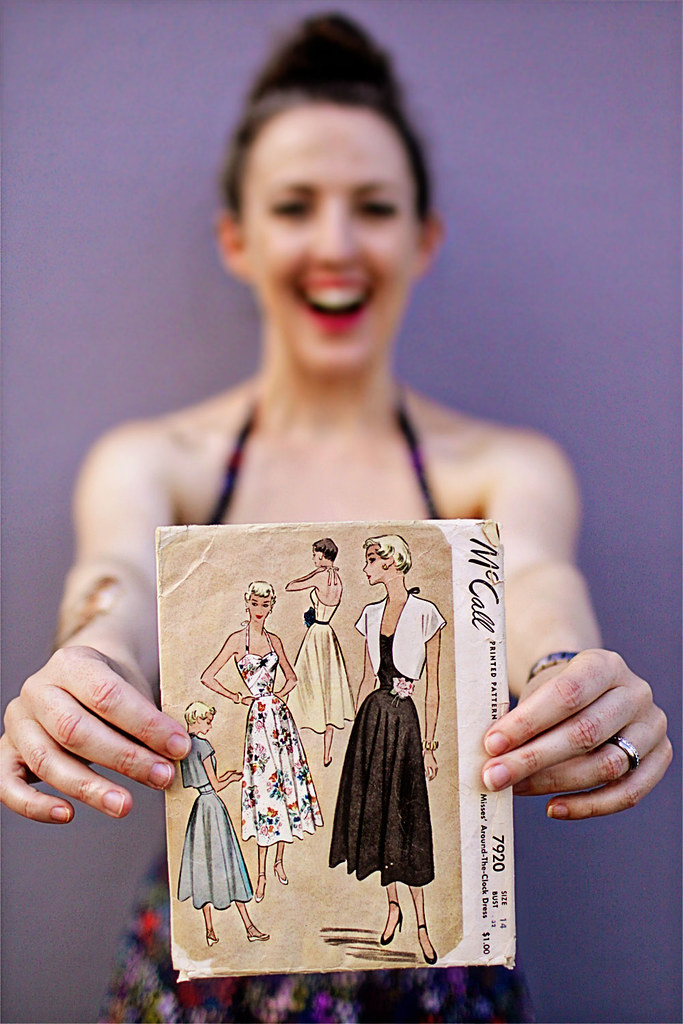
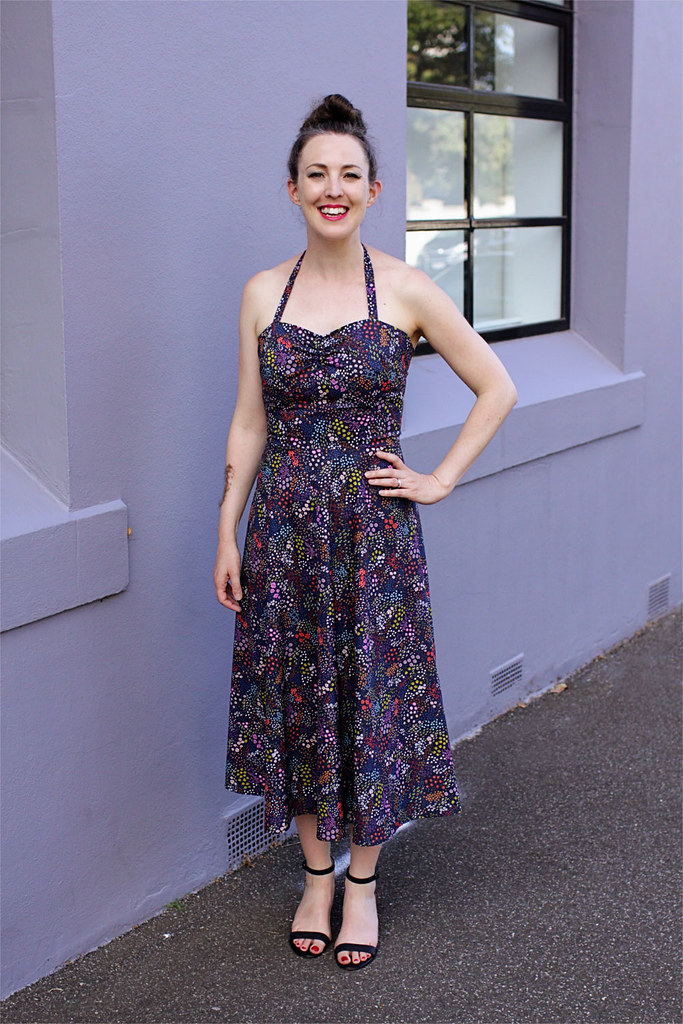
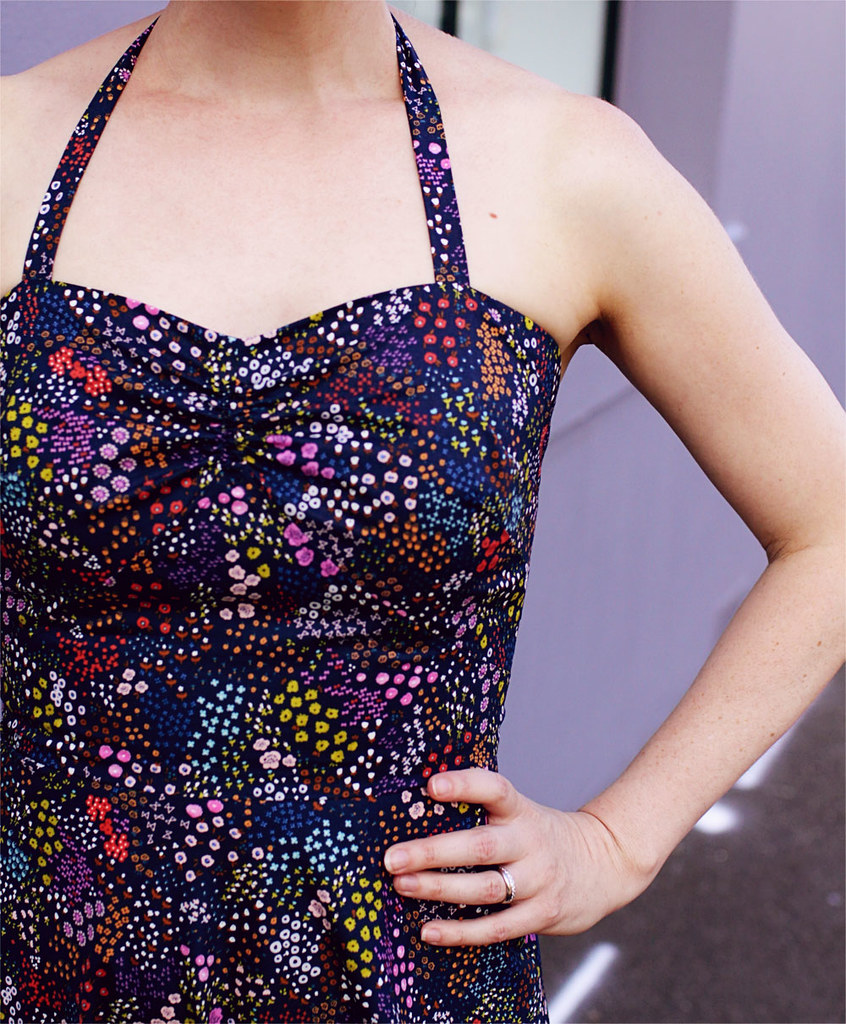
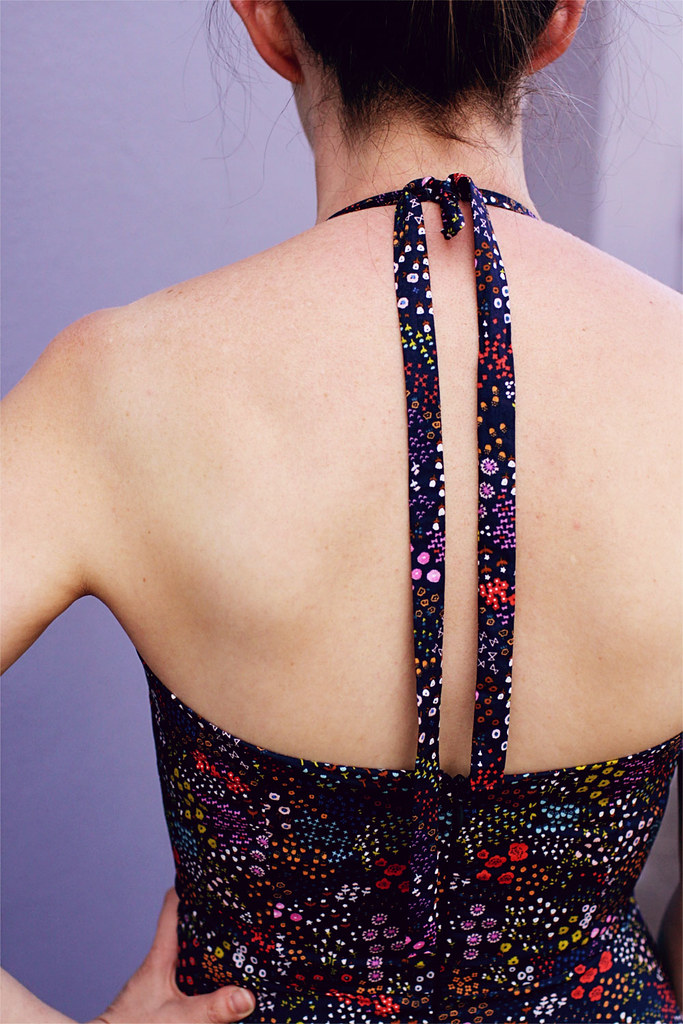
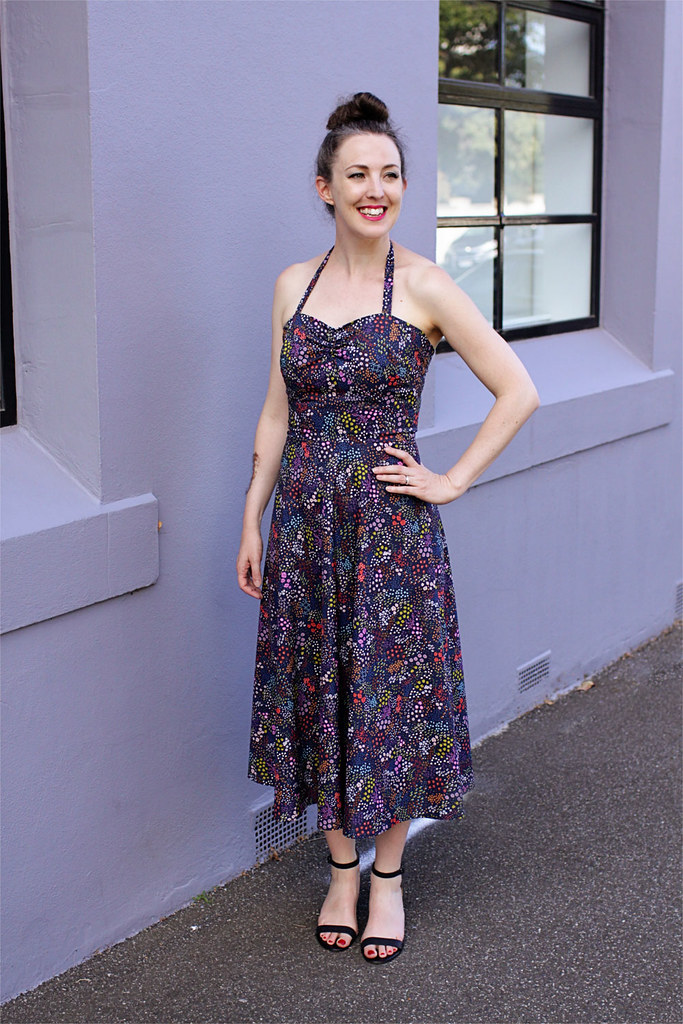
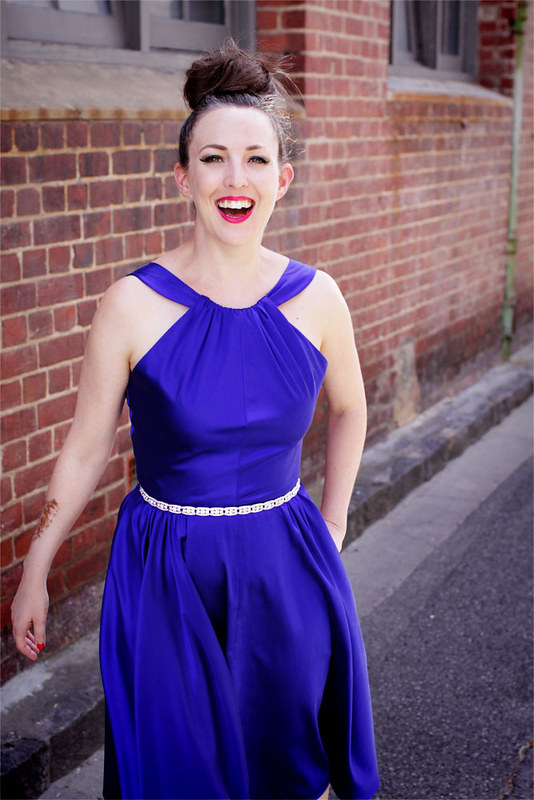
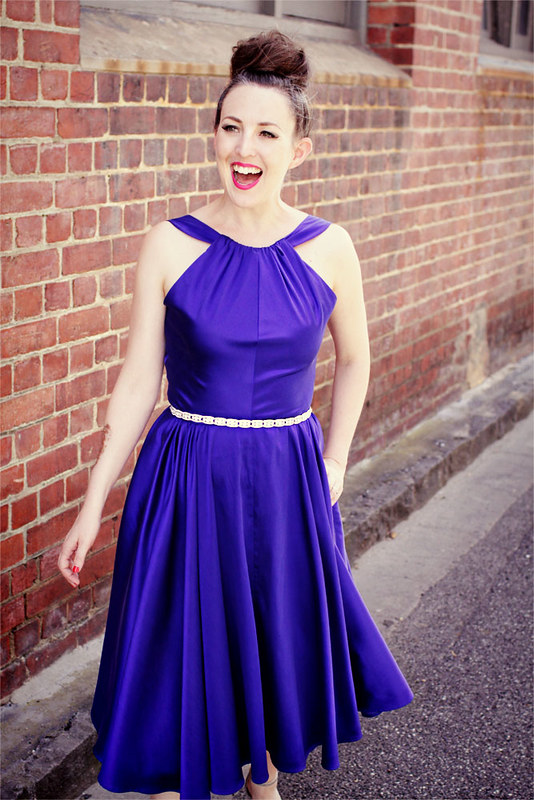
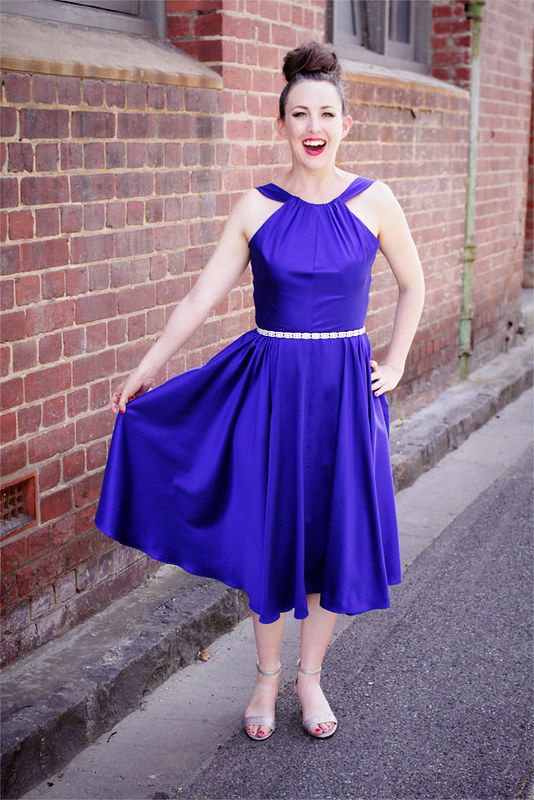
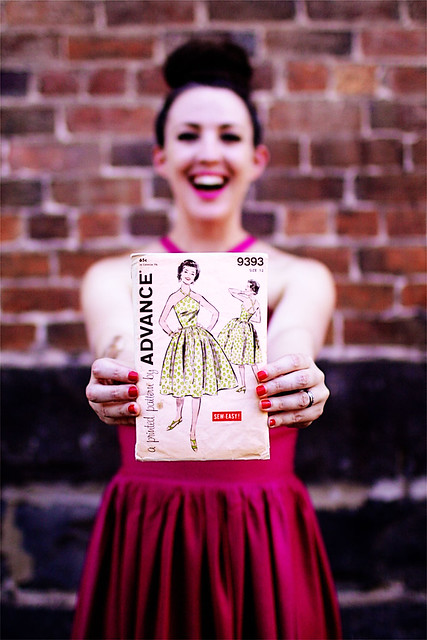
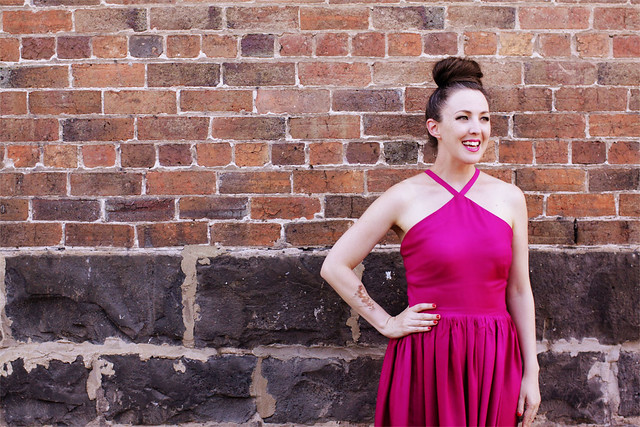
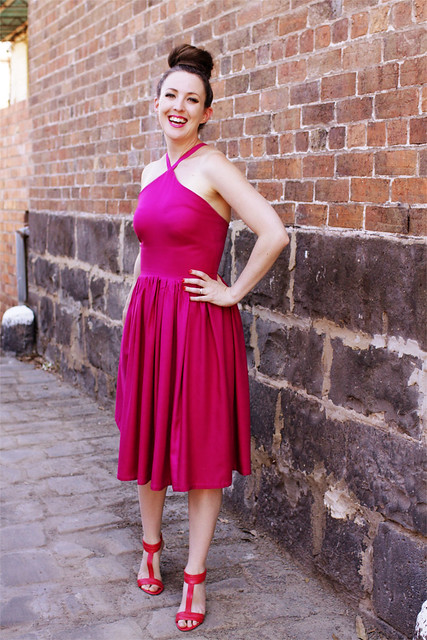
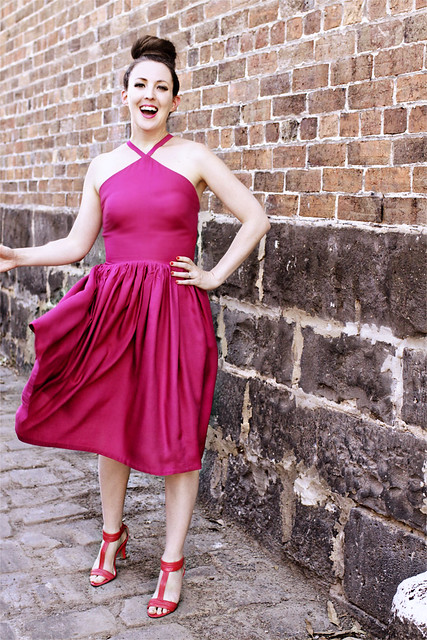
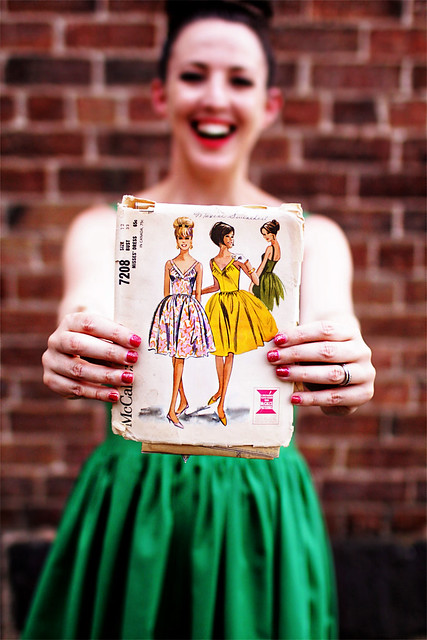
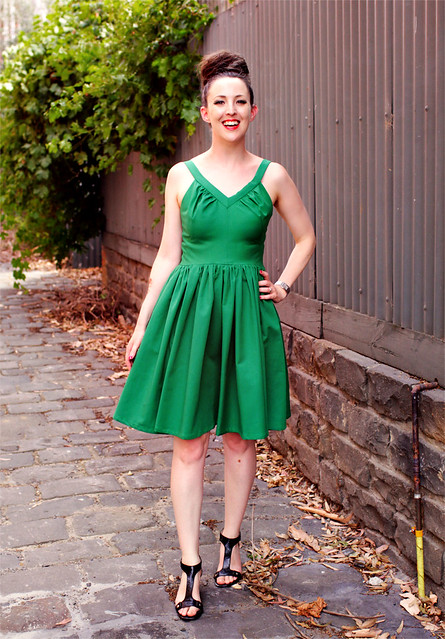
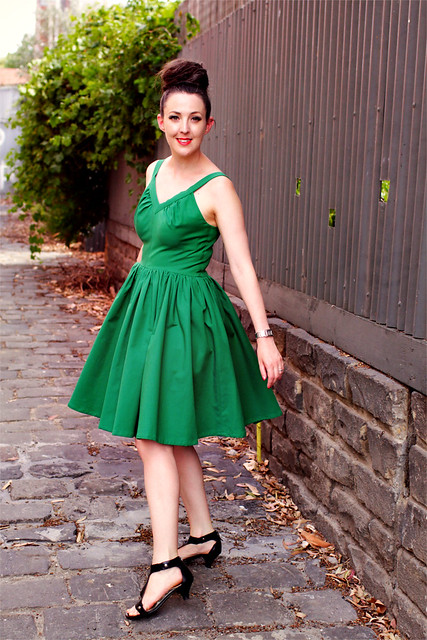
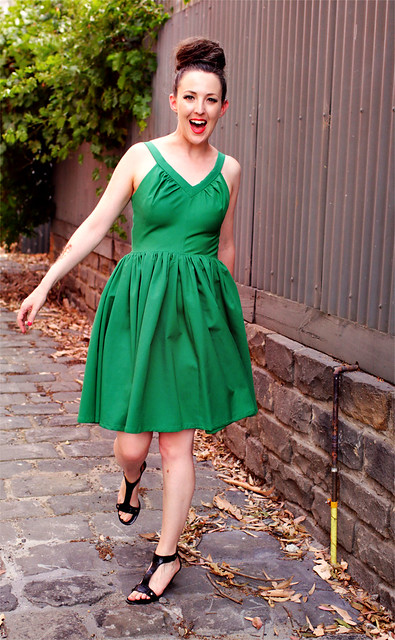
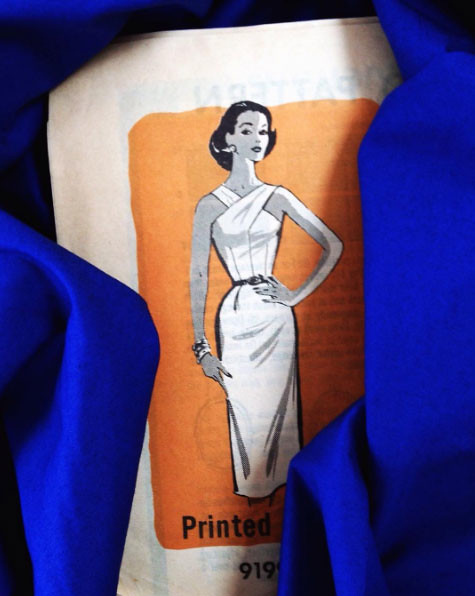
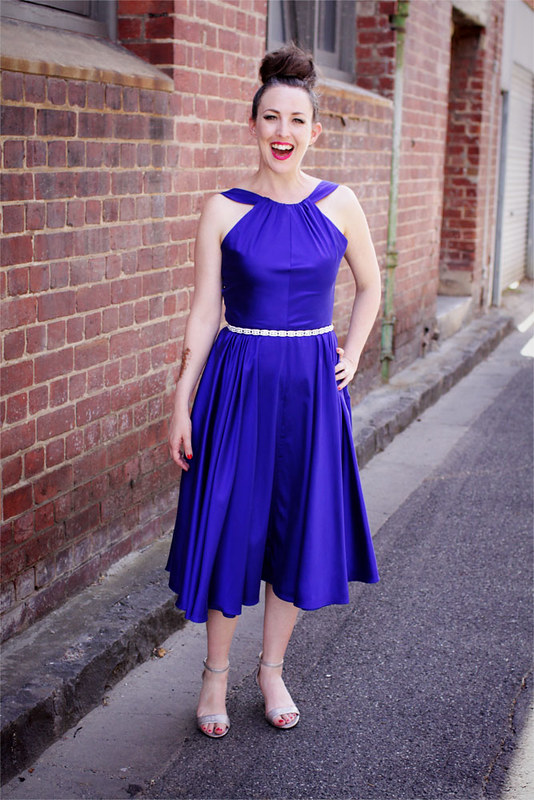
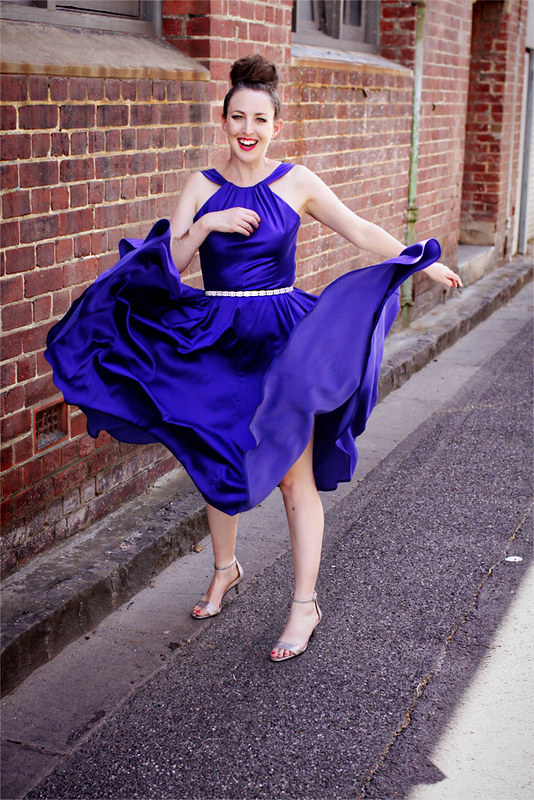
First cab off the rank is Butterick 4792. Normally I'm not one for halters, but halters from the 1950s have a glamour all of their own, so resistance was futile. I opted out of making the matching bolero, because it's one thing to wear a vintage silk dress in a laneway, but even I know that wearing a matchy matchy bolero is just taking things too far.


I didn't make any major modifications to this pattern, but I did omit making the petticoat layer, which was actually sewn to the skirt. The silk fabric I was using is stunning, but unforgivable - there are no hiding your indulgences with this sort of material, and I didn't want any bulky seams showing through. Plus one day in my vintage-coloured future I hope to be the proud owner of an actual skirt petticoat, so I figured that if I wanted volume in the skirt I would wear it with that. Personally, I quite like the flow the skirt has without the petticoat. The silk falls like molten metal. Ah, be still my beating heart!

Blue Halter #6

I had a wee bit of hassle with the hem. I usually do a double hem, but when I tried it on this fabric it did not want to play ball. The hem was curved, and doing the double hem resulted in a very lumpy hem indeed. With a sigh I got out my old pal the quick-un-pick, and unstitched what felt like miles and miles of heming. I then repressed and did a simple narrow hem instead, which falls beautifully, so it was worth taking the extra time to get it right.

The pattern came with instructions for a belt, but I decided to up the glamour and pair it with a glittery bejewelled belt from Forever New. I love it! Normally I don't go for that much bling, but this dress, being the brightest electric blue you ever did see, was more than capable of handling hundreds of glittering faux diamonds.

Blue Halter #7

Now if you'll excuse me, I need to trot off to the hairdressers to have my hair washed and set, then I might pop into town to find the perfect pair of gloves to go with this frock. Ha! I know the 1950s were not a blissful time of Rockwellesque prosperity for one and all, but in my opinion they sure got the fashion right!

Project Details
Pattern - Butterick 4792 (vintage pattern reproduction), size 8
Fabric - Silk/lycra blend from The Fabric Store
Notions - 35cm invisible zipper

Blue Halter #4


Monday, February 12, 2018

Yellow Lace Dress

I'm a bad 'un, and I'll never ever be any good. I've had this dress made for months now, and have only just got around to getting pics done!

YellowLace8

And when I say months, I mean it was actually a possible Frocktails contender - and that was way back in November - yikes! Still, better late than never, so feast your eyes, sewing peeps - just make sure you put some sunnies on first, cos this bad boy is BRIGHT!

YellowLace3


I made this dress using my trusty Vogue 8184 pattern. Figuring out how best to incorporate the lace, I decided to layer the lace pieces straight onto the bodice pieces, sewing them together using a 5mm seam allowance. For the skirt, I kept the lace pieces and skirt pieces separate, only sewing them together at the back seam, as I figured it would make inserting the zip much easier that way. I wanted the lace skirt to hang free from the base fabric skirt, so I sewed the base fabric in the usual way, but did French seams for the lace seams. It worked a treat - I'd never sewn a French seam before, and was belabouring under the illusion that it was a super tricky couture technique, but it was surprisingly easy, and rather satisfying to do.

Instead of the usual straps, I decided to create lace straps by using the scalloped edge of the lace fabric, for it was far too pretty to go to waste. I inserted one edge into the top of the bodice, then criss-crossed them over the from of the decolletage, before straightening up past the shoulders to the back bodice. If I do say so myself, it looks rather spiffy, and gives the dress an extra-glam edge! I also shortened my front bodice by 1.5cm to ensure more room for the lace cross over.

YellowLace4

Hmm, what other alterations did I make? That's right - I also cut my lace skirt pieces about 5cm longer, as I wanted a see-through lace edging to the skirt. I left it the skirt edge raw, as the corded lace would have resulted in a lumpy thick hem, which would have ruined the whole look of the skirt. No lumpy hems around her, thank you very much!

To be perfectly honest, it's not exactly an 'everyday' dress, but I've always wanted to sew myself a fancy lace dress, so even if it never gets a lot of wear, just having it the wardrobe, ready for glam duty, is enough to make me happy. I really needn't worry about it not getting worn, though - Tyger has told me that she intends to grow into it, and fast, so that she can wear it to all her high school parties. Good grief - I've created a mini vintage-loving fashionista!

YellowLace6


Project Details
Pattern - Vogue 8184
Fabric - Yellow lace and yellow cotton, 2m of each, both from The Fabric Store
Notions - 35cm invisible zip


Monday, February 27, 2017

The brightest pink halter neck dress you ever did see! Vintage Advance 9393

Put your shades on, people - this dress is as bright as they come!

Advance Halterneck #1


If you squint closely, you can also see that the envelope claims it is "Sew Easy!" Aw, how cute - they even added an exclamation mark to boost your confidence. Don't make a muslin - just dive right in! And in a way they were right - it was 'sew easy' to sew. It was just getting the fit right that was a nightmare!


Advance Halterneck #3


As you can probably tell from the photos, I did not achieve one hundred per cent success on the fit. (Did I make a muslin? Of course not! Lesson duly learnt). I probably could have brought the bodice in tighter in order to get a better bust fit, but just between you and me, I kinda like being able to breath in my dresses. Going blue in the face for blog photos is not the look I am currently going for. So slightly floppy boob area but with added breathability it is. Sometimes ya gotta take the pay off!


Advance Halterneck #2


Also, as much as I love this dress (and I really do, despite the fit issues - it's bright pink! And with a full skirt! And a funky bodice!), getting into the darn thing is a trial within itself! The straps cross over at the back, so you need to pull the dress on over your head, then do some Houdini-worthy wriggling and arm rearranging before finally drawing pretty tight straps cross-ways over your head. And of course I made this dress in the most wrinkly cotton twill known to man, so even once you do get into the dress you find that (a) your perfect bun is totally mussed up (b) your lipstick is now smeared halfway over your face and (c) the dress is wrinkled to pieces! If I ever make it again I will consider doing it in a less wrinkly cotton, after doing a muslin first (promise!), and maybe putting in a side zip instead of the back zipper.


Advance Halterneck #5


Still, you live and learn. It's good to have a challenging project occasionally - it stops me from floating above the world thinking I am a superb sewist, and brings me down to earth with a heavily felt thud! But that's one of the grand things about this hobby - there is always something new to learn (the importance of muslins, Jorthy, cough cough!). And even though I am acutely aware of the fit issues, I think the brightness of the pink succeeds from blinding everybody else to them. I wore this dress out to dinner, and received quite a few compliments on it, so my evil blind-you-all-with-mega-fuchsia-so-you-see-no-faults plan totally worked! Woo hoo!


Advance Halterneck #6


And I do love a full skirt you can dramatically throw around! Ok, bright pink dress - you get to stay!

Project Details
Pattern - Vintage Advance pattern number 9393, size 12 bust 32
Fabric - 2.4m of silky cotton twill from The Fabric Store
Notions - Interfacing for facings, invisible zipper

Sunday, January 08, 2017

The Vintage Green Dress: McCalls 7208

I had considered buying fireworks. Or at the very least a massive amount of confetti to throw gleefully around. And popping of champagne corks felt like a must! Because after years of lusting, and yearning, and pressing my greasy nose against the computer monitor and moaning with unfulfilled desire, I finally had got the vintage pattern of my dreams, and even better yet, I had found it in my size! The sewing gods indeed had smiled upon me!

Meet McCalls 7208. First released in 1964, and very happily made by me 52 years later!

Vintage Green McCalls #1


Vintage Green McCalls #2


First things first - whilst I love this dress, it sure did use up a huge amount of fabric! The skirt is one of the biggest I have ever gathered, and when I read the pattern and realised that they wanted a skirt lining (gathered also) plus piping for the skirt seam, I threw back my head and laughed and laughed. I had enough trouble gathering all that amount of thick fabric and then sewing it to the bodice without complicating matters with extra fabric for lining and the fiddlyness of piping to boot! So I kept things simple and just sewed on the skirt. Just between you and me, I feel the incredible fullness of the skirt makes it look like I have added a few pounds, so I shudder to think of the effect the lining would have had!

The bust size on this was 32 inches, which I am, but as per my usual experience of making a vintage pattern, I needed to bring it in substantially to get a correct fit. The strap was a bit of a nightmare to put on - getting the strap seam and the bodice centre seam to match felt like mission impossible at times, but after employing my quick-un-pick too many times to mention, I got there in the end!

I also cut about 20cm off the skirt length. I am constantly surprised at how long vintage skirts end up being, especially since the pattern illustration makes them look like they finish at the knee. Was there some sort of anti-calf sentiment going on in the 1950s and 60s that I remain blithely unaware of? I am so puzzled by it!

All things considered, I am pretty happy with this dress. The green is my favourite shade of green, but if I ever made it again I would choose a much lighter fabric than the one I sewed it up in. It's just that bit too heavy for the dress - a lawn or voile with lining would be a much better choice. Ack - ya live and learn!

Vintage Green McCalls #4


Now if you'll excuse me, I gotta go do some twirling. This dress was made for being spun around a dance floor!


Vintage Green McCalls #3


Wheeeeeeee!

Project Details
Pattern - McCalls 7208, published 1964
Fabric - Heavy cotton from The Fabric Store
Notions - Interfacing, invisible zip

Monday, September 12, 2016

Summer Camisole and French Knickers Set

Eeek! Feeling ever so slightly (read: incredibly) nervous about posting this one, because I'm basically going to be showing you my smalls! But when your smalls - also known as your new summer pjamas - are made out of the cutest Liberty lawn print imaginable, it feels like a duty to show them to your sewing community so everybody can make themselves a pair! They are so light and comfortable to wear, which will be perfect come the searing heat this summer. I see another pair, plus a nightie from the same pattern, in my future. And not in slithery old silk satin, either - it's crisp and cool Liberty allllll the way!

Ok. Enough of the stalling. Here they are!

Camisole #2

Camisole #2


Ergh. I feel like the naffest pj model ever! And my photographer forgot to notice that the lace on the back had folded itself down, so please excuse that and my blindingly pale winter skin. The pattern is an old 1980 Simplicity pattern that I had in my stash, and I can tell you, the model on the front looks pretty darn cool in her version. No feeling naff for her! And the drawn models are practically oozing sex appeal. I should probably take lessons from them!


But seriously, how cute is this pattern? I don't even remember where I got it from, but it had been languishing in the stash for ages. I always knew I wanted to make up the camisole and French knickers set, but it wasn't until I spotted this particular Liberty print from Cutting Cloth that the dream pjs came together.

The pattern was so economical on fabric - the set took only 1 metre in total, and that is despite having the camisole cut on the bias. Even making it out of Liberty, it was still a steal! The sewing itself wasn't hard - just a bit fiddly sewing on the lace, but it turned out so well. I am pretty chuffed with my lace attaching skills now. Watch out, I'll be putting lace on everything now!

The only part that gave me any trouble was the v-point on the centre front of the bodice. I really suck at these, and it took a few unpickings to get a nice smooth finish. I was actually a bit worried about the fine lawn fabric, as it didn't take kindly to unpicking (and I unpicked 3 times) but we got there in the end with no lasting damage done.

So there you are: my super cute (and kinda sexy) summer pjs. Short version of the nightie next, but with the straight neckline lace trim. We're in for a hot, hot summer!

Project Details
Pattern - Simplicity 9859 (printed 1980), size 10
Fabric - 1m Liberty Tana Lawn from Cutting Cloth
Notions - 2cm wide lace from Rathdowne Fabrics, elastic for French knickers

Wednesday, June 22, 2016

Vintage Blue Dress for The Dressmaker's Do!

By the splendid power of the sewing machine, I command ye Jorth to turn this:

Blue Dress

into this:

Dressmaker's Do Blue Vintage #1


Mission accomplished, and just in time for The Dressmaker's Do!

What a fabulous night it was - one I'll remember forever. Sewists from all over came to join Nichola from Handmaker's Factory and I for a fun night of drinking, dining, and lots and lots of oohing and ahhing over each other's beautiful frocks - and trust me, there were gorgeous dresses and outfits aplenty on display that night. I am constantly in awe of the talent that fills our amazing sewing community!

It was so lovely to hang out with sewing folk I knew, plus meet some brilliant new ones. I think the best part of night, however, was taking total control of the microphone so I could hand out prizes from our kind and generous sponsors: The Cloth Shop, You Sew Girl, Woolarium, The Fabric Store, Ink & Spindle and Handmaker's Factory.

And now for the dress - I had changed my mind over which vintage number I would make for the evening (no pressure, being the host and all) but finally decided on the blue one. And I'm glad I did, for it was the perfect marriage of comfort and glamour.

The pattern is a mail order one from 1950s that you could send away for and then receive from The Workbasket Magazine which was based in New York. I had never heard of the magazine, and just happened to stumble upon this gem one day when perusing Etsy for vintage patterns (which I do far too often!) There's a brief history of the magazine on this website - it's always sad to read about great magazines that disappear, but alas, that appears to have been The Workbasket's fate.

Dressmaker's Do Blue Vintage #3


The pattern itself was very well written, well drafted and super easy to follow - however, I did end up wondering if the grading itself was accurate as I am definitely a 32 bust, but needed to bring the bodice in by 2 inches! However it wasn't a big drama, and I ended up with a fit I was happy with.

The back is cute, with a pleat at the back to stop the skirt from being the full wriggle. I'm so glad I decided to go with this vintage beauty, and can see myself getting a lot of wear out of her in the future, and maybe even making another few versions!

Once again, I'd like to thank all the fabulous ladies who came along - it was such a fun night, and Nic and I are already thinking about planning another!

Project Details
Pattern - 9199 Mail Order pattern from The Workbasket Magazine
Fabric - Stretch cotton sateen from The Fabric Store
Notions - 35cm zipper, interfacing

Dressmaker's Do Blue Vintage #4