Tuesday, December 13, 2016
Liberty Tween Dress: New Look 6444
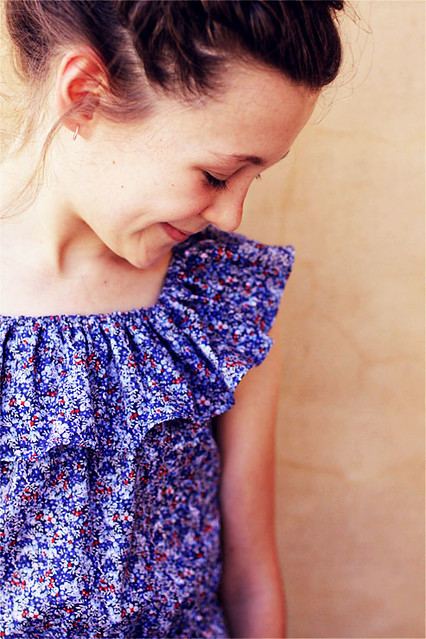
Genetics are a wonderful thing. My daughter has inherited, via a random combination of nucleobases zipping around at the moment of conception, not only my teeth (er, sorry about that one, Tyger), my dark hair and pale skin but also - and let me assure you folks, I consider this one to be the most important - my LOVE OF LIBERTY FABRIC!
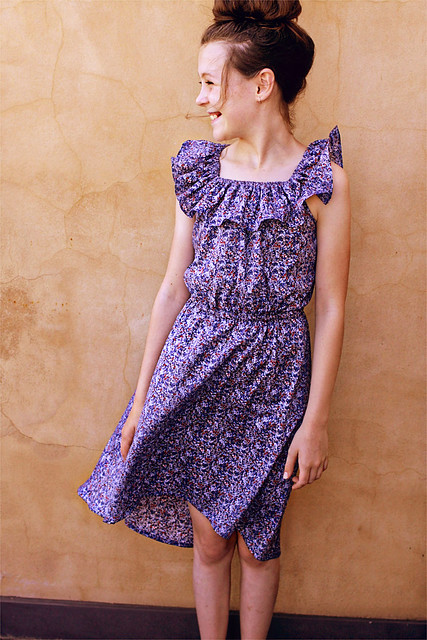
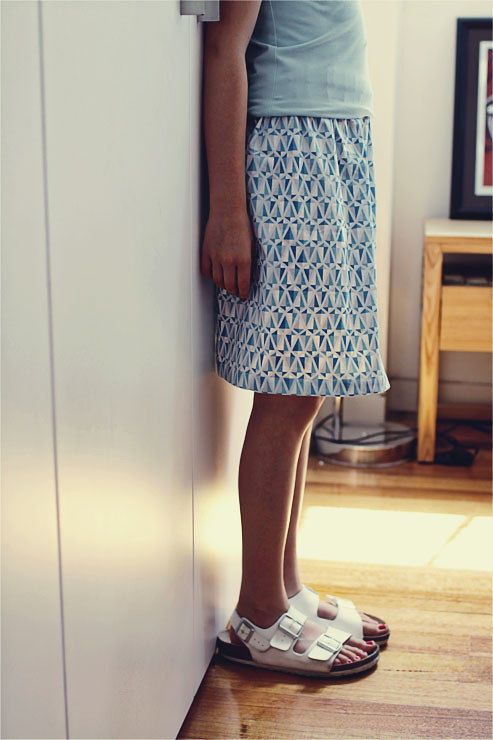
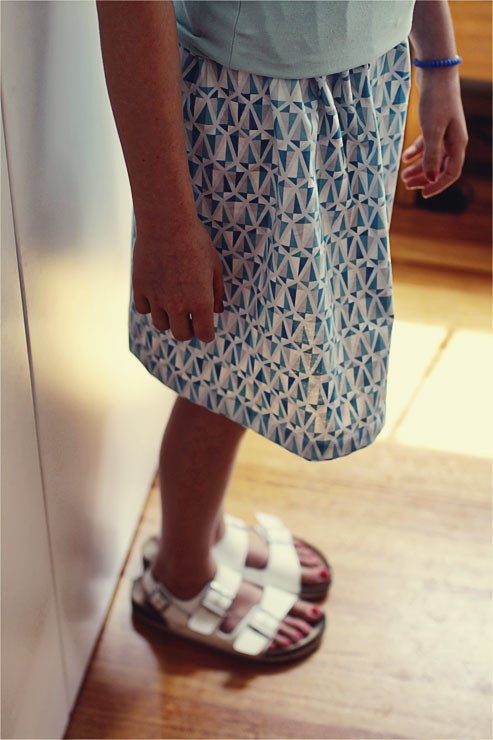
So when we went to The Fabric Store armed with our copy of New Look 6444, and she pointed out a fetching blue Liberty print and asked if her dress could be made out of that, my answer was somewhere along the lines of "Hell, yeah!"
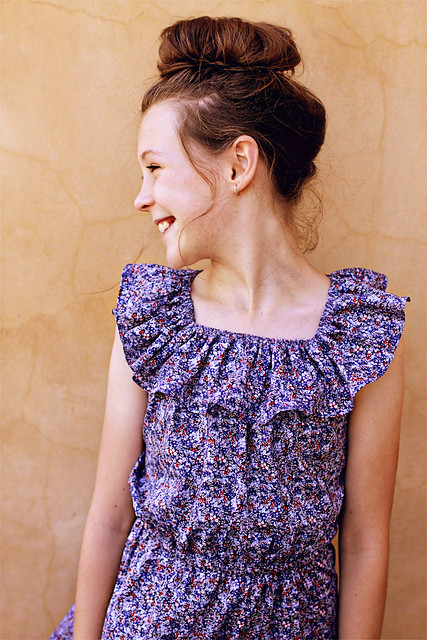
It's come up rather nice, if I do say so myself!
It was easy to sew, but I did query the way the ruffle elastic was attached. Basically, the pattern instructions asked for you to sew a line of bias binding a few cms down from the ruffle edge, threading in the elastic as you sewed. Once I did this, I asked Tyger to try it on to see if the bodice was the right size (we'd already both agreed that the off-the-shoulder version was a bit too grown up looking for both our likings, so we wanted it to sit on the shoulders, and not easily slip off). So she tried it on, and then we both looked at her reflection in the mirror in dismay.
Me: "Um, honey - I'm not super keen on that wavy edge above the ruffle. Thoughts?"
Tyger: "Can you get rid of it? It's WEIRD!"
Weird, as I've learnt the hard way, holds no currency whatsoever with the tween crowd, so I did what I thought I should do regarding the ruffle in the first place - I made a hem at the top edge of the ruffle, then threaded the elastic into that. No mucking around with bias binding casings if I ever make this again - my way gives a neat finish, which both Tyger and I consider to look much better.
Apart from that design quibble, it was a very easy pattern to put together. Despite the fact it is meant to be her Christmas dress, she has worn it 3 times already, and has already asked for another. That, my friends, is a win! Trust me - those tweens are a tough crowd to please!
Project Details
Pattern - New Look 6444, version D, size 10 (even though she is twelve and tall for her age, she is very slim, so we went for fit rather than length. The length is fine, anyway)
Fabric - 2m Liberty Tana Lawn from The Fabric Store
Notions - Elastic
Tuesday, December 06, 2016
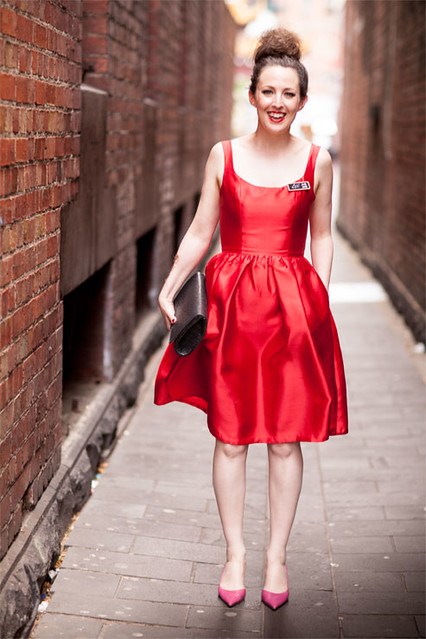
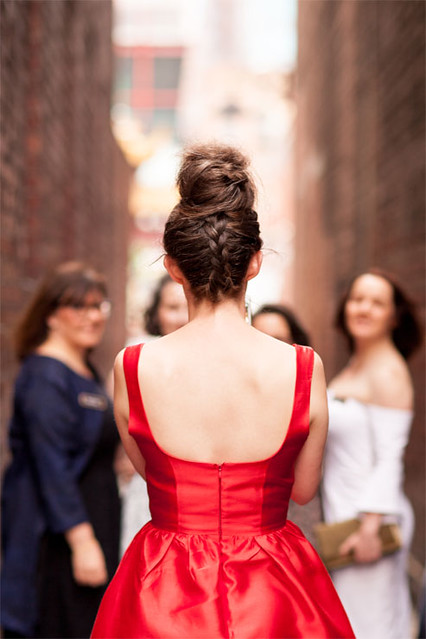
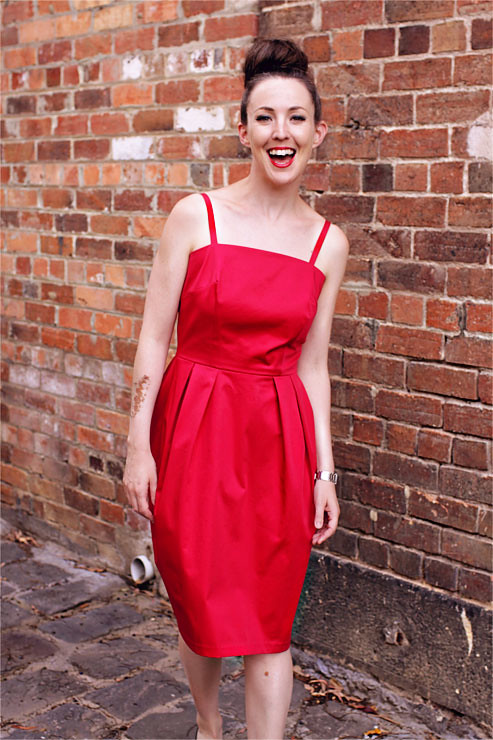
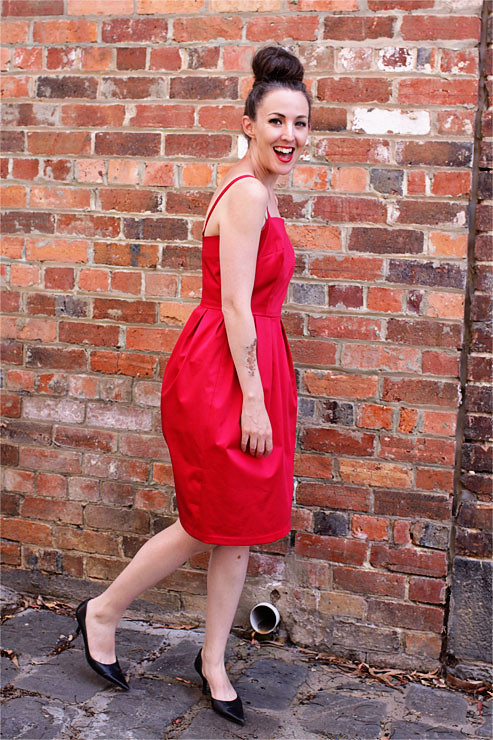
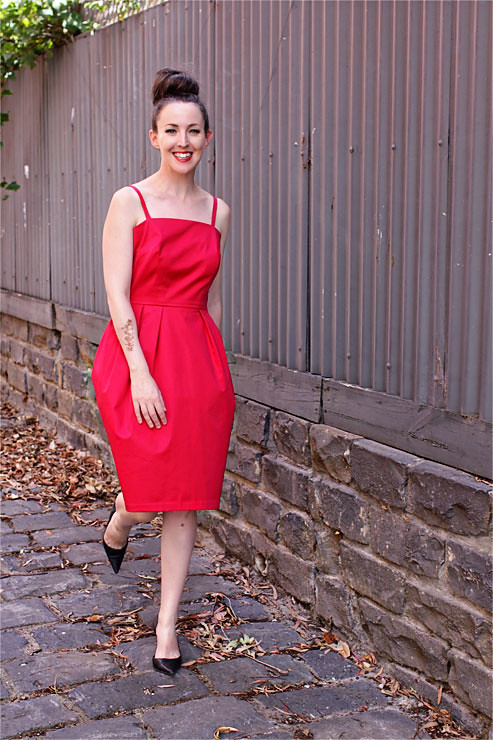
Frocktails 2016 Dress aka Lady In Red
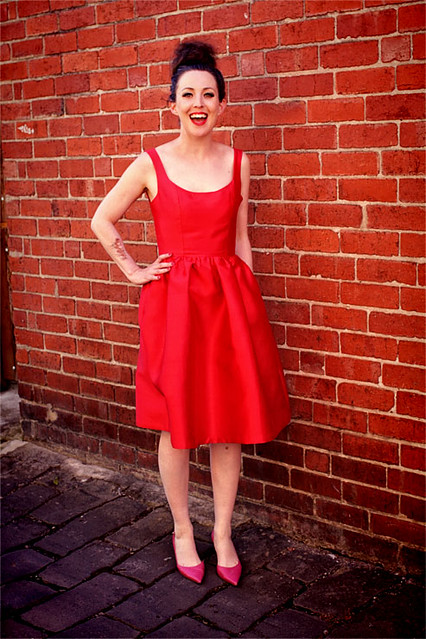
Chris de Burgh was, all things considered, rather proud of his back catalogue. He'd had some big hits in his day, but the one song he slightly regretted writing was that ever popular classic, Lady In Red. It wasn't the song itself that was the problem, but the fact that the mischievous imps he called his friends never failed to send him a pic of a lady in - you guessed it - red whenever they came across one. The little blighters had totally blown his data limit for the month by sending him an assortment of pics from some seamstress in Melbourne who had donned a red dress for an event called Frocktails.
Chris sighed as another pic notification dinged on his phone. Who were these people, he thought jadedly to himself, and what the hell is a Frocktails when it's at home? He stopped to look at the pic, and despite his general weariness of all girls in red dresses, he couldn't help but think that this red dress wasn't actually bad as far as red dresses went.
Tossing the phone onto the sofa, he then sat down at his piano to finish composing his next hit. He had been inclined to call this one Lady In Absolutely Nothing, but remembering the pictures filling his phone he thought better of it. and called it The Great Non-being instead.
*********************************************************************************
Oh dear - my apologies to Chris de Burgh, but ever since that night I have had Lady In Red on constant repeat in my brain. Wearing a red dress to Frocktails will do that to a girl! Melbourne Frocktails 2016 was a blast, and it was such a pleasure to see so many other fellow seamstresses all in their best, most inspiring finery. Old friends were caught up with, and new ones were made - it was a wonderful, wonderful night!
I had already made a version of Vogue 9100 the week before (as yet unblogged), and was so darn pleased with how it turned out that I immediately began dreaming of another one. The first one I made was in cotton, but with the tight bodice and full gathered skirt, I knew that the next one should be made into something sumptuous that with a skirt so full it could fill a room! Dashing into The Fabric Store with a scant 20 minutes to spare before they closed for the day, I caught sight of some red silk dupion, and knew my choice had been made.
If I may say so myself, the gorgeous lustre and the full body of the dupion made this dress! Sometimes the pattern itself that you use isn't overly complicated, but when pared with the right fabric it can become something very special indeed, and I humbly think I may have achieved that with this frock!
The pattern is one of those marvelous Custom Fit ones, where you can get a very accurate fit on the bust, which was brilliant because it made me look like I had actual cleavage, for once in my skinny minnie life! The super fitted bodice (I did wear a strapless bra, but I could totally have gotten away without one, so tight was the fit) combined with the fullness of the skirt meant that my waist looked pretty small. Ah, love a bit of trompe l'oeil!
The only issue I had with this pattern was the fact that I was unlucky enough to purchase one of the versions with the skirt pattern pieces printed wrong. Thankfully I had already read about this on Pattern Review, so was able to redraft the pieces before I cut out my fabric. I was told by Clegs, where I purchased the pattern, that if I cared to bring it back to the store they would happily replace it for me.
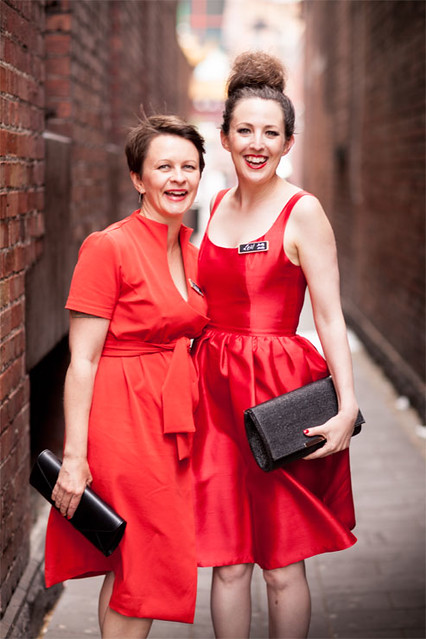
All in all, I am thrilled with this dress. It had everything I love in a frock - full skirt for swishing about it, pockets, great fit and the shine on the dupion makes me feel very regal indeed. It was perfect for a night of dressing up (thank you ladies, for organising Frocktails!) and I'd also like to say a big thank you to photographer Kirsten Simpson for her amazing pics of my dress (and everybody else's!) on the night. Her work is all the pics on this post, except for the very top one. What a talent!
Project Details
Pattern - Vogue 9100, version A, size 8
Fabric - 1.6m red silk dupion from The Fabric Store
Notions - 35cm invisible zipper
And last but not least, here is my other favourite lady in red - or orange to be absolutely correct!
Monday, November 07, 2016
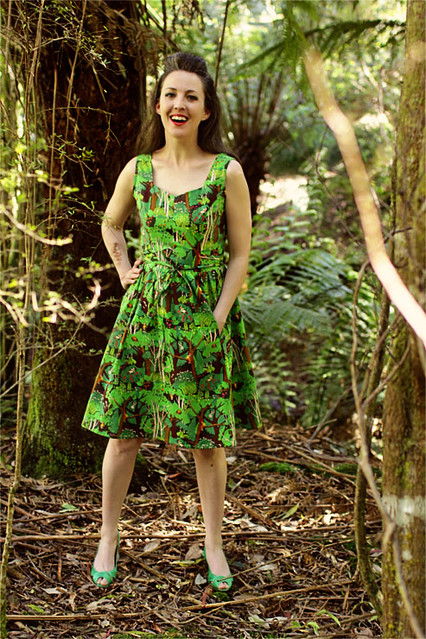
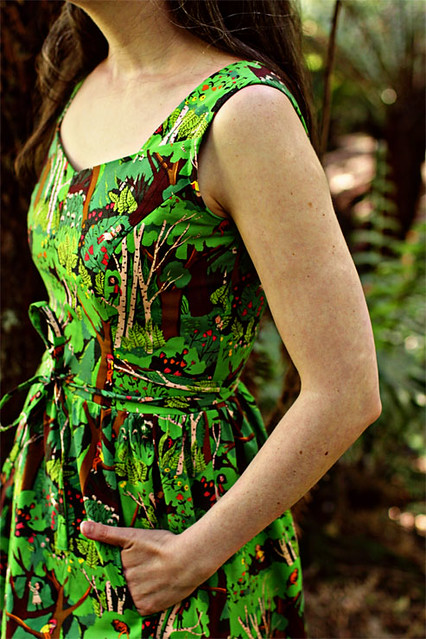
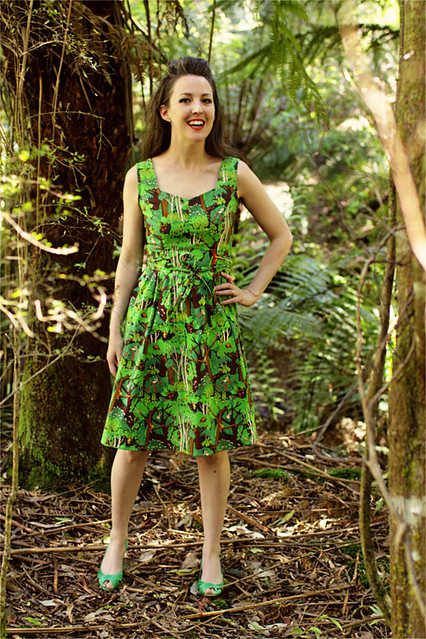
Into The Woods Dress
Well folks, I hope you are happy. In order to bring these pics to you, I braved crazed koalas, threatening kangaroos and killer snakes - you know, just the usual inhabitants of the Australian bush. And ants! Man, those six-legged wonders sure can get big down this way. I was scared! But such is my dedication to you all that I ventured forth with nary a thought for my own safety, just so I could present to you my Into The Woods Dress. I got scratched up, but I survived!
And yes, technically I know we don't called forested areas in Australia 'woods'. But I thought "Into The Bush Dress" might bring the wrong kinda readers to my blog, and apart from rare lapses into complete and utter crassness, I like to keep it clean around these parts. Anyway, here she is!
This is the sixth version of this dress I have made - I swear, I will find a new summer dress pattern, but I honestly had to make one out of this fabric, as I only had 1.8m to work with, as that was all that was left on the fabric roll, and Simplicity 1803 is very fabric-length friendly. I knew whilst in the store that I was setting myself a cutting-out challenge, but there was no way I was leaving this fabric behind! I've always been a sucker for a cute print, and I think this is the cutest print dress I've made to date!
The pockets are made out of plain green fabric, as I couldn't fit them onto the length of fabric I had, but you can't tell at all. I always forget how much fabric pockets actually take up until I am laying pattern pieces out. Fabric hogs! No other adjustments were made to the pattern - it's such a great fit for my body shape that I never need to do anything to it, which is always such a blessed relief.
I am so happy with this dress! The cute girls (plus cats!) in the print always make me smile, and I've wanted a fun green dress pretty much since the day I was born. Hooray!
Now all I need is to meet my favourite girl crush Emily Blunt somewhere, so she can humble brag about being in the movie version of Into The Woods, and I can act all cool and like "Yeah, but I got the dress, baybee!" And then we would totally go and have pint somewhere and end up becoming best friends (I'll probably tell her the same drunken word play about being in Into The Woods myself, literally, like right now cos I am totally wearing the dress, about 8 times and being the new BFF she will be she'll laugh like a drain every darn time) and one day I might even let her borrow the dress for the 20th anniversary digital remastering release. Maybe.
Project Details
Pattern - Simplicity 1803
Fabric - 1.8m cotton fabric from GJ's Discount Fabrics
Notions - 35cm invisible zipper, interfacing
Monday, October 24, 2016
Peacock Eyes Cardigan
You know you've had a busy year when you finish a cardigan way back in February, but don't manage to get pics of it until October. Good grief - what have I been doing with my time? (knitting, obviously!)
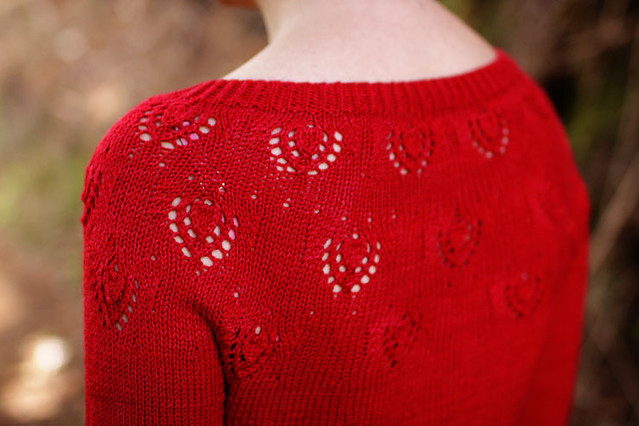
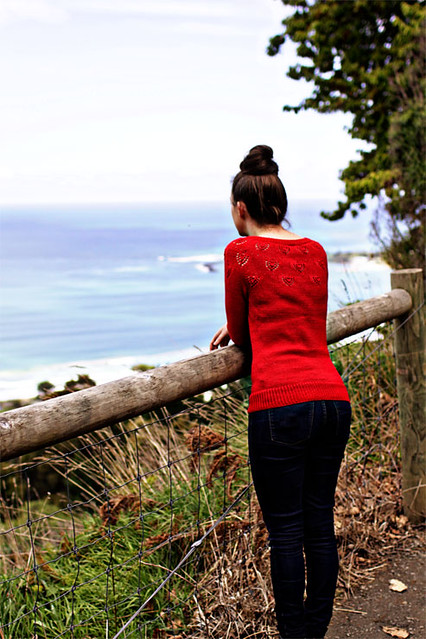
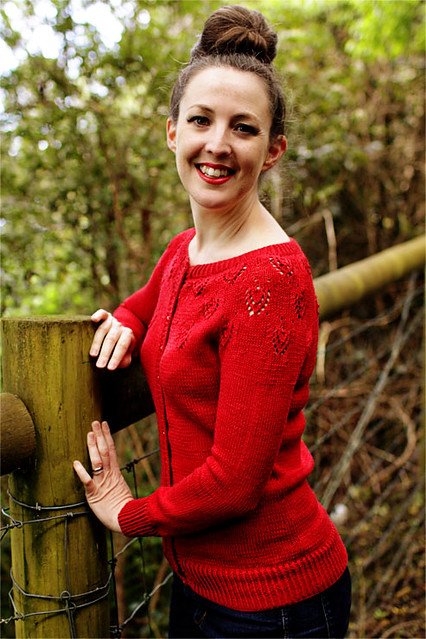
Well, as they say in the classics, better late than never. Meet my Peacock Eyes cardigan - here she is, finally, in all of her very red glory!
I loved knitting this pattern. It's so elegant - could work equally well with jeans as I've done here as draped casually over an evening dress when the chill of the evening sets in. It's a classic, timeless design, and since my love affair will red will only die when I do, I think I'll probably be wearing this for the rest of my mortal life!
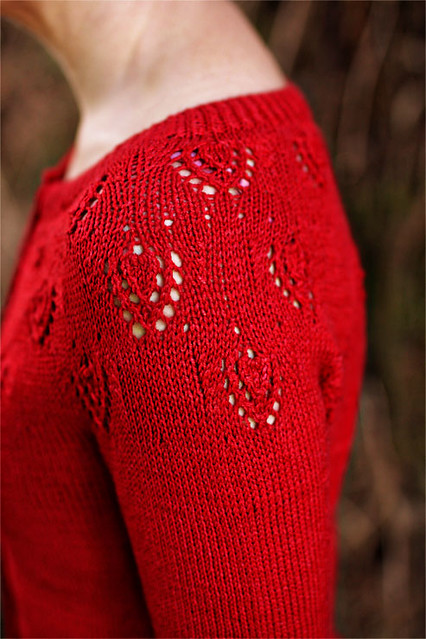
It's knit out of Spud and Chloe Fine, which is a wool/silk blend in a fingering (4 ply) weight. Normally silk in a yarn provides drape, but not in this case - it ends up being quite sturdy, which is good as it supports the lace well (I don't want no floppy lace) and will wear well with minimal pilling. For when you've spent hours and hours knitting a cardigan on tiny needles, you want it to look for as long as possible!
I didn't alter the pattern except to make the sleeves full length rather than 3/4. The fit is great, and the pattern is beautifully written. Five stars from this happy knitter!
Oh, and one last thing: Tyger is laughing in that last pic because she is hatching her evil plan to steal my cardigan from me. Note from the wise, kid: don't tell your victim of your intended evil plan!
Project Details
Pattern - Peacock Eyes Cardigan by Justyna Lorkowska (Lete's Knits)
Yarn - 4.25 skeins Spud and Chloe Fine by Blue Sky Fibers (227m per skein) in shade 7815 Red Hot
Needles - 3.0mm and 3.25mm circular needles.
Notions - 13 buttons
See this project on Ravelry.
Sunday, September 18, 2016
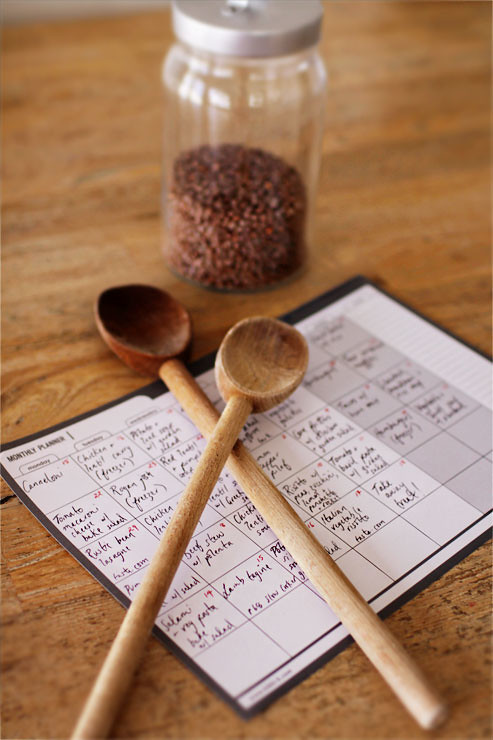
Monthly Menu Plan - September/October
Ahh, spring is here, and my thoughts turn to...greenery! Roquette, asparagus, dill, grapefruit, mint - I want fresh, vibrant flavours to wake up my deadened winter palate, and make my coat shiny and my eyes bright. I also want loads of veggies, and to be as plastic-free as possible, and totally unrelatedly, a new red dress. I fear all this probably says more about my scattered ping pong ball system of thinking than anything else, but there you have it. The thoughts and desires of Jorth laid bare for all to see.
Hmm. Not very deep today. Onwards to the menu plan!
Week One
Monday - Pumpkin and pearl couscous tagine
Tuesday - Lentil spaghetti bolognaise with rocket salad
Wednesday - Spring chicken stew
Thursday - Potato and yellow split pea curry
Friday - Lentil sausage rolls with garden salad
Saturday - Roast chicken
Sunday - Dinner out
Week Two
Monday - Creamy chicken and rocket pasta
Tuesday - Salmon, pea and potato cakes with green salad
Wednesday - Harissa roast carrot, quinoa and haloumi salad
Thursday - Asparagus, feta and dill tart with garden salad
Friday - Spaghetti and meatballs with rocket salad
Saturday - Beetroot ravioli with sage and poppy seed burnt butter sauce
Sunday - Roasted and spiced vegetable tacos
Week Three
Monday - Curried butternut and red lentil soup with silverbeet
Tuesday - Italian beef casserole (half in freezer) with sweet potato mash
Wednesday - Jamie Oliver's spring minestrone
Thursday - Spiced carrot fritters plus quinoa salad with asparagus and feta
Friday - Spicy kumara sausage rolls with chunky garden salad
Saturday - Zucchini pasta with asparagus, smoked salmon and rocket
Sunday - Tofu burgers with coleslaw and wedges
Week Four
Monday - Spinach and ricotta cannelloni with chunky lentil sauce
Tuesday - Italian beef casserole (from freezer) with garlicky mash
Wednesday - Creamy silverbeet soup with savoury scones
Thursday - Jamie's vegan burgers with red cabbage coleslaw
Friday - Roast vegetable pasties with salad
Saturday - Pizzas on homemade honey and wholewheat bases (roasted veg + feta, Hawaiian)
Monday, September 12, 2016
Summer Camisole and French Knickers Set
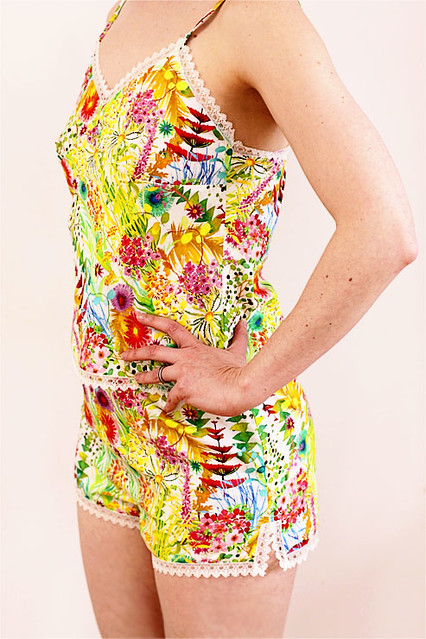
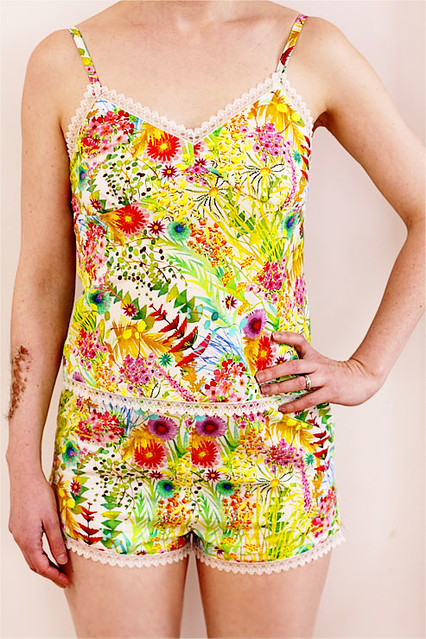
Eeek! Feeling ever so slightly (read: incredibly) nervous about posting this one, because I'm basically going to be showing you my smalls! But when your smalls - also known as your new summer pjamas - are made out of the cutest Liberty lawn print imaginable, it feels like a duty to show them to your sewing community so everybody can make themselves a pair! They are so light and comfortable to wear, which will be perfect come the searing heat this summer. I see another pair, plus a nightie from the same pattern, in my future. And not in slithery old silk satin, either - it's crisp and cool Liberty allllll the way!
Ok. Enough of the stalling. Here they are!
Ergh. I feel like the naffest pj model ever! And my photographer forgot to notice that the lace on the back had folded itself down, so please excuse that and my blindingly pale winter skin. The pattern is an old 1980 Simplicity pattern that I had in my stash, and I can tell you, the model on the front looks pretty darn cool in her version. No feeling naff for her! And the drawn models are practically oozing sex appeal. I should probably take lessons from them!
But seriously, how cute is this pattern? I don't even remember where I got it from, but it had been languishing in the stash for ages. I always knew I wanted to make up the camisole and French knickers set, but it wasn't until I spotted this particular Liberty print from Cutting Cloth that the dream pjs came together.
The pattern was so economical on fabric - the set took only 1 metre in total, and that is despite having the camisole cut on the bias. Even making it out of Liberty, it was still a steal! The sewing itself wasn't hard - just a bit fiddly sewing on the lace, but it turned out so well. I am pretty chuffed with my lace attaching skills now. Watch out, I'll be putting lace on everything now!
The only part that gave me any trouble was the v-point on the centre front of the bodice. I really suck at these, and it took a few unpickings to get a nice smooth finish. I was actually a bit worried about the fine lawn fabric, as it didn't take kindly to unpicking (and I unpicked 3 times) but we got there in the end with no lasting damage done.
So there you are: my super cute (and kinda sexy) summer pjs. Short version of the nightie next, but with the straight neckline lace trim. We're in for a hot, hot summer!
Project Details
Pattern - Simplicity 9859 (printed 1980), size 10
Fabric - 1m Liberty Tana Lawn from Cutting Cloth
Notions - 2cm wide lace from Rathdowne Fabrics, elastic for French knickers
Monday, July 11, 2016
Plastic Free July - Menu for Week Two
And here we are - one week in to Plastic Free July, and plastic has been successfully avoided! But the biggest success? Last week nobody went hungry, or complained about the food. Phew!
Here is the menu for week two - since the weather forecast is telling us that we are in for some nasty old wintry weather this week, the menu is heavy on hearty soups to see us through.
Monday
Breakfast - Toast with home made spicy bean dip
Lunch - Minestrone
Snack - Pear
Dinner - Store cupboard lentil soup
Tuesday
Breakfast - Muesli with stewed fruit
Lunch - Left over lentil soup
Snack - Fresh winter fruit salad with ginger
Dinner - Chickpea tagine with dates and couscous
Wednesday
Breakfast - Porridge with bananas and cinnamon
Lunch - Left over tagine
Snack - Bean dip with carrots and cucumbers
Dinner - Potato and leek soup with pumpkin bread
Thursday
Breakfast - Feta, tomato and spinach toasted sandwiches
Lunch - Left over soup and pumpkin bread
Snack - Banana bread
Dinner - Sweet potato and white bean chilli with green salad
Friday
Breakfast - Scrambled eggs with roasted tomatoes and salad
Lunch - Leftover chilli
Snack - Fresh fruit
Dinner - Beetroot and kale risotto with feta cheese
Saturday
Breakfast - Pancakes with poached dried winter fruits
Lunch - Leftover risotto with garden salad
Snack - Fruit salad
Dinner - Roasted veg and feta tacos
Sunday
Breakfast - Raisin toast
Lunch - Salad sandwiches
Snack - Orange butter cake
Dinner - Ribollita with olive and rosemary focaccia
Monday, July 04, 2016
Plastic Free July - Menu for week one
It's July - time for hand knits, snuggling up in front of the heater, and oh! Plastic Free July! I've decided to join in, and will attempt to live without any single-use plastic items (such as food packaging, plastic bags, straws, take-away food containers etc) for the month of July. I have made essential toiletries and medical supplies the exception, but apart from that no plastic shall cross my threshold if I can help it!
You can join in yourself, or just read up on it at the official website. There are heaps of great tips on how to be plastic-free in every aspect of your life.
Most people, when I tell them of my plans, are simultaneously intrigued and baffled. Plastic is such a prominent part of our modern lives - insidiously so, I believe - that the concept of avoiding it for a month seems nigh on impossible. So I've decided to share my weekly menu plans to show that with a little planning and organisation it can be done, and that my family doesn't have to live on raw fruit and vegetables for a month!
The first thing to do is to find a good store that sells dry goods, particularly grains and pulses, in bulk. Most of these items come in plastic packets at the supermarket, but bulk good stores allow you to fill your own bags (or handily provide paper bags), which are then weighed at the counter to calculate the cost. If you are lucky, these shops will also sell an array of dairy products in glass, too.
The second thing to do is to focus not on what you can't have, but what you can have, which is fresh, seasonal food! By making the most of the ingredients you have that come plastic-free, it soon becomes easy to figure out delicious meals that are as plastic-free as nature intended.
All grains, pulses, dry goods and dairy products that I am using this week are from such a store, and our bread is from local bakeries that put their bread in paper bags. Once you incorporate this way of shopping into your routine, it becomes pretty easy to avoid the evil plastic stuff. It does help that my local area has places like this to shop in, but it is getting easier - there seems to be more and more places selling food in this way. Sustainable Table even has a bulk store directory, so you can see if there is one local to you in your state.
Below is my menu plan, including snacks even. Never let it be said that my plastic-free experiments resulted in my family going hungry!
Monday
Breakfast - Raisin toast with butter and/or homemade jam
Lunch - Vegetable soup with spelt bread toast
Snack - Orange, pink grapefrut, ginger and black pepper fruit salad
Dinner - Malaysian vegetable curry with brown rice
Tuesday
Breakfast - Porridge with stewed apple and rhubarb
Lunch - Left over vegetable curry
Snack - Banana
Dinner - Moroccan lentil and chickpea soup
Wednesday
Breakfast - Avocado with black pepper on spelt toast
Lunch - Left over soup
Snack - Winter fruit salad
Dinner - Kale and sweet potato pilaf
Thursday
Breakfast - Soft boiled eggs with toast soldiers
Lunch - Left over pilaf
Snack - Apple, rhubarb, oat and yogurt pots
Dinner - Pumpkin and feta risotto with rocket salad
Friday
Breakfast - Toast with home-made hummus, cucumber and tomato
Lunch - Left over risotto
Snack - Pears
Dinner - Home made veggie pizza with feta
Saturday
Breakfast - Sultana, apple and cinnamon couscous porridge
Lunch - Left over pizza with garden salad
Snack - Carrot and cucumber sticks with hummus
Dinner - Greek bean and silverbeet stew
Sunday
Breakfast - Chocolate chia waffles with banana and maple syrup
Lunch - Left over stew
Snack - Oat and fruit cookies
Dinner - Heuvos rancheros with salad
Wednesday, June 22, 2016
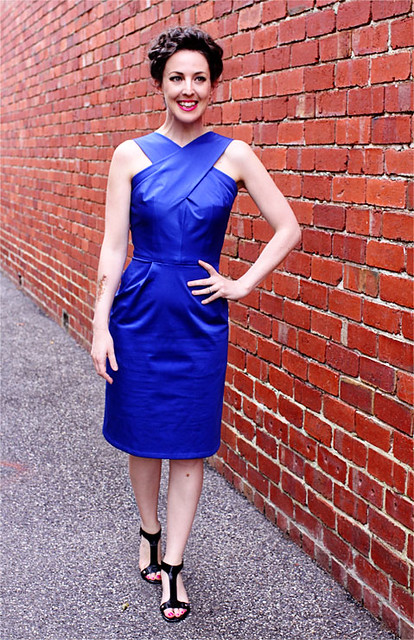
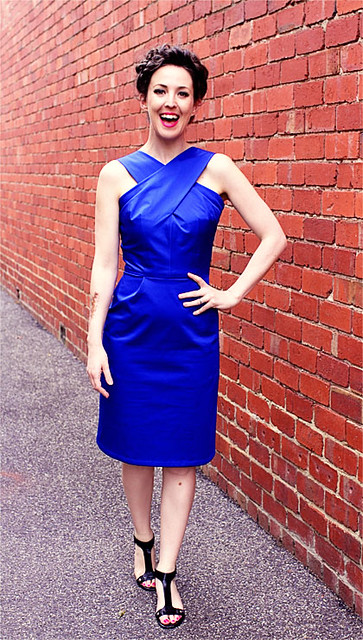
Vintage Blue Dress for The Dressmaker's Do!
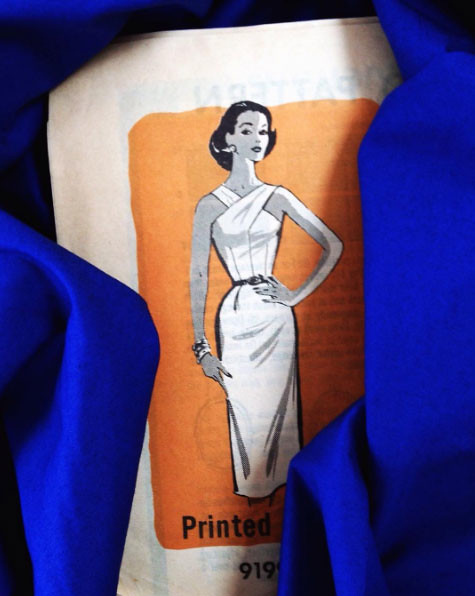
By the splendid power of the sewing machine, I command ye Jorth to turn this:
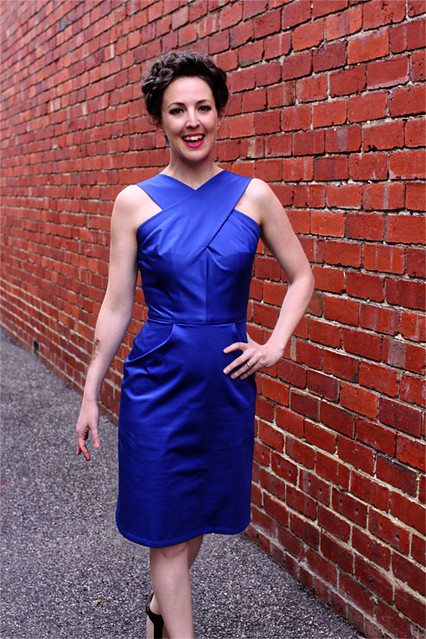
into this:
Mission accomplished, and just in time for The Dressmaker's Do!
What a fabulous night it was - one I'll remember forever. Sewists from all over came to join Nichola from Handmaker's Factory and I for a fun night of drinking, dining, and lots and lots of oohing and ahhing over each other's beautiful frocks - and trust me, there were gorgeous dresses and outfits aplenty on display that night. I am constantly in awe of the talent that fills our amazing sewing community!
It was so lovely to hang out with sewing folk I knew, plus meet some brilliant new ones. I think the best part of night, however, was taking total control of the microphone so I could hand out prizes from our kind and generous sponsors: The Cloth Shop, You Sew Girl, Woolarium, The Fabric Store, Ink & Spindle and Handmaker's Factory.
And now for the dress - I had changed my mind over which vintage number I would make for the evening (no pressure, being the host and all) but finally decided on the blue one. And I'm glad I did, for it was the perfect marriage of comfort and glamour.
The pattern is a mail order one from 1950s that you could send away for and then receive from The Workbasket Magazine which was based in New York. I had never heard of the magazine, and just happened to stumble upon this gem one day when perusing Etsy for vintage patterns (which I do far too often!) There's a brief history of the magazine on this website - it's always sad to read about great magazines that disappear, but alas, that appears to have been The Workbasket's fate.
The pattern itself was very well written, well drafted and super easy to follow - however, I did end up wondering if the grading itself was accurate as I am definitely a 32 bust, but needed to bring the bodice in by 2 inches! However it wasn't a big drama, and I ended up with a fit I was happy with.
The back is cute, with a pleat at the back to stop the skirt from being the full wriggle. I'm so glad I decided to go with this vintage beauty, and can see myself getting a lot of wear out of her in the future, and maybe even making another few versions!
Once again, I'd like to thank all the fabulous ladies who came along - it was such a fun night, and Nic and I are already thinking about planning another!
Project Details
Pattern - 9199 Mail Order pattern from The Workbasket Magazine
Fabric - Stretch cotton sateen from The Fabric Store
Notions - 35cm zipper, interfacing
Monday, May 16, 2016
Monthly menu plan - May/June
I read a report the other day that stated that less than 4% of Australians managed to eat enough vegetables - i.e. the recommended 5 serves of veg, plus 2 of fruit. Eeeek! So to make sure that as a family we hit those targets, I've decided to reduce our meat intake to once a week, and to eat mostly vegetarians meals instead. Good for us, good for our wallets, great for the environment. Win, win, win.
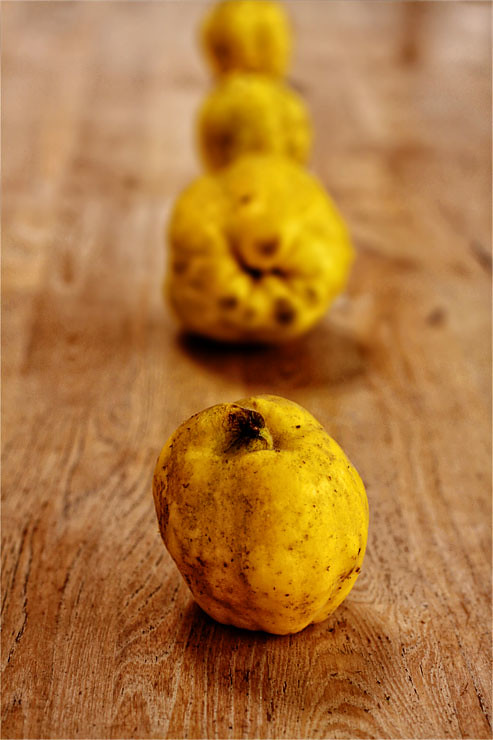
I've also tried to make my cooking go as Zero Waste as possible. We did a stock up at our local bulk organic store, and filled our jars with chickpeas, lentils and rice. It was so economical, and I love not having any single-use plastic to turf afterwards. And they also had quinces! So of course I brought them home with me. Quinces, meet the oven. You'll be slow cooked in there for about 10 hours until you are a dark and deep maroon. Delicious!
Week One
Monday - Moroccan lentil and chickpea soup
Tuesday - Chicken curry
Wednesday - Potato and leek soup with salad baguettes
Thursday - Lentil, feta and roasted pumpkin pasta with garden salad
Friday - Dinner with friends, so to be decided
Saturday - Persian eggs with lentils and couscous
Sunday - Grilled vegetable and bean tacos with red cabbage coleslaw
Week Two
Monday - Tortellini minestrone
Tuesday - Simple beef and vegetable casserole (slow cooker)
Wednesday - Roast vegetable and mushroom pizza
Thursday - Wholemeal pasta with silverbeet and walnuts and green salad
Friday - Bean nachos
Saturday - Spicy rice and sweet potato biryani with baked eggs and garden salad
Sunday - Spicy winter vegetable soup with chickpea and cauliflower tabouli
Week Three
Monday - Roasted vegetable,cheese and cranberry filo pie with salad
Tuesday - Beef, date and spinach tagine
Wednesday - Spiced pumpkin soup with super green salad
Thursday - Smoky chickpea stew with couscous
Friday - Carrot, feta, dill and chickpea tart with potato salad
Saturday - Baked jacket potatoes topped with leftover chickpea stew, plus loads of vegetables
Sunday - Roast chicken
Week Four
Monday - Creamy silverbeet soup with garlic bread
Tuesday - Beef casserole (from freezer)
Wednesday - Pearl barley minestrone
Thursday - Italian vegetable risotto with salad
Friday - Caramelised onion frittata with roasted garlic tomatoes and rocket salad
Saturday - Vegetable and tofu stir fry
Sunday - Spinach and ricotta cannelloni
Week Five
Monday - Spiced carrot soup with ginger raita
Tuesday - Beef tagine (from freezer)
Wednesday - Curried pea and lettuce soup with savoury scones
Thursday - Red lentil dhal with carrot and sweet potato
Friday - Baked beetroot and apple soup with Greek salad
Monday, May 09, 2016
Pebble Beach Shawlette
As I sit here to type this post up, the weather outside is the least conducive to carefree beach going that you can think of: the rain is pelting down, the storm water drains are beginning to back up, and the wind and rain are conspiring to rob as many people of their umbrellas as possible.
So I shan't pop out and look for a nice pebbly beach on which to wear my Pebble Beach Shawlette, and shall instead have to stay here with the rain lashing the windows whilst quinces slow cook in the oven. I know, tough life, eh?
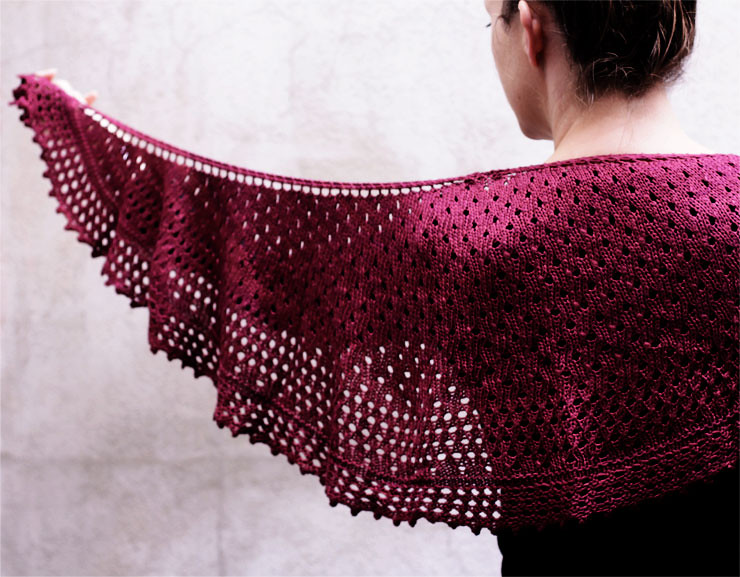
To the knitting! Here is my version of the Pebble Beach Shawlette designed by Helen Stewart. To be perfectly frank with you, knitting a shawl has never appealed to me, but once I lay eyes on this design, it suddenly became imperative that I knit one right this very minute. It's so lovely that even I, avowed shawl derider, fell under its lacy spell.
I knit this shawlette in Vinnis Colours Serina, a beautifully silky and drapey yarn from Woolarium. It's hard to tell from the pics, but the yarn has the most incredibly subtle colour variegations within it that had me captivated.
The pattern was one of the best written I have ever come upon. One component that really tickled my fancy was the percentage of completion that accompanied each row. It was like having a little cheer squad encouraging you to knit more quickly to the end! Whilst there was a lot of knitting in this, the pattern was very easy to follow. I can see more being made as gifts!
Project Details
Pattern - Pebble Beach Shawlette by Helen Stewart, knit in size small
Yarn - Vinnis Colours Serina bamboo yarn from Woolarium
Needles - 4mm 100cm circular needle
Project Ravelried here.
Wednesday, April 06, 2016
The Dressmaker's Do!
Sewing bloggers, get your machines ready – tickets for The Dressmaker’s Do are here!
Join us and fellow sewists wearing your best sewn creations for a fun-filled evening brilliant fashion, fine food and drinks.
Hosted by Nichola from Handmaker's Factory and yours truly, it promises to be a great night – with fantastic door prizes to be won, including a brand new whiz-bang Singer sewing machine!
The Dressmaker’s Do will be held at The Kent Hotel, North Carlton, which is easily accessible by public transport. Tickets cost $90, and include finger food plus an open bar with red and white wine, sparkling wine, beer and soft drinks. Vegetarian and gluten-free food will be available, as will funky tunes to get your make-it-and-shake-it boogie on the dance floor later in the night. Take advantage of the photo wall to take great pics of yourself and your friends in your best sewn finery.
Follow us on Instagram for more exciting news in the lead up to the night: @handmakersfactory or @jorthknits – we can’t wait to see you there!
Tickets available now - would love to see all my favourite sewing people there!
Details:
Date - Saturday, 18th June 2016
Location - The Kent Hotel, 370 Rathdowne St, North Carlton
Time - 8pm until 11:30
Dress Code - The best finery you can sew!
Wednesday, February 17, 2016
Monthly Menu Plan - February/March
Now that school has resumed, and all the assorted after-school activities are back with a time-gobbling vengeance, organisation is paramount to ensuring that I have a happy state of mind. Seriously - by the time I get home after work (particularly on the days we are up at 4:45 for sports training) I pretty much have no brain power left and limited energy. Once again, the menu plan saves the day! I'm trying to make dinner ahead of time on our super busy days, and on our not-so-crazy days ensuring the dinners are pretty easy (yet still healthy) to put together. Because I don't know about you, but neither my budget nor my insides cope well with take-away!
Week One:
Monday - Spinach and ricotta cannelloni (note: instead of using passata I make up a chunky tomato, lentil and carrot sauce to really boost up this meal)
Tuesday - Slow cooker chicken and lentil curry, double batch (half now, half in freezer)
Wednesday - Potato and leek soup with garden salad and garlic bread
Thursday - Lentil and cauliflower pilaf with minted yoghurt
Friday - Zucchini pasta with rocket salad
Saturday - Tofu burgers with coleslaw
Sunday - Bean enchiladas with brown rice and left-over coleslaw
Week Two:
Monday - Tomato and macaroni cheese bake with salad
Tuesday - Slow cooker Rogan Josh (from freezer)
Wednesday - Red lentil and pumpkin soup with garden salad and cheese toasties
Thursday - Coconut lentil dhal with saffron rice
Friday - Roasted vegetable galettes with salad
Saturday - Home-made lentil and beef burgers (half now, half in freezer)
Sunday - Taco cornbread waffles
Week Three:
Monday - Rustic bean lasagne with green salad
Tuesday - Slow cooker chicken and lentil curry (from freezer)
Wednesday - Roasted tomato and lentil soup with Greek salad and pita bread
Thursday - Lemon pepper pilaf
Friday - Corn fritters with coleslaw and garden salad
Saturday - Home-made tacos with bean filling and all the trimmings
Sunday - Silverbeet, broad bean and rice soup
Week Four:
Monday - Pumpkin and pasta bake with salad
Tuesday - Slow cooker beef stew with polenta (half now, half in freezer)
Wednesday - Chicken and lentil soup with garlic bread
Thursday - Risotto with peas, zucchini, lemon and pancetta with rocket salad
Friday - Tomato and basil pasta with garden salad
Saturday - Home-made lentil and beef burgers (from freezer)
Sunday - Vegetable and lentil soup with silverbeet
Week Five:
Monday - Salami and vegetable pasta bake with garden salad (add in mushrooms, carrots and zucchini)
Tuesday - Slow cooker lamb tagine (half now, half in freezer)
Wednesday - Potato and silverbeet soup with salad and rolls
Thursday - Italian vegetable risotto with salad
Friday - I think I might hand the apron to Galump and let him sort dinner out on this night - I'm spent!
Monday, February 15, 2016
Year of Vintage Sewing : January : Simplicity 4688
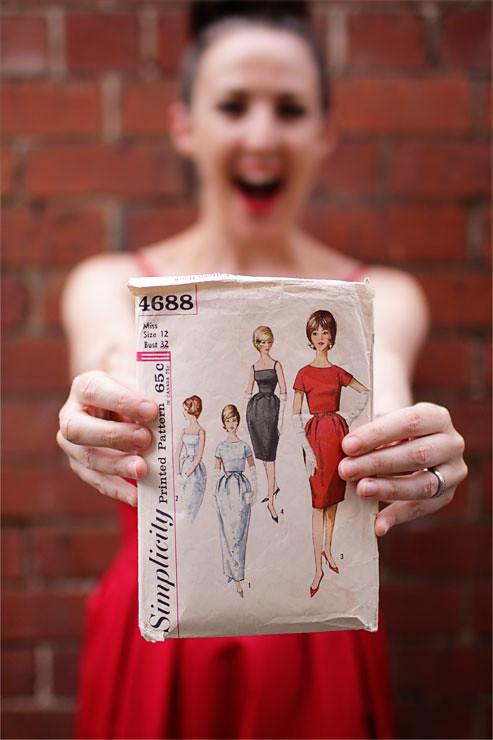
So here is the very first dress of my Year of Vintage Sewing challenge - Simplicity 4688. I like this dress. I mean I really, really like this dress. After all, you can't go wrong with a red frock. I only wish that the pattern had requested a pair of falsies bras would be worn with it, because seriously - those bust darts in their original state really needed some filling out!
Not being in possession of either a falsie bra nor a ginormous pair of dangerously pointy bazookas, I had to do some fiddling before I got those darts to result in a more, er, natural shape. Trust me - I deeply regretted my choice not to do a muslin first as I unpicked and remodelled those darts for the tenth time! But I got there in the end by taking out the excess in the side dart and elongating the dart itself. Phew! Because this is just not my favourite look!
Nope. Never. Ever. Happening.
So darts were tamed, and once that was all sorted the rest of the dress came together quite easily. The pattern requested that the bodice be lined, but the technique involved sewing the lining pieces to each of the bodice pieces before doing the darts, which I thought would just be messy. Plus there were facings, so I skipped the lining all together. If I was making the dress in a silk dupion I would have lined it, but since it is made out of cotton I decided it really wasn't worth the bother.
How about the skirt, hey? Talk about rooooooomy! I was under the impression from the pattern illustration that the skirt would be tulip-shaped, but instead it was just a pleated straight skirt. They fooled me with the fancy pictures! There are many good things about this skirt: I can easily ride my bike in it, and I could totally eat all the burritos I wanted and nobody would ever catch sight of my protruding gut. The bad things: it catches the wind like it's trying to green power all of Melbourne, and the temptation to burrito binge whilst wearing it is substantial. However, for somebody who doesn't walk so much as stride with excessive vigour, it's a good skirt.
The hem is hand-stitched, as are the zipper and bodice facings. I did make the tie belt, but darned if I could figure out how to make it look right. All my efforts to tie it around my waist just made the bow look drunk, so I gave up and ditched it for the pics.
All in all, it was a fun project. Luckily my measurements (strange pointy breasts aside) matched up, so I didn't need to make any major alterations. All I need now is a pair of long white gloves and some decent helmet hair and I could rock da frock like the slightly-daft looking pattern ladies!
Project Notes:
Pattern - Vintage Simplicity 4688, size 12 bust 32
Fabric - 3 1/8 yards (2.8 metres) of red cotton with lycra from The Fabric Store
Notions - 35cm invisible zipper, iron-on interfacing
Monday, January 11, 2016
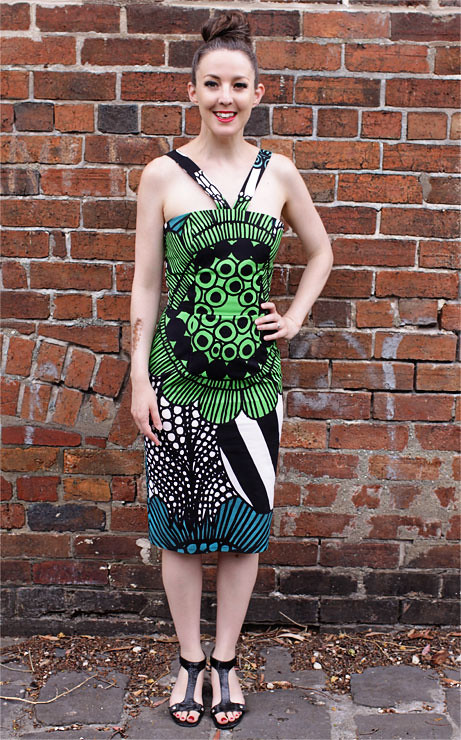
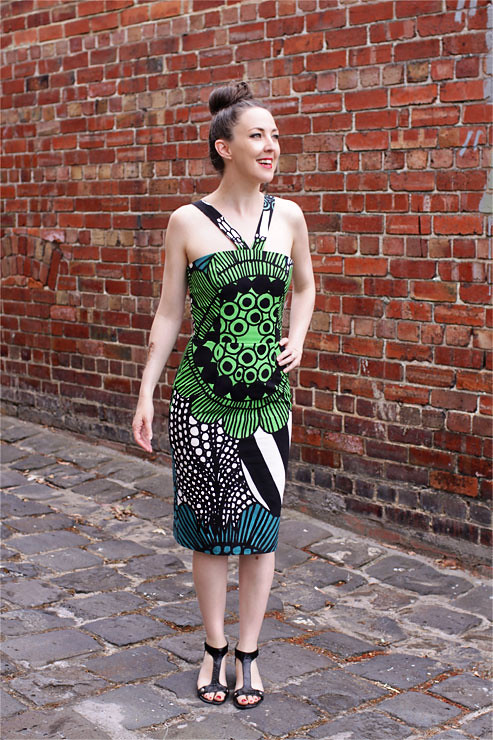
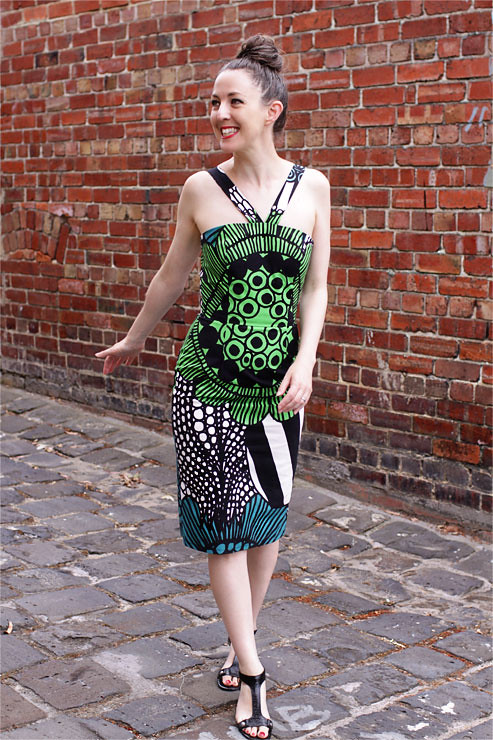
Marimekko dress
There are a few things that I'd love to have happen in my life. I'd love to visit Antarctica, and feel like I was standing at the edge of the world. I'd also love to live in New York, and be snapped by Scott Schuman as I nonchalantly exited my brownstone abode wearing one of my lovingly made frocks. And speaking of frocks, I've always wanted to have a dress made out of Marimekko fabric.
Now, current budget constraints are putting the kibosh on both an Antarctica trip and the chance to reside in the Big Apple for the time being, but as soon as I saw this incredible fabric from Yulki's Home Décor I knew that I could make my Marimekko dress dreams come true!
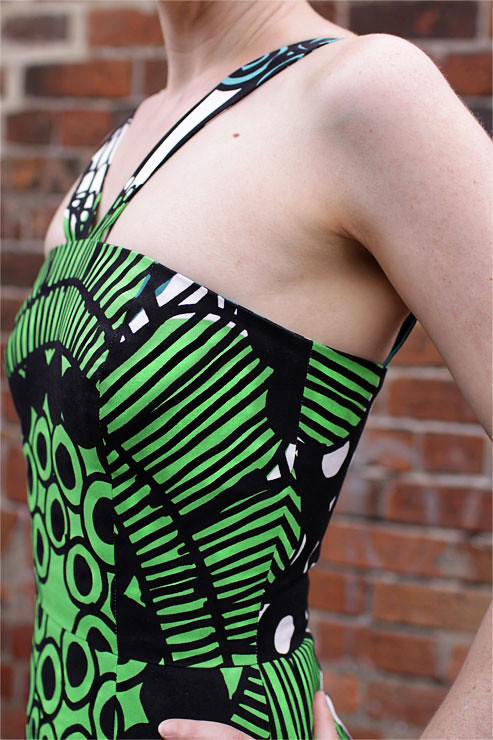
This was the last dress that I made in 2015, and I got it finished just in time for Christmas - yay! I used my trusty Vogue 8184, and the fabric was perfect for the job. I wanted to make a structured version of the dress, so needed a fabric that was strong enough to provide the structure required, but wasn't too thick or heavy to sew with. To be honest, I couldn't have picked a better fabric for the job - by using it to line the bodice section I have the strength I desired without needing boning for reinforcement (and that also means I can breath in it, too!).
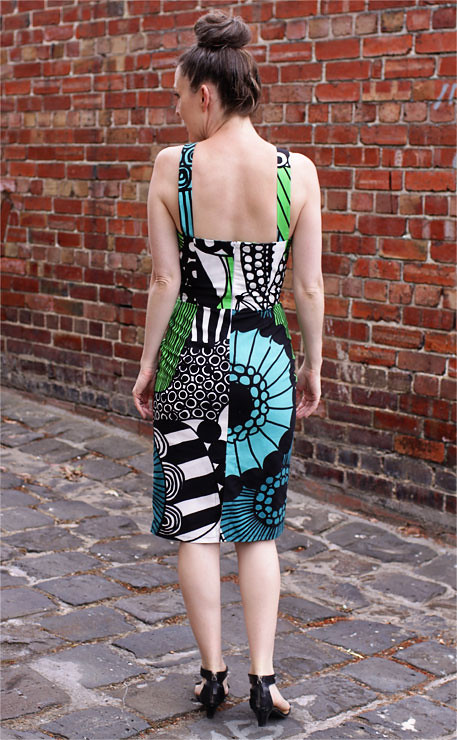
The pattern on this fabric is classic Marimekko - big, bold and colourful, so I did some strategic fussy cutting to make the most of the pattern and to ensure that the colours on the print flowed nicely into each other from each piece of the dress pattern. I am so happy with how it has turned out - I really wanted a fun dress that married the quirky nature of a Marimekko print with an elegant sophistication that reflects the vintage vibe of the dress design, and I think I've nailed it!
The only modification I have made to the pattern was to alter the shoulder straps so they came from the centre of the neckline - I love the look of this, and find it nice and comfortable to wear, as you never have to worry about your shoulder straps slipping off!
And who knows - maybe next time The Sartorialist comes to Australia he'll snap me in this dress!
Project Details
Pattern - Vogue 8184, made in size 8
Fabric - 1.2 m of Marimekko Siirtolapuutarha fabric from Yulki's Home Décor - Marimekko Fabric Australia
Notions - 35 cm invisible zipper
Wednesday, January 06, 2016
Back to school skirt
Ja, ja, I know - school isn't back for a few more weeks yet but it appears that Santa DID leave some sewing mojo in my stocking, so a quick skirt for Tyger was in order!
You seriously cannot get more basic than this - I took an 80cm by 115cm length of fabric, sewed the short sides together, hemmed the bottom, did a 3cm hem on the top and inserted some 2.5cm elastic and hey presto - a skirt was made!
The verdict? She's chuffed because she picked the fabric and that it goes so well with her favourite t-shirt, and I'm chuffed because it took all of 20 minutes to make! Happy new year!
Friday, January 01, 2016
The Year Of Vintage Sewing
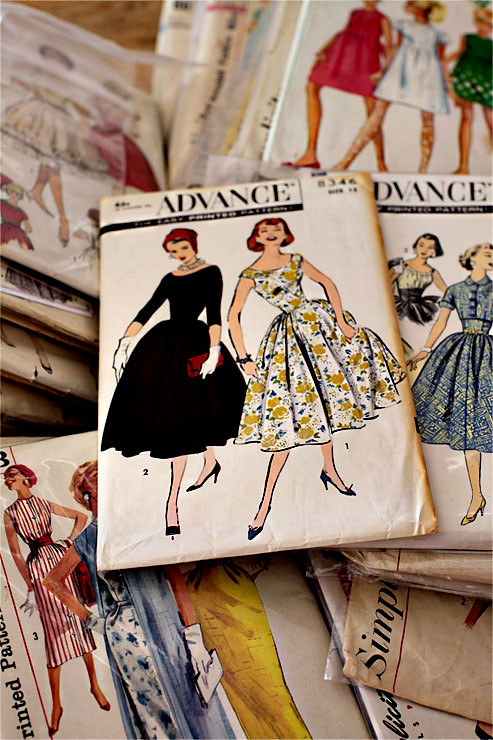
There's a cupboard in my house that for some time I have been scared to open. It's full of vintage patterns, and whilst you would expect them to all sit there quietly in their protective covers, I can assure you that this is not the case. As soon as their door is open, they begin to clamorously beseech me to stop faffing around and begin sewing them, NOW! Their heart-rending cries of desperate longing to be made up began to seriously do my head in, so guiltily I avoided the cupboard all together, rather than face their continued disappointment.
But vintage patterns, there is good news: I've decided that 2016 is the year for me to begin sewing you, so nag away - I'm on the job!
To be perfectly honest, I'm pretty excited about this project. I've been collecting vintage patterns for years now, and I've got some pretty good ones tucked away in there. The aim is to sew at least one vintage pattern up per month. And by vintage, I mean minimum 30 years old. I think I'll mostly be sewing ones from the 1940s, 1950s and 1960s as they are my favourite eras for fashion. The glamour! The styling! I want in on that action!
The patterns themselves can be original vintage or reproduced vintage ones. I'm hoping not only to end the year with an incredible wardrobe, but to also increase my sewing skills by learning some new techniques. I didn't sew as much last year as I would have liked to, so I'm hoping this project helps bring my sewing mojo back.
Now for the hardest part - which one to pick first!

