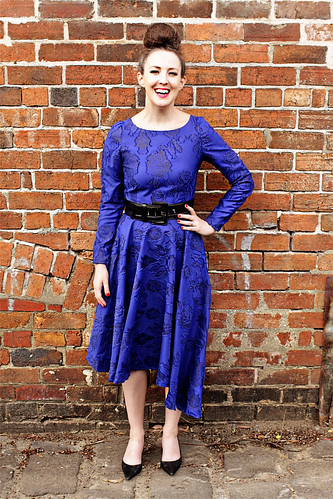
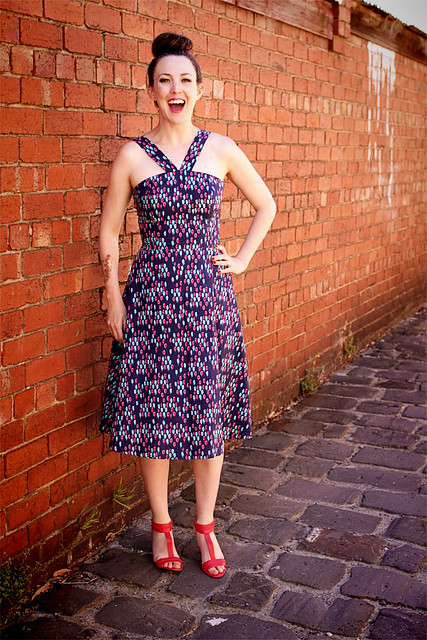
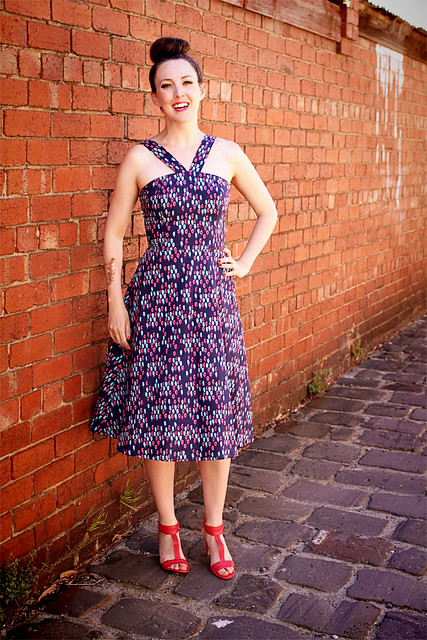
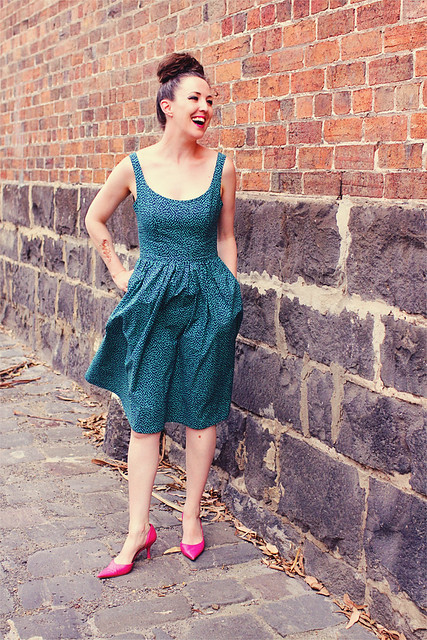
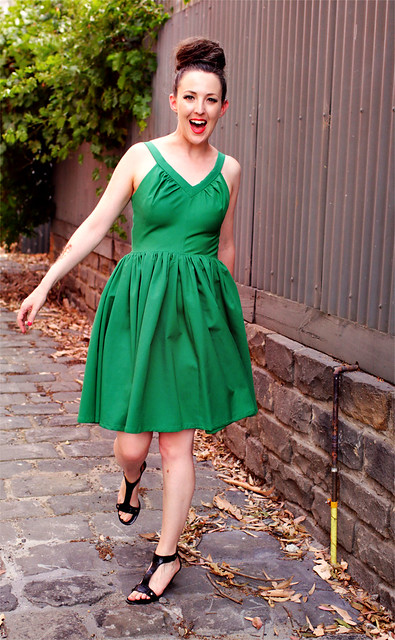
Some would say the Oscars. Others would nominate the Nobel Peace Prize. Your more sporting friends might vote for the AFL Grand Final. But for me, dear sewing friends, the social event of the year is the one, the only Frocktails party!
There are so many things I enjoy about this night. Seeing all of my favourite local sewists in the same room is utterly brilliant. As is oohing and aahing over all the incredible outfits on display. But one of the best things is being able to create a one-off frock, and this year I was determined to put my rusting pattern making skills to the test, and create a pattern from scratch. Why? Just to see if I could. I really felt the need to push myself.
So I did!
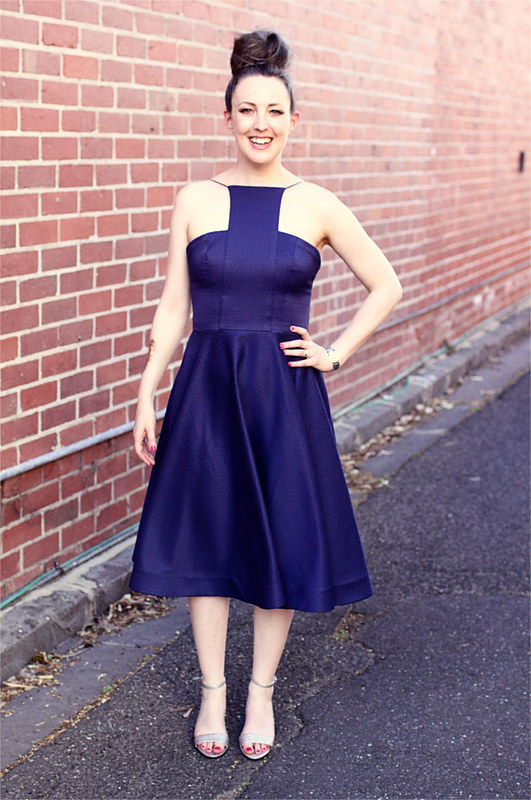
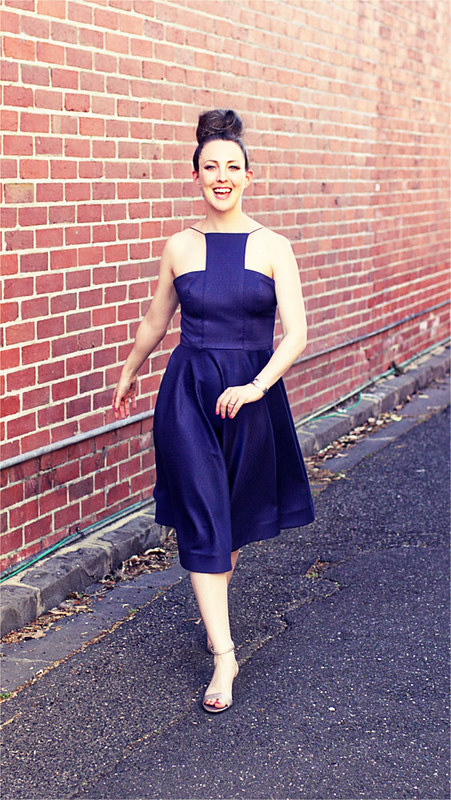
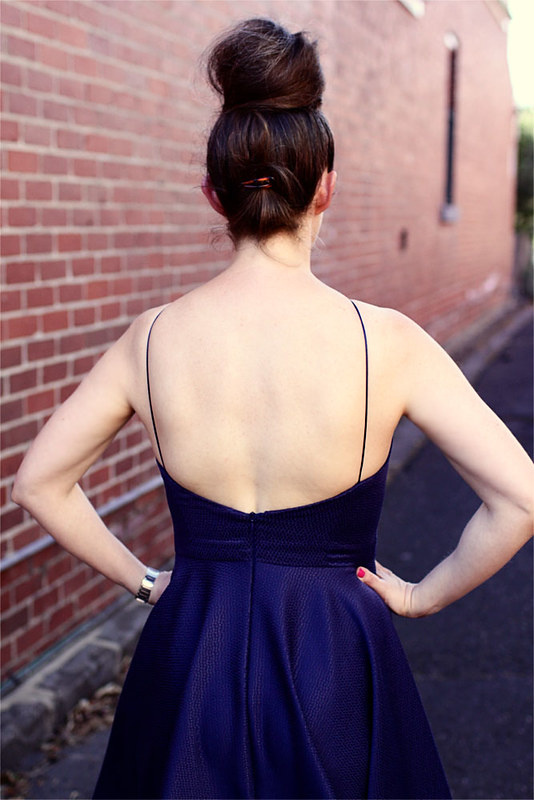
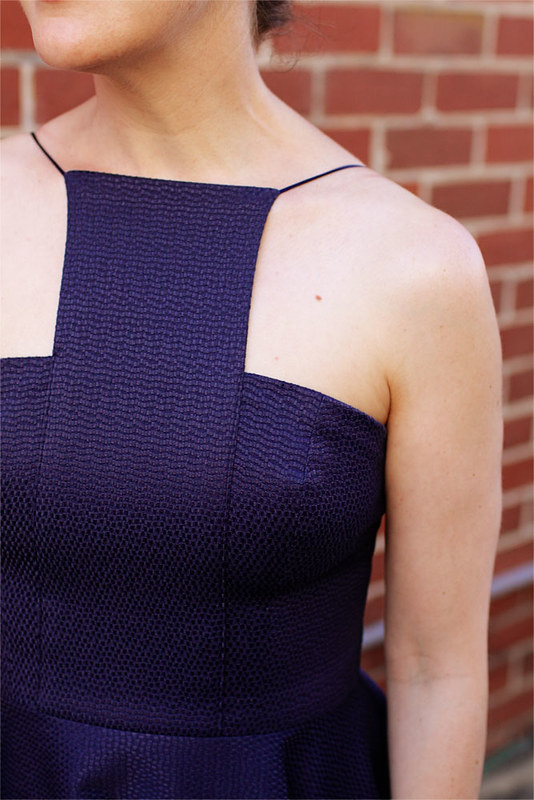
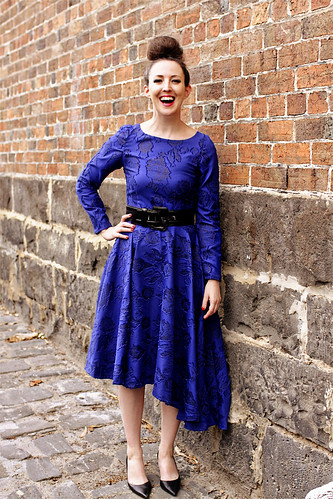
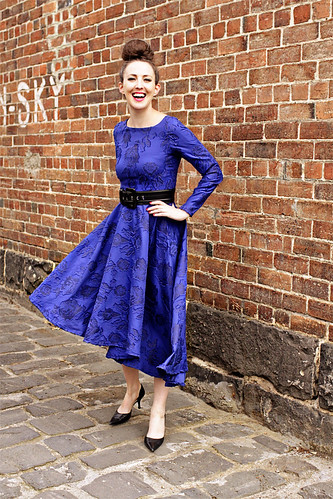
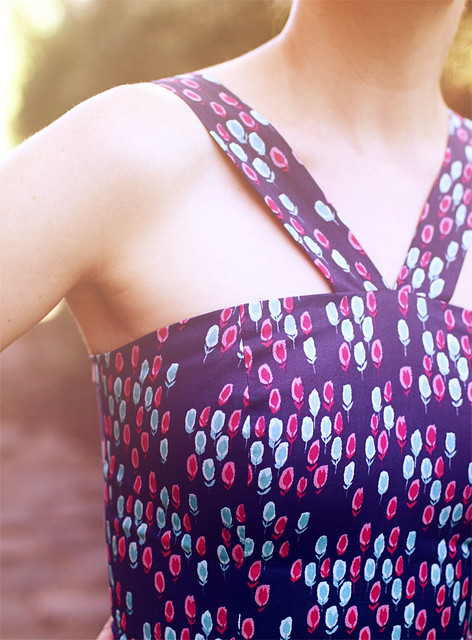
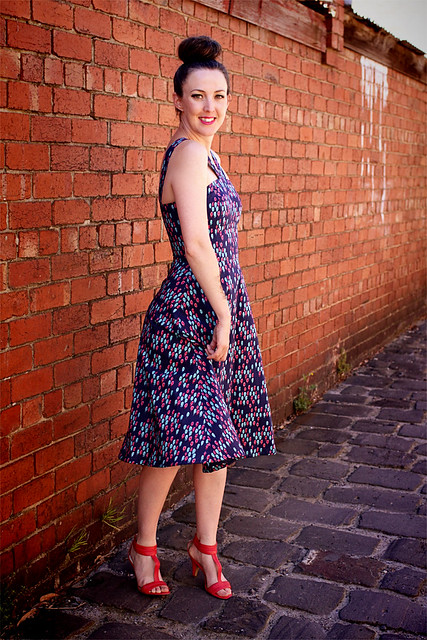
Anybody who reads this blog know that I have a thing for a statement neckline, and a statement sleeve/shoulder. Now, generally I feel that never the twain should meet, so I decided to focus on the neckline aspect. I also wanted this to be a knockout evening gown, so I decided on a low and sexy backline, and since I adore all things vintage, I went for a full circle mid-length skirt. A happy afternoon was spent with my pattern blocks, and before you could say "seam allowance" my pattern was created, rising up from a sea of scrunched up paper.
Well, that was my designing done. Now for the calico!
I was lucky enough to have a sewing day with the lovely Julia Bobbin, and I sewed my calico there. We were sharing the sewing space with a group of quilters who meet there regularly, and as soon as I came out of the toilet in my toile, their quilting chitter chatter ceased and they began to remark upon my dress. (Julia told me later that you could clean see my underpants through the calico, but we'll just draw a veil over that bit). Thankfully all their words were kindness itself (nobody mentioned my underpants!), and after making a few minor adjustments, I was satisfied with the fit. The calico fabric itself was a bit tight and unyielding, but I thought "Pah! No need to worry yourself over that, Jorthy!" and went merrily home to cut out my actual fabric.
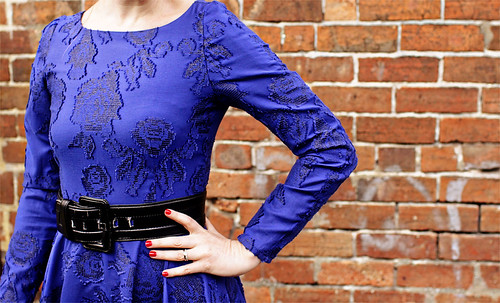
Here, my friend, is where my sewing sadly deviated from its projected path. I had STUPIDLY failed to take into account the 'give' difference between my calico and the fabric I had chosen for the dress, which was a silk/cotton blend with a loose-ish jaquard weave. And this, alas, is where I started to sail clean into stormy waters, instead of safely berthing at Point Successful Sewing.
Due to the aforementioned looseness, my bodice ended up being much larger than my calico one. I did not, however, realise this fatal flaw until after I had not only sewn the darn bodice up, but sewn in the lining and attached the skirt. I then waited until Tyger got home from school, then got her to pin together the dress in lieu of a zipper being inserted. I stood there, with Tyger repeatedly (hopefully accidentally) stabbing me in the back with pins, silently mouthing a certain naughty word that may or may not begin with F to myself as I gazed in horror at my gaping bodice. It was so bad that I feared an imminent nip slip, and I really have very little there to slip. GAH! So I took off the dress, and did what any sewist in a hurry would do - I tried to take in the seams without unpicking anything.
This, of course, did not work at all, and left me with a lumpy sad bodice that still had major fit issues. So out came the quick-un-pick, and I unpicked the whole darn lot, then re-sewed, making each seam (of which the bodice had 6) 0.5cm wider than before.
IT STILL DIDN'T FIT!!! I'm pretty sure this is when I stopped mouthing that pesky F word and started bellowing it, before I calmed down and accepted my lot: there was nothing left to do but redraft the bodice pattern, taking the loose weave of the fabric into account, and begin again. So the next morning, that's what I did.
Did I mention Frocktails was only a day away? No pressure!
This time around the fit was much much better. I ended up taking 2cm off each seam allowance, which improved matters greatly. I probably could have taken the side seams in a wee bit more, but the quick-un-pick and I were sick to death of each other by that stage, so I decided that extra breathing room was fine by me and left it as was.
Once my bodice was fully lined, I sewed the front panel on, and from there I attached the skirt. The very cool thing about the front panel is the nylon cord I found to use as the straps. It was thin, but so strong, and the colour match was great! I am really pleased with how it turned out - it looks exactly as I wished it to.
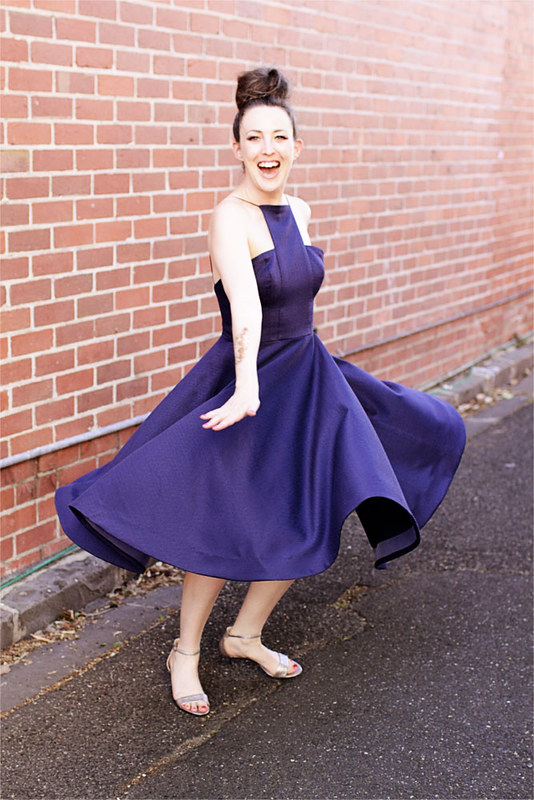
As I mentioned before, the skirt was a full circle. Man, that thing just asks to be twirled about in! To make it look as full as possible, I sewed in horsehair braid, which I had never done before but will probably do to everything in the future because it looks so goshdarn awesome! Ok, so sewing 6 metres of braid in by hand maybe wasn't so awesome, but the end result was worth it!
All in all, I am super proud of my dress! It has been literally years since I drafted a pattern from scratch, so I am thrilled that it turned out so well. I feel like I have been plodding along a bit with my sewing, not really trying anything new, so I really wanted to push my oar out and extend my skills. After all, if you fail, you just grab up the quick-un-pick and start again, right? I was also reminded of how beautiful fashion can be after seeing the Dior exhibition at the NGV, and this in turn led me to remember the line in The Devil Wears Prada about how fashion is art that we live our lives in. I have the sewing skills to make my life in clothes as colourful and unique as I want it to be, so I decided to go all out and see what I could achieve. It was worth every F-bomb!
Project Details
Pattern - Self drafted by yours truly
Fabric - Silk/cotton blend textured fabric from The Cloth Shop
Notions - invisible zip, nylon cord, horsehair braid
Monday, November 13, 2017
Wednesday, September 06, 2017
Lemons Dress
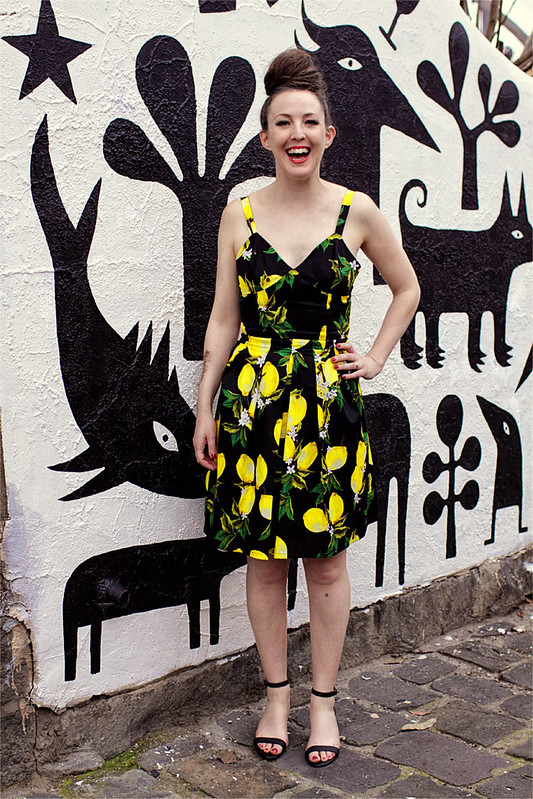
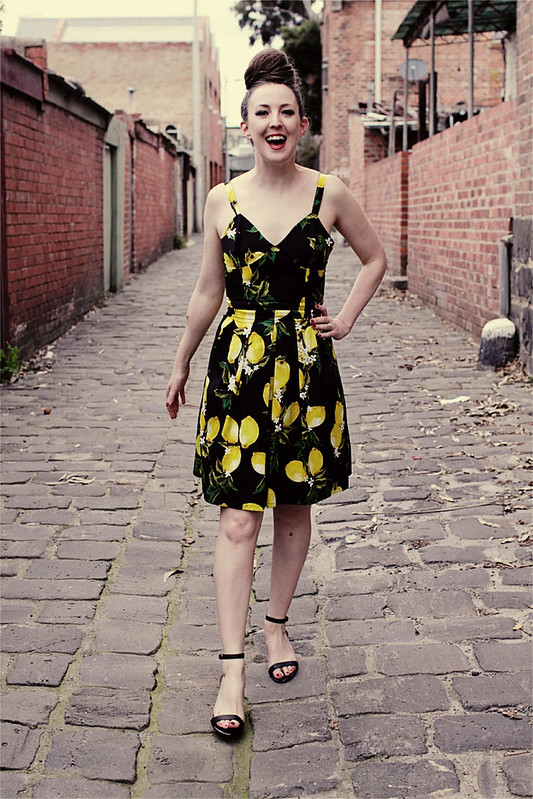
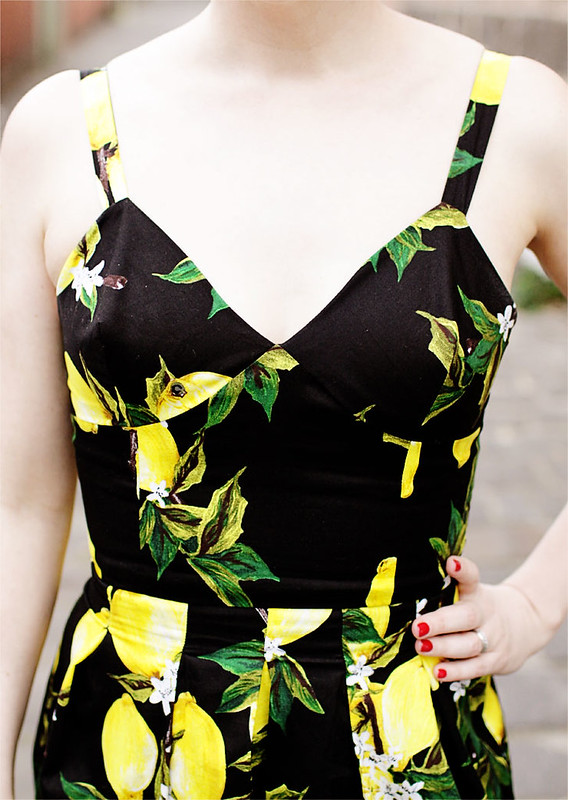
When life gives you lemons, what do you do? Do you make lemonade, as the tired old saying goes? Go on a furious rampage, squirting acidic juice into your enemy's eyes? Or do you think, "Screw this - if lemons it must be, let's make it lemons a la Hot Italian Mama Style. Messers Dolce and Gabbana have totally got this yellow fruit thing sorted right out!"
Obviously, I chose the last option. If lemons are having a moment, then I wanted in on it! So I betook myself over to KJT Fabrics and ordered myself 1.5m of lemony goodness.
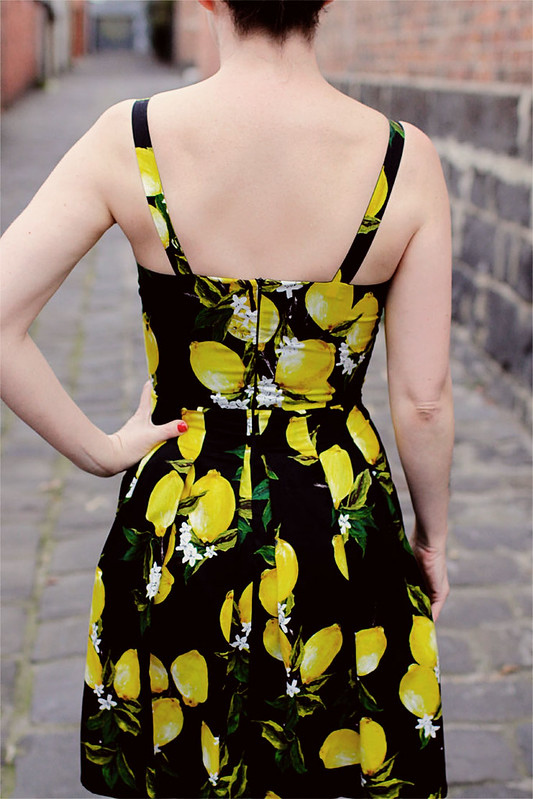
When my order arrived I was surprised by how light and almost sheer the fabric was. Being a cotton, I expected it to be heavier, but this was so fine that you could see through it when it was held up to the light. Based upon this, I considered lining the entire dress, but then I remembered: HOT ITALIAN MAMA STYLE! Let's live dangerously, and risk showing a wee bit of leg through the skirt! The bodice section, however, did get the lining treatment, with some black silk/cotton voile performing the duty.
I will admit, I was a bit scared of sewing the triangulated point of the bodice. My track record with these types of patterns isn't anything to write home about, but I girded by loins and sewed that bad boy as accurately as possible, even slowing down to a stop and then hand cranking the needle for the last few centimeters to ensure that I didn't go over the stop point. Behold! My carefulness was rewarded with a perfect bodice! There was happy dancing all around. I may even have stopped to juggle a few lemons in celebration. When life gives you lemons in your fruit bowl, make those yellow orbs multitask, I say!
Apart from a slightly tricky bodice, this pattern was a breeze to put together. I didn't need to make any adjustments, and the fit was spot on. It's a great pattern for many fancy frock possibilities. My new painted dog pal approves!
Project Details:
Pattern - McCalls 6833, version B, size 8
Fabric - 1.5m Dolce & Gabbana lemon cotton print from KJT Fabrics
Notions - 35cm invisible zipper, plus silk/cotton voile in black for lining
Tuesday, August 22, 2017
New knitting pattern release - the Dandelion Baby Blanket
Behold my latest design for Jorth Knits - the Dandelion Baby Blanket!
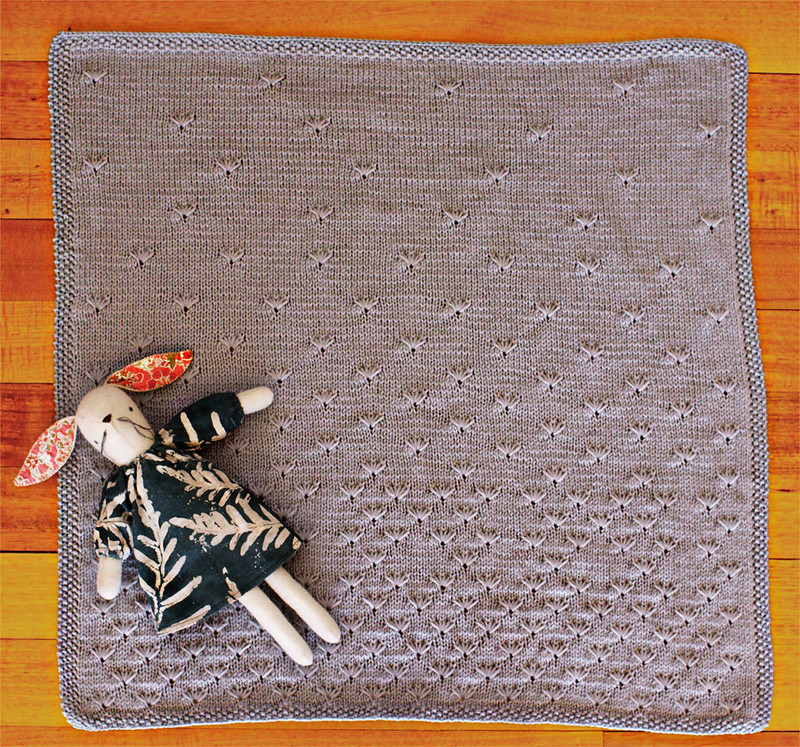
The inspiration behind this blanket was the sheer childhood delight of blowing upon a dandelion flower and making a wish as the seeds scattered in the air. Legend says that if you manage to blow all the seeds off the flower head then any wish you make will come true - I hope any child who sleeps under this blanket dreams beautiful slumbering fancies of such things taking place.

Knit up in cosy 10 ply (worsted) yarn, this is such a fun knit! The dandelion flowers give lots of textural interest, and it would look good in a huge variety of colours.
You can buy the pattern now from the following places:
Jorth Knits on Ravelry
Jorth Knits on Etsy
If you make one up, please let me know - I get such a thrill when I see everybody's finished projects!
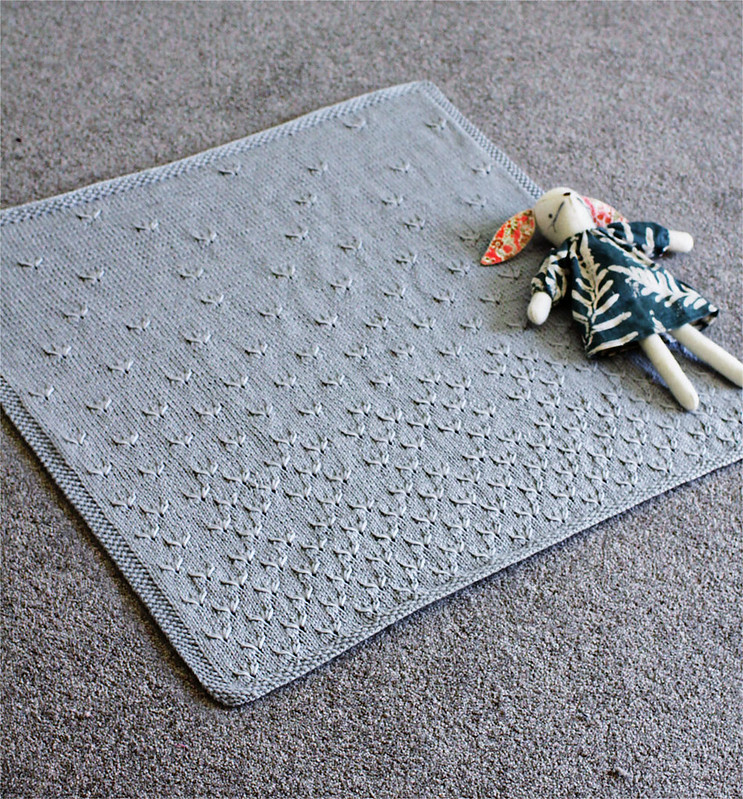

The inspiration behind this blanket was the sheer childhood delight of blowing upon a dandelion flower and making a wish as the seeds scattered in the air. Legend says that if you manage to blow all the seeds off the flower head then any wish you make will come true - I hope any child who sleeps under this blanket dreams beautiful slumbering fancies of such things taking place.

Knit up in cosy 10 ply (worsted) yarn, this is such a fun knit! The dandelion flowers give lots of textural interest, and it would look good in a huge variety of colours.
You can buy the pattern now from the following places:
Jorth Knits on Ravelry
Jorth Knits on Etsy
If you make one up, please let me know - I get such a thrill when I see everybody's finished projects!

Thursday, May 04, 2017
New knitting pattern - the Tegwyn Cowl!
Hi friends! I so happy today to be able to share with you my latest pattern - the Tegwyn Cowl!
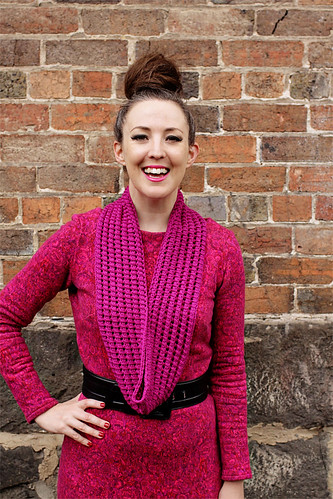
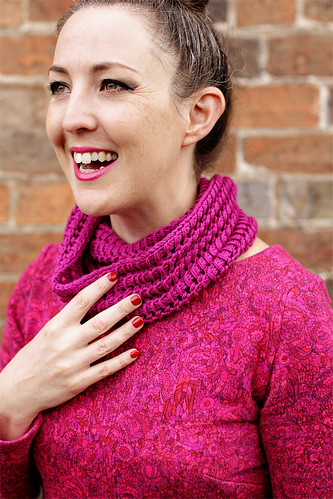
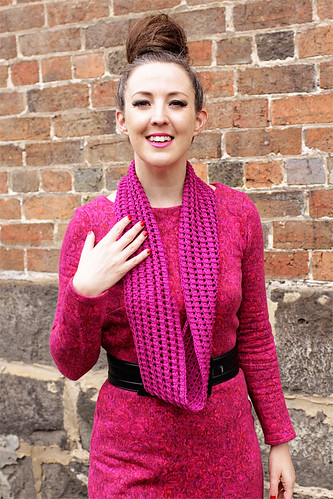
The Tegwyn Cowl is a super textured open work cowl - perfect for cosy winter layering! Looking equally good wound cosily around your neck or left to hand loose, the lacy nature of this cowl means that it fits beautifully underneath winter coats and jackets.
The pattern is knit with the yarn held double - this makes the resulting fabric look amazingly textured. I love how this cowl has turned out! It's also a really quick and easy knit. Done in 4 ply (fingering) yarn, it's also the perfect one skein wonder, so if you have a lovely skein of sock weight yarn kicking about, you now know what to knit with it!
This pattern is available from my following Jorth Knits shops: Ravely and Etsy.
I'd love to see finished versions of this - let me know if you knit one up!
Tuesday, April 18, 2017
Asymmetrical blue dress
Dear Your Royal Majesty the Queen,
I would like to respectfully ask Your Highness for some sort of royal recognition for services to sewing (and thus, of course, therefore to your empire. A well dressed empire is a happy empire, I always say). Now, I know that I haven't won any major awards for costume design, or even had a fashion label that your royal professional stylists may have chosen a frock from. But I do make some pretty nice things, and have been quite an active member of the sewing community over the years. You can't put a price on community involvement!
But I suppose I should be honest. The real reason I'd like one of those fancy star medals you pin on people every now and then is that I have just made the perfect dress for such an occasion! Trust me - it's too fancy for doing the supermarket run, and also a bit much for going out to dinner in. Kneeling humbly before yours truly before bouncing up again with an OBE pinned to my breast is pretty much the only occasion worthy of this frock!
Yours in dedicated anticipation,
Jorth
PS I think Dame Jorth has quite the ring to it, n'est-ce pa?
Project Details
Pattern - Vogue 9149, view C
Fabric - 2.9m of 150cm cotton/lurex blend from The Fabric Store
Notions - 55cm invisible zipper, lining for the bodice
I am so pleased with how this dress turned out! I have a feeling that I used the wrong side of the fabric, but I did this on purpose as I just loved the textured look it gave the dress. I was slightly worried the addition of metallic lurex would make the fabric scratchy, but it is a joy to wear with no itchiness in sight.
This dress does take a lot of fabric, and you need to keep your wits about you when cutting out the skirt, so if you make this yourself pay close attention to the skirt cutting lines! Otherwise you might end up with mis-matched asymmetrical sides. That would be a disaster!
The only real quibble I have with this pattern is the amount of ease in the sleeves. The schematic illustration makes it look like the sleeves are rather fitted, but they are HUGE! I ended up removing 6cm of fullness from each sleeve. You need to be careful in a long dress like this - if the sleeves aren't fitted nicely then they can often make it look like you are packing a pair of tuck shop lady arms in there. Not generally the look I go for!
Other than the sleeve issue, I am very happy with this dress. Hey Lizzie - don't forget my invite to Buckingham Palace!
Monday, April 03, 2017
Chunky Cable Cowl - now available from both Ravelry and Etsy
Boy oh boy, did I have a busy weekend. Pics were taken, modelling was gamely attempted, knitting was arranged just so around my neck, patterns were pdf'd and an Etsy store set up. Woo hoo! I am beginning to feel that my life as a knitting pattern designer has truly begun!
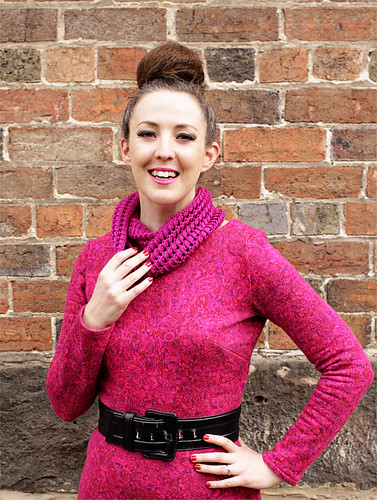
Some of you may have seen this before, but I would like to reintroduce my Chunky Cable Cowl. Designed especially for beginner knitters who would like to try cables, this is a super easy (not to mention snuggly) knit that is perfect for winter!
Designed for super bulky yarn, it's also a rather quick knit. My aunty LOVES this pattern, and has made one up for all her friends! It looks great over a dress or tee, or layered with your favourite coat.
To knit this pattern, you will need the following:
- 160m/174 yards of super bulky yarn, with a gauge of 9 stitches and 12 rows to 10 cm over stocking stitch. I used 2 balls of Debbie Bliss Roma.
- 10mm/US 15 needles
- large cable needle
- large darning needle
Fancy making one yourself? They are available from the following places:
Ravelry Store: Jorth Knits
Etsy Store: Jorth Knits
Drop me a line via either email or on Ravelry if you make one - I can't wait to see everybody's beautiful versions out there!
Monday, February 27, 2017
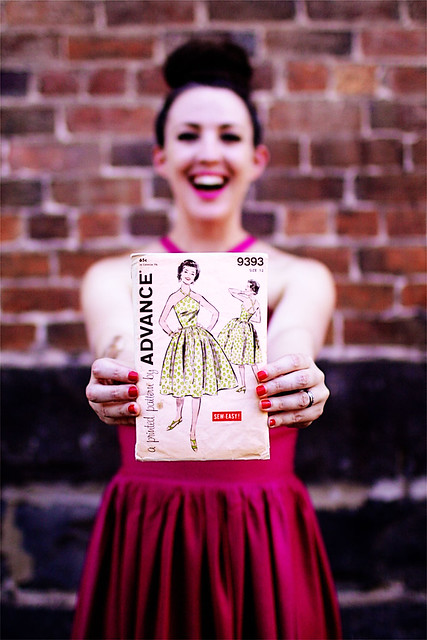
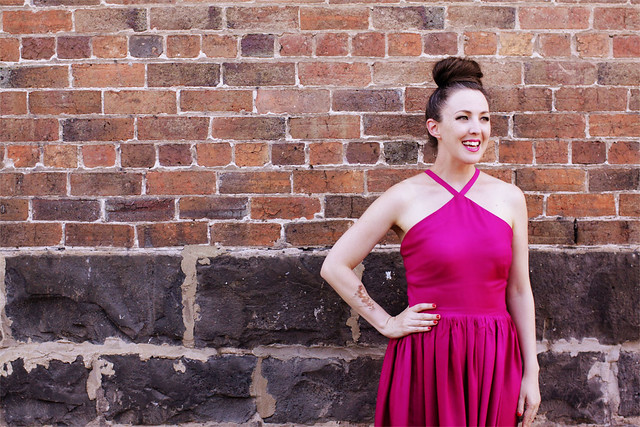
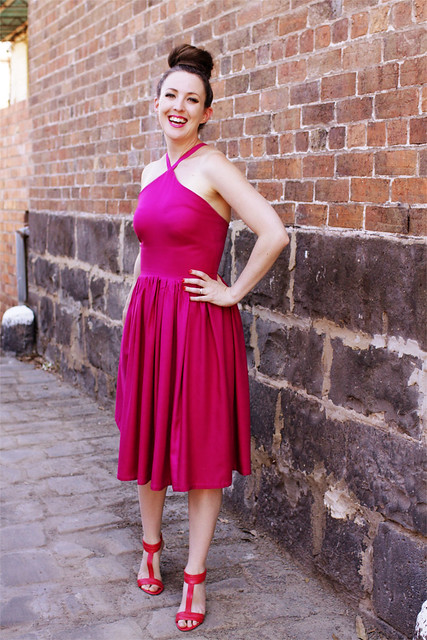
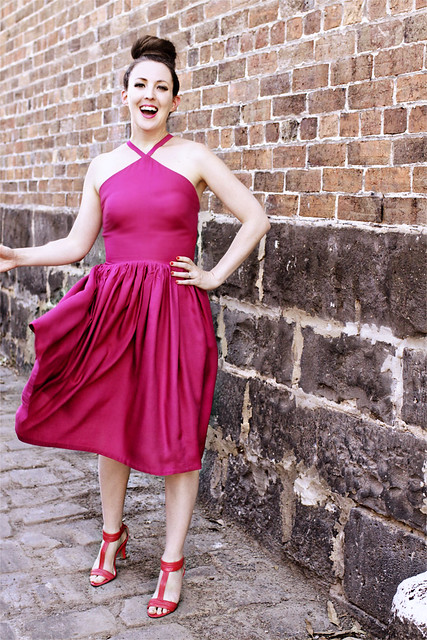
The brightest pink halter neck dress you ever did see! Vintage Advance 9393
Put your shades on, people - this dress is as bright as they come!
If you squint closely, you can also see that the envelope claims it is "Sew Easy!" Aw, how cute - they even added an exclamation mark to boost your confidence. Don't make a muslin - just dive right in! And in a way they were right - it was 'sew easy' to sew. It was just getting the fit right that was a nightmare!
As you can probably tell from the photos, I did not achieve one hundred per cent success on the fit. (Did I make a muslin? Of course not! Lesson duly learnt). I probably could have brought the bodice in tighter in order to get a better bust fit, but just between you and me, I kinda like being able to breath in my dresses. Going blue in the face for blog photos is not the look I am currently going for. So slightly floppy boob area but with added breathability it is. Sometimes ya gotta take the pay off!
Also, as much as I love this dress (and I really do, despite the fit issues - it's bright pink! And with a full skirt! And a funky bodice!), getting into the darn thing is a trial within itself! The straps cross over at the back, so you need to pull the dress on over your head, then do some Houdini-worthy wriggling and arm rearranging before finally drawing pretty tight straps cross-ways over your head. And of course I made this dress in the most wrinkly cotton twill known to man, so even once you do get into the dress you find that (a) your perfect bun is totally mussed up (b) your lipstick is now smeared halfway over your face and (c) the dress is wrinkled to pieces! If I ever make it again I will consider doing it in a less wrinkly cotton, after doing a muslin first (promise!), and maybe putting in a side zip instead of the back zipper.
Still, you live and learn. It's good to have a challenging project occasionally - it stops me from floating above the world thinking I am a superb sewist, and brings me down to earth with a heavily felt thud! But that's one of the grand things about this hobby - there is always something new to learn (the importance of muslins, Jorthy, cough cough!). And even though I am acutely aware of the fit issues, I think the brightness of the pink succeeds from blinding everybody else to them. I wore this dress out to dinner, and received quite a few compliments on it, so my evil blind-you-all-with-mega-fuchsia-so-you-see-no-faults plan totally worked! Woo hoo!
And I do love a full skirt you can dramatically throw around! Ok, bright pink dress - you get to stay!
Project Details
Pattern - Vintage Advance pattern number 9393, size 12 bust 32
Fabric - 2.4m of silky cotton twill from The Fabric Store
Notions - Interfacing for facings, invisible zipper
Tuesday, February 07, 2017
Banana choc chip muffins
Some people get really excited over a pair of shoes. Others, it's the perfect handbag that melts their ice cream. However, I save the pounce and the emitting of happy cries for when I spy some super ripe bananas, because once I have my hot little hands upon them I know that I can make THE BEST BANANA MUFFINS EVER!
1 cup self raising flour
1/2 cup wholemeal self raising flour
1/2 cup raw caster sugar
1 cup raw oats
1/2 cup chocolate chips
1/2 tbsp cinnamon
3 really ripe bananas, mashed
1/2 cup olive oil
2 eggs, beaten well
1 tsp vanilla essence
1 - Preheat oven to 180 C.
2 - Mix all the dry ingredients together in a large bowl and set aside.
3 - Mix together the bananas, oil, eggs and vanilla essence until combined. Add to the dry ingredients, and mix gently until just combined.
4 - Line the holes of a 12 hold muffin tin, then dollop spoonfuls evenly into the cases. Bake for 20 minutes (test with a skewer to ensure they are cooked through), then cool out of tin on a wire rack.
Monday, January 23, 2017
TNT - Another Vogue 8184
I think anybody who sews for any length of time ends up with a TNT - a tried and true pattern that they turn to again and again. Fashion archivists will look through my sewing history one day far (hopefully really far) in the future, and start to log the Vogue 8184 frocks I've made in increasingly bored tones. So far the tally is 8 and counting, but I can't help it - it's such a versatile pattern, is very fabric length friendly, and suits my vintage-loving heart down to the ground!
May I humbly introduce you to the latest addition to my 8184 canon:
There's not a lot different in this make to some of the others I've done in the past - I've altered the straps once again to originate from the centre of the neckline (lengthening the straps is required here if you'd like to do this yourself).
What I am really happy about is the fabric I used. It's a Cotton + Steel cotton lawn from the Hatbox collection that is so light and delicious to wear! I'm really feeling the heat this summer (curse you global warming!), so an airy dress like this is just the ticket for those relentless summer days.
I am also totally into the deep blues this summer. It just feels so fresh - much better than white on me, which only makes me look like a bewildered ghost. Since confused spirit out of time is not exactly the look I am going for, I think I'll stick to gorgeous blue fabrics like this!
So, TNT Vogue 8184 has come through with the goods again! After all, summer ain't summer without me whipping up one of these!
Project Details
Pattern - Vogue 8184, view B with alterations to straps
Fabric - 2.3m Cotton + Steel cotton lawn from the Hatbox Collection
Notions - 35cm invisible zipper
Thursday, January 12, 2017
So nice she made it twice! Vogue 9100
"Put your bets on, ladies and gents, put your bets on!" hollered the bookmaker, as the crowd surged forward to see which pattern Jorth would choose. Bets were placed left, right and centre, as Jorth spread her TNT patterns (tried 'n' trues) out on the table, and thoughtfully considered the teardrop printed fabric before her.
"Vogue 8184 is leading the pack, with odds of 3 to 1, closely followed by Simplicity 1803 at 5 to 1", the bookie informed the gathering, as he handed out betting slips with one hand and pocketed the money with the other.
"What are the odds on Vogue 9100?" asked one punter in hope. "Terrible!", the bookie replied. "I've given dreadful odds of 85 to 1 on that one - she made it too recently, and despite her love of pockets, I reckon a new year calls for a new style. Place a bet if ya wanna, mate, but all you'll be doing is making my retirement fund that little bit sweeter!"
The punter was undeterred. He'd studied Jorth's form for years now, and had a hunch he could reliably predict her unpredictability. He took out his wallet, and rashly placed his money into the bookie's hand, who accepted it with a contemptuous smirk. Suddenly a hush descended upon the crowd, and every body there craned their necks and stood on the tippiest of tippy toes to see which pattern Jorth would reach for. Her hand reached out... hovered... moved from one pattern to the next, sending the crowd into a moaning frenzy then...
"Well love me tender and call me Elvis!" exclaimed the bookmaker in surprise. "It's Vogue 9100 for the win!" He watched as most of the crowd departed, cursing their luck, and was ready to pack up and head for home when one happy punter appeared before him. "Oh, it's you again, 'eh?" he said as he grumpily delved into his case and began extracting bills.
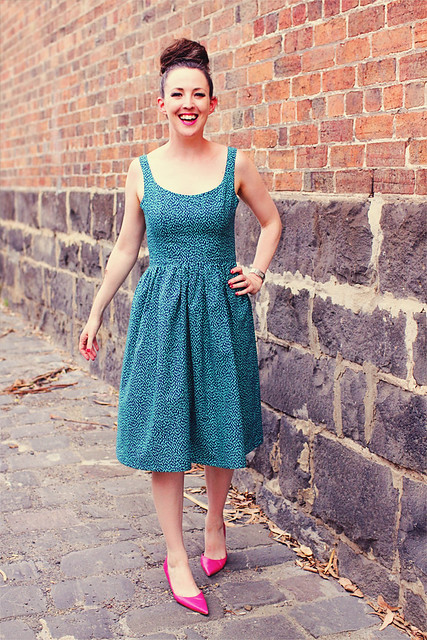
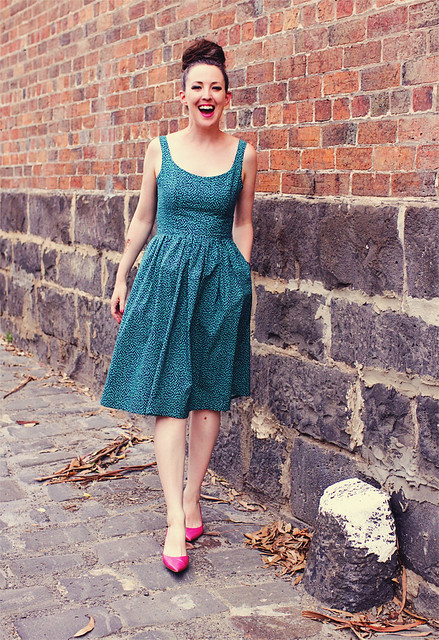
What can I say? It's a new favourite! The fit is great, the pockets are the best, and the gathered skirt hides all the big lunches I've indulged in recently!
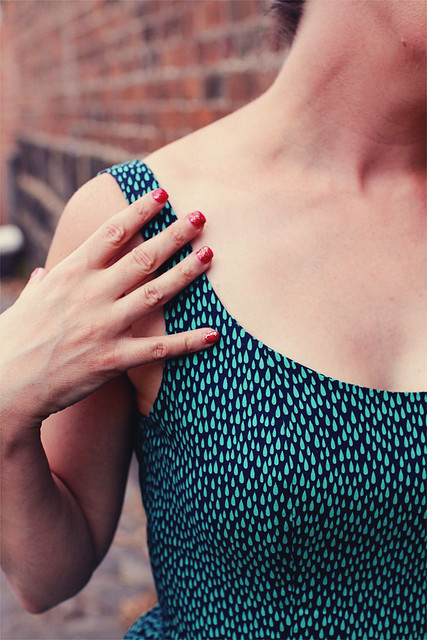
I also just adore this teardrop fabric - it reminds me of the dress I made for Tyger all those years ago (she's so little there!), but thankfully that dress has long been passed on so we don't do the matchy-matchy mother daughter thing. People already say she is a mini-me - we can't start dressing the same way, as that would just be too weird!
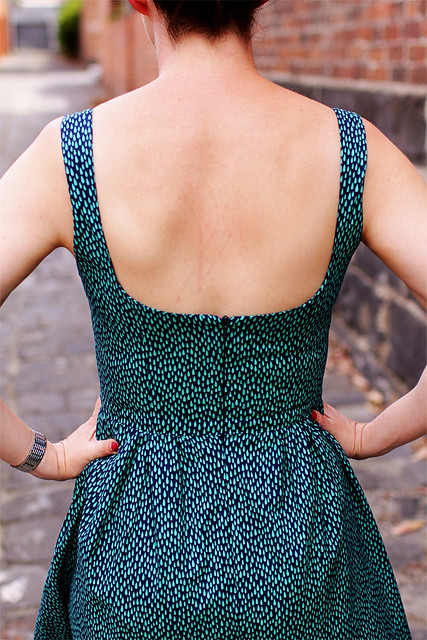
As you can see this dress has quite a low back on it - I know some other sewists have disliked that feature as their bras can be seen, but mine sits just fine. Maybe having a longer than average torso has it's advantages! I have no idea where those scratch marks came from - please excuse them!
And finally, the 'battling with an uncooperative wind' shot! All in all, I love this dress, and suspect that version number two will be far from the last. Can you imagine how sweet it would look in a broderie anglaise or eyelet fabric? If I ever see some such fabric in a bright hue (alas, white just makes me look like a ghost) then I think I know what I will do with it!
Project Details
Pattern - Vogue 9100, size 8
Fabric - 2.3m cotton from GJ's Discount Fabrics
Notions - 35cm invisible zip
You can read about my other version of this dress here.
Sunday, January 08, 2017
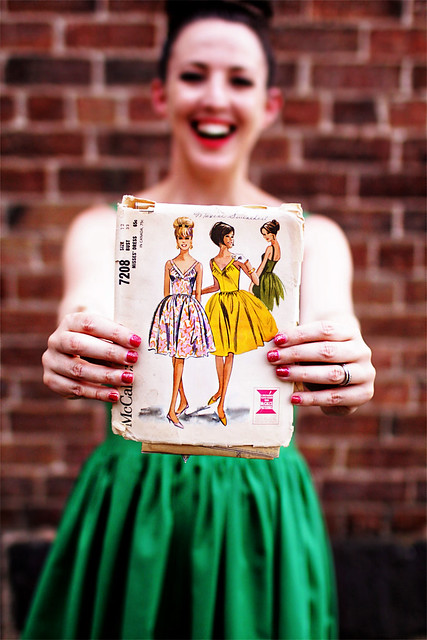
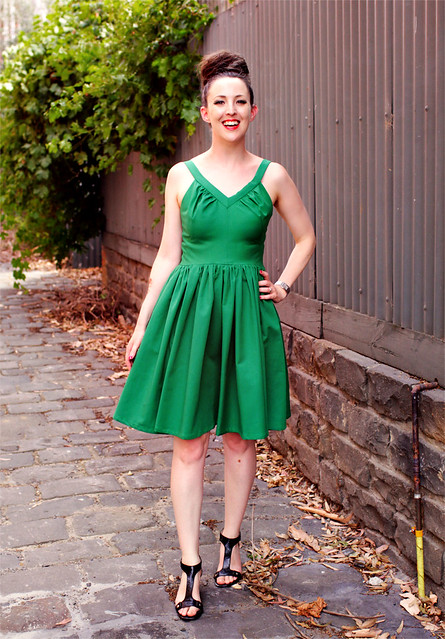
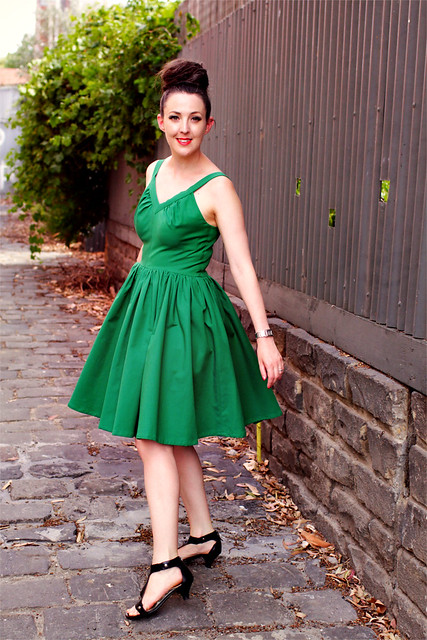
The Vintage Green Dress: McCalls 7208
I had considered buying fireworks. Or at the very least a massive amount of confetti to throw gleefully around. And popping of champagne corks felt like a must! Because after years of lusting, and yearning, and pressing my greasy nose against the computer monitor and moaning with unfulfilled desire, I finally had got the vintage pattern of my dreams, and even better yet, I had found it in my size! The sewing gods indeed had smiled upon me!
Meet McCalls 7208. First released in 1964, and very happily made by me 52 years later!
First things first - whilst I love this dress, it sure did use up a huge amount of fabric! The skirt is one of the biggest I have ever gathered, and when I read the pattern and realised that they wanted a skirt lining (gathered also) plus piping for the skirt seam, I threw back my head and laughed and laughed. I had enough trouble gathering all that amount of thick fabric and then sewing it to the bodice without complicating matters with extra fabric for lining and the fiddlyness of piping to boot! So I kept things simple and just sewed on the skirt. Just between you and me, I feel the incredible fullness of the skirt makes it look like I have added a few pounds, so I shudder to think of the effect the lining would have had!
The bust size on this was 32 inches, which I am, but as per my usual experience of making a vintage pattern, I needed to bring it in substantially to get a correct fit. The strap was a bit of a nightmare to put on - getting the strap seam and the bodice centre seam to match felt like mission impossible at times, but after employing my quick-un-pick too many times to mention, I got there in the end!
I also cut about 20cm off the skirt length. I am constantly surprised at how long vintage skirts end up being, especially since the pattern illustration makes them look like they finish at the knee. Was there some sort of anti-calf sentiment going on in the 1950s and 60s that I remain blithely unaware of? I am so puzzled by it!
All things considered, I am pretty happy with this dress. The green is my favourite shade of green, but if I ever made it again I would choose a much lighter fabric than the one I sewed it up in. It's just that bit too heavy for the dress - a lawn or voile with lining would be a much better choice. Ack - ya live and learn!
Now if you'll excuse me, I gotta go do some twirling. This dress was made for being spun around a dance floor!
Wheeeeeeee!
Project Details
Pattern - McCalls 7208, published 1964
Fabric - Heavy cotton from The Fabric Store
Notions - Interfacing, invisible zip

