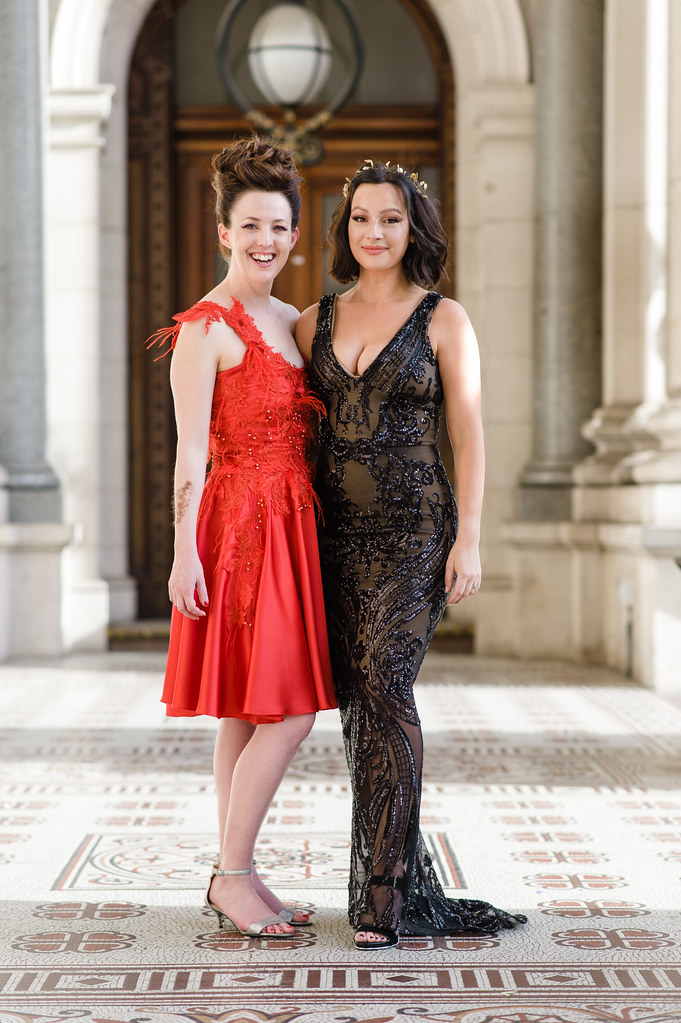
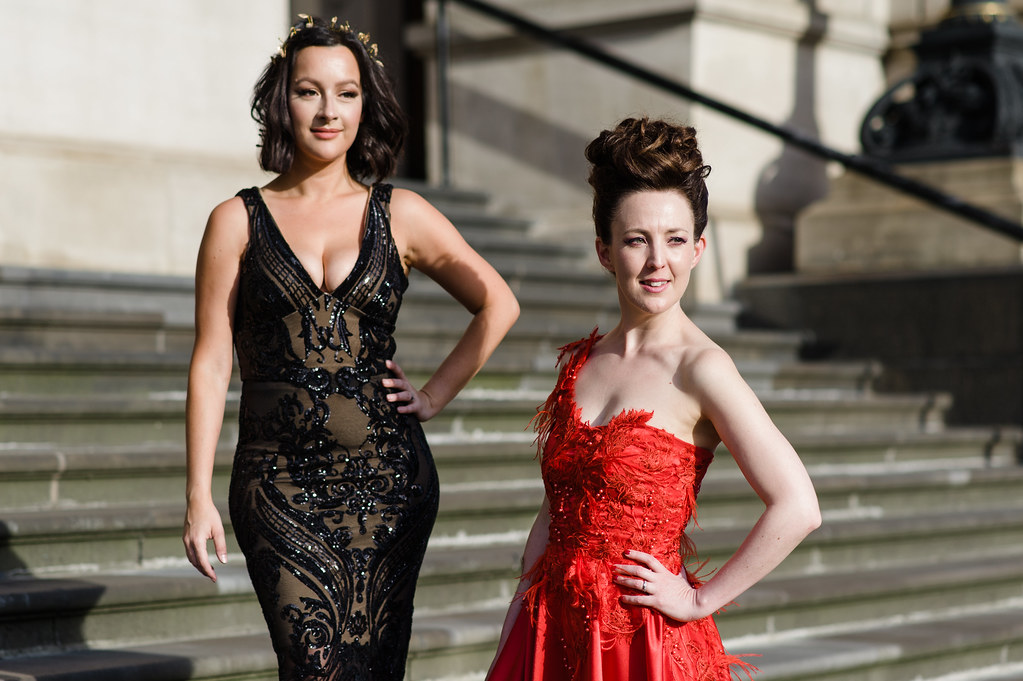
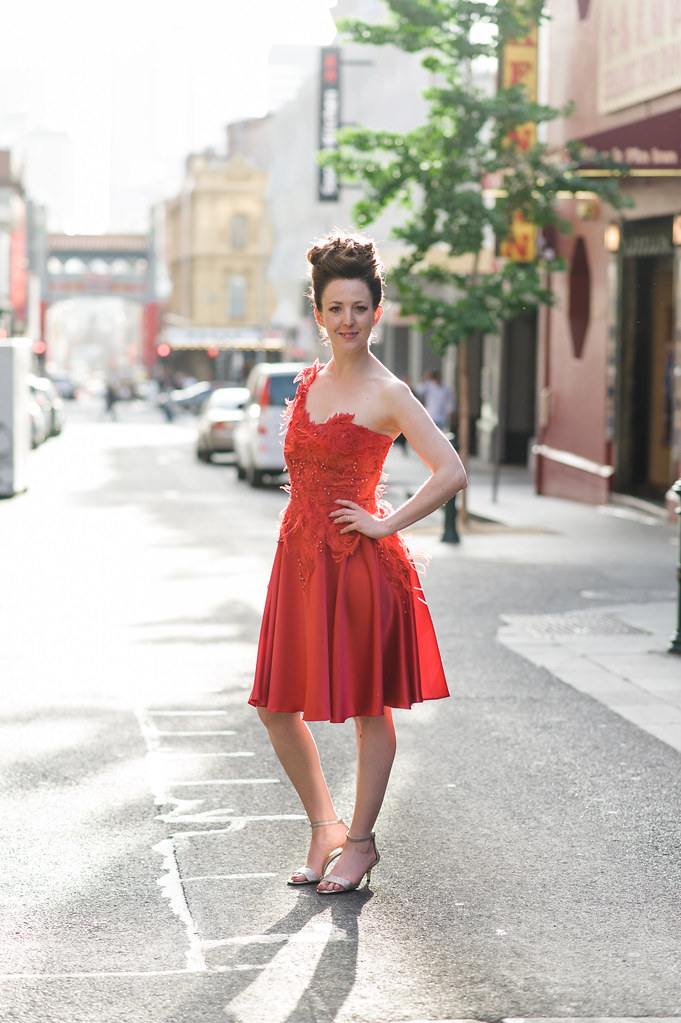
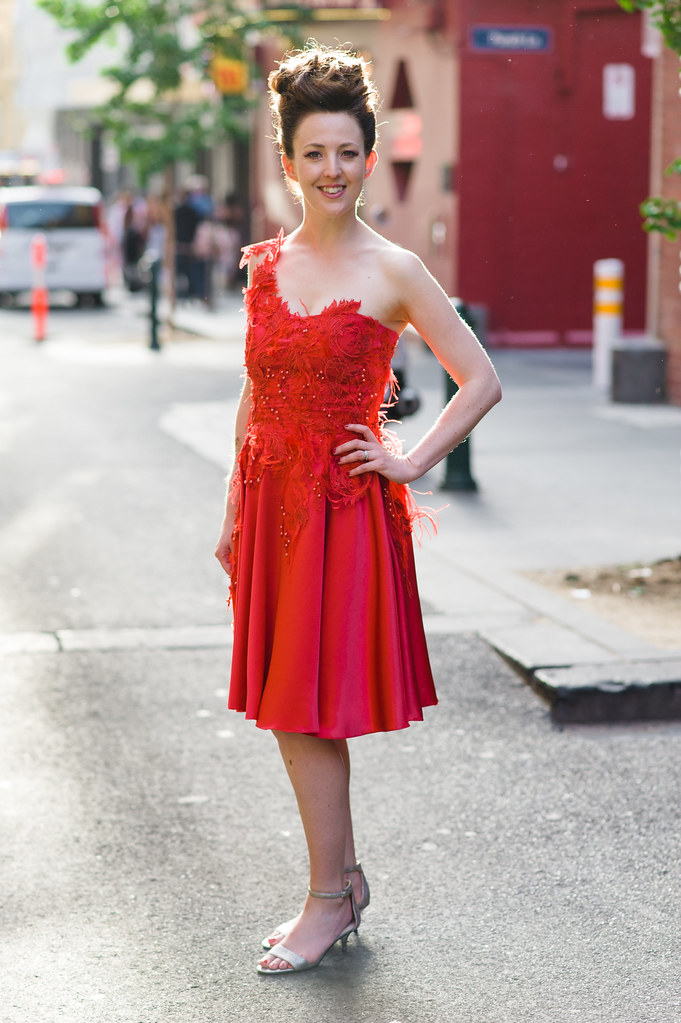
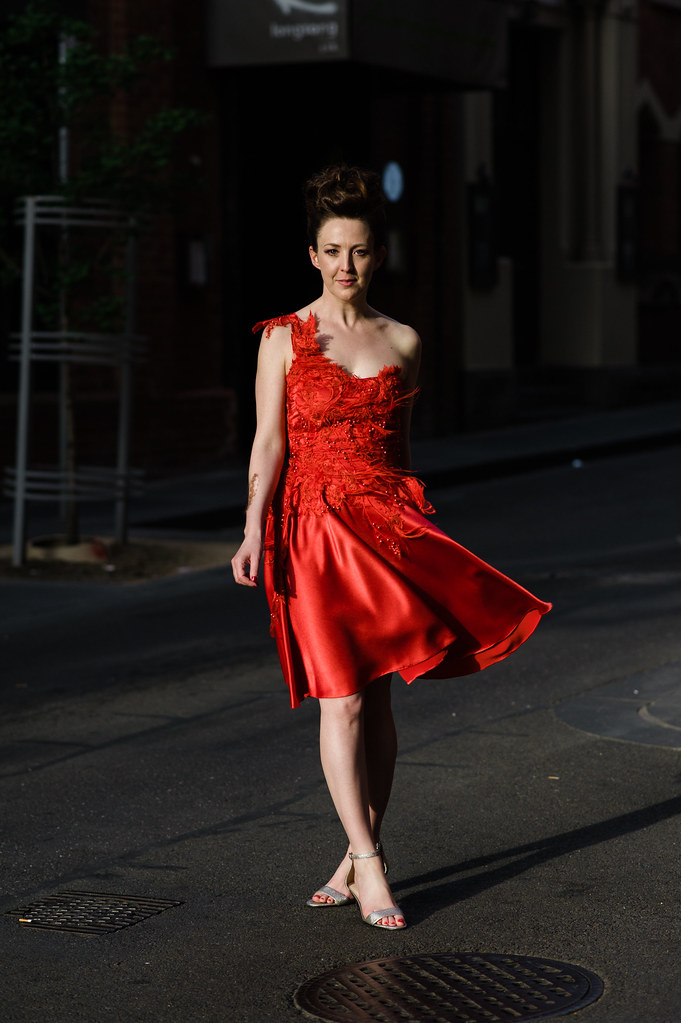
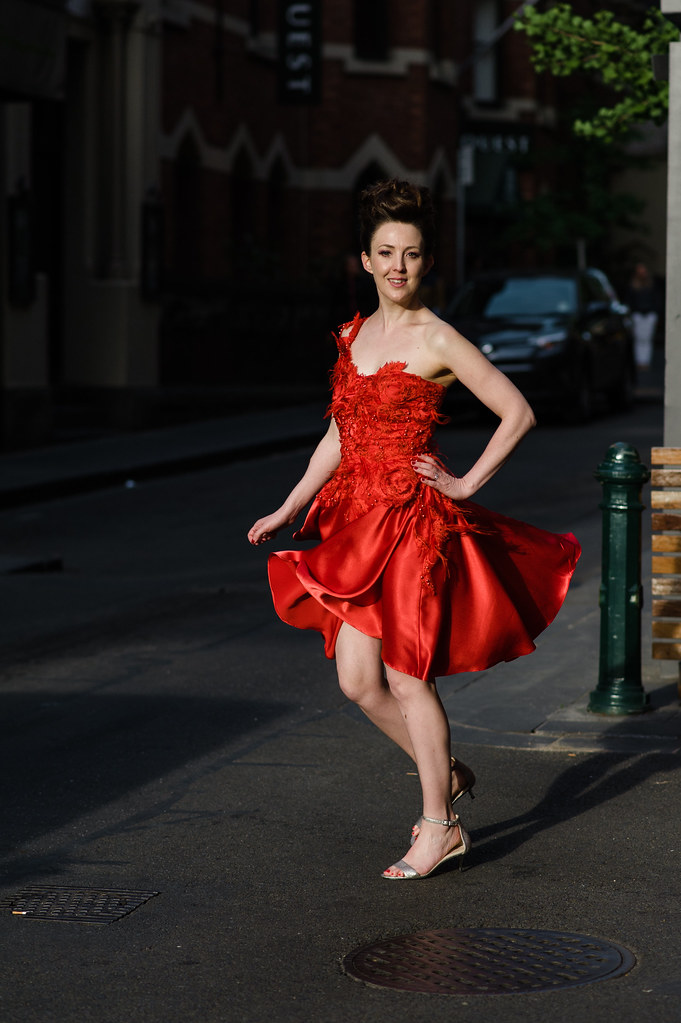
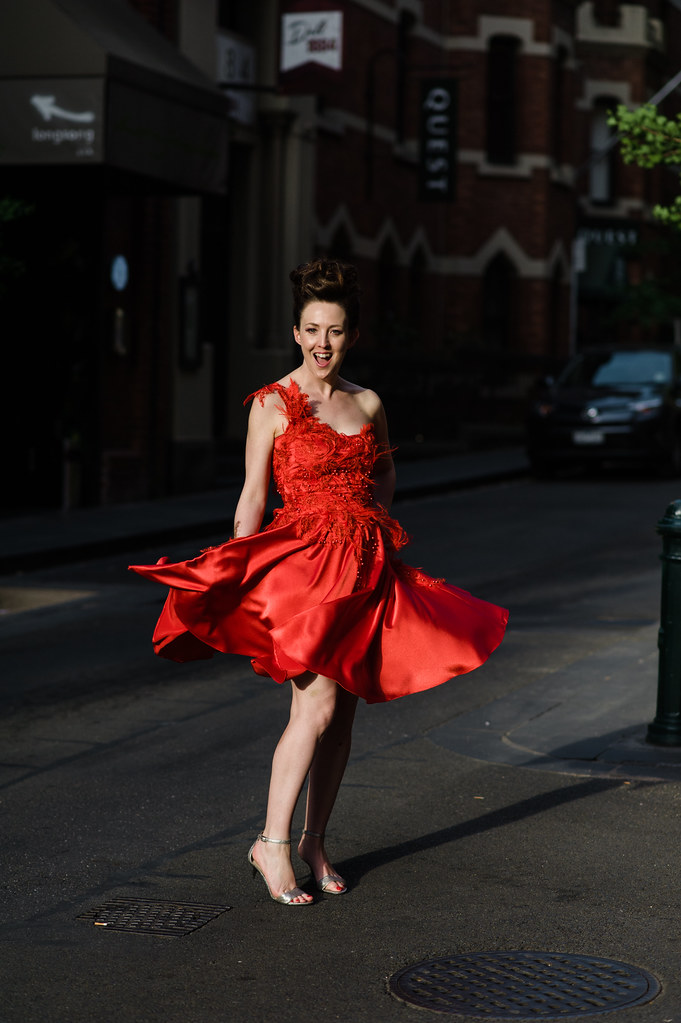
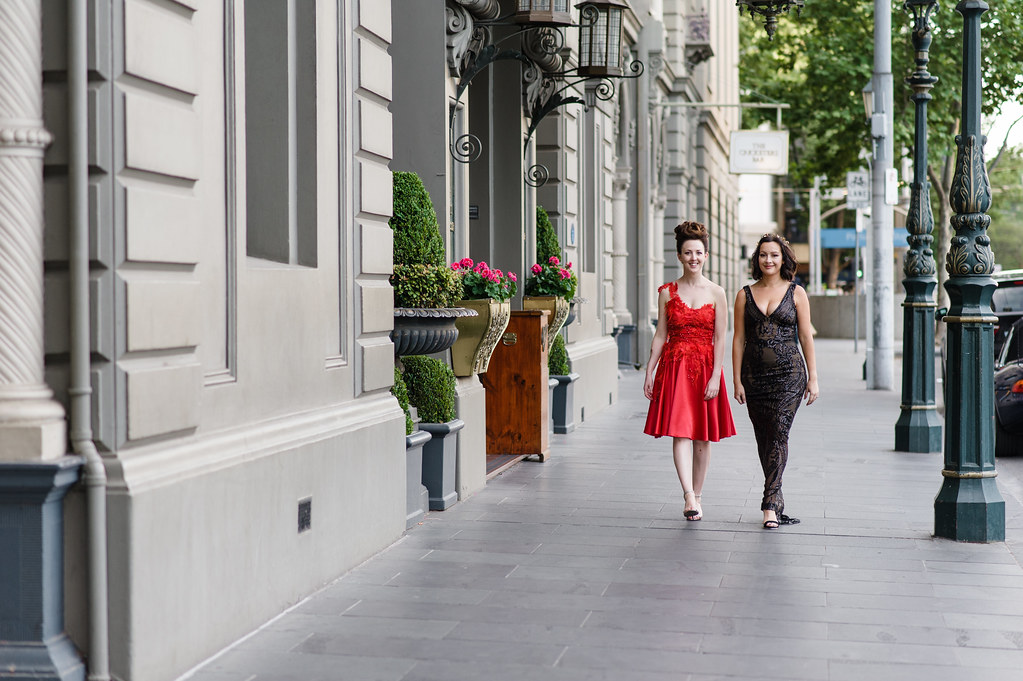
Frocktails! It's bigger than the Grammys, Emmys, Oscars and the yearly dinner for the Queensland Philatelic Council! Usually much much thought goes into planning my outfit, with many accompanying mind changes, but this year I knew exactly what I wanted to do - pretty much a grown-up version of my girl's iceskating outfit, but with added feathers.
I think I TOTALLY nailed the assignment!
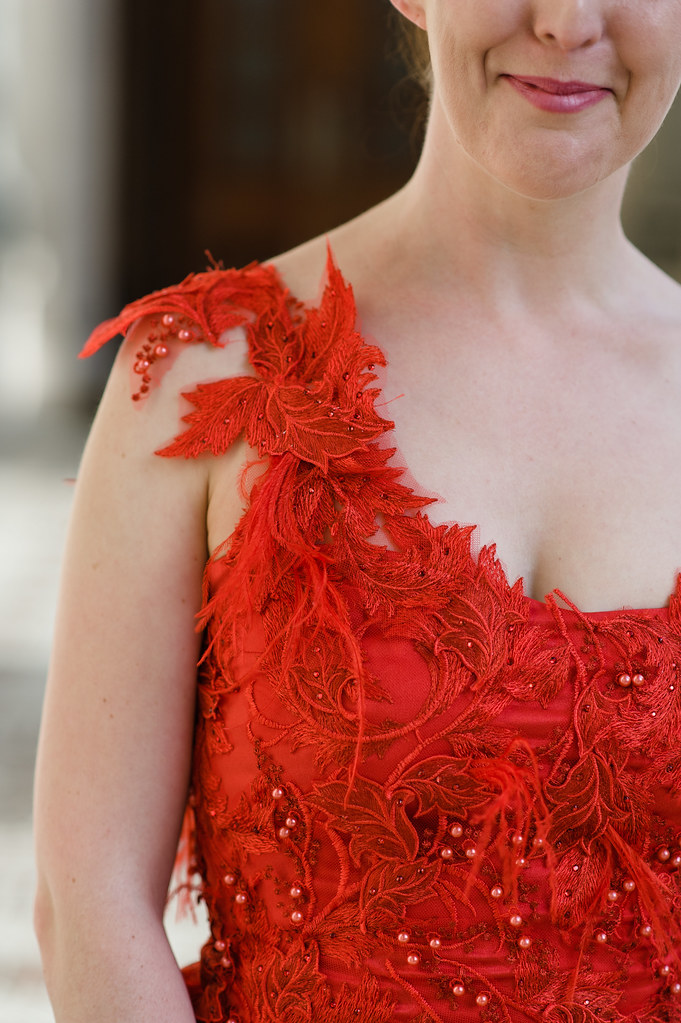
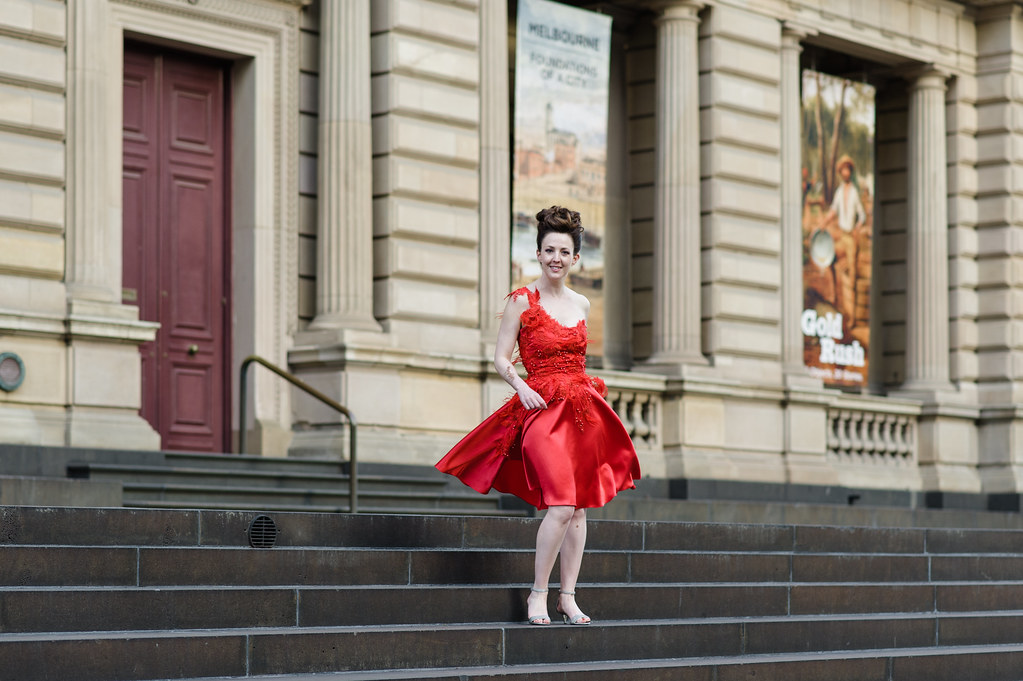
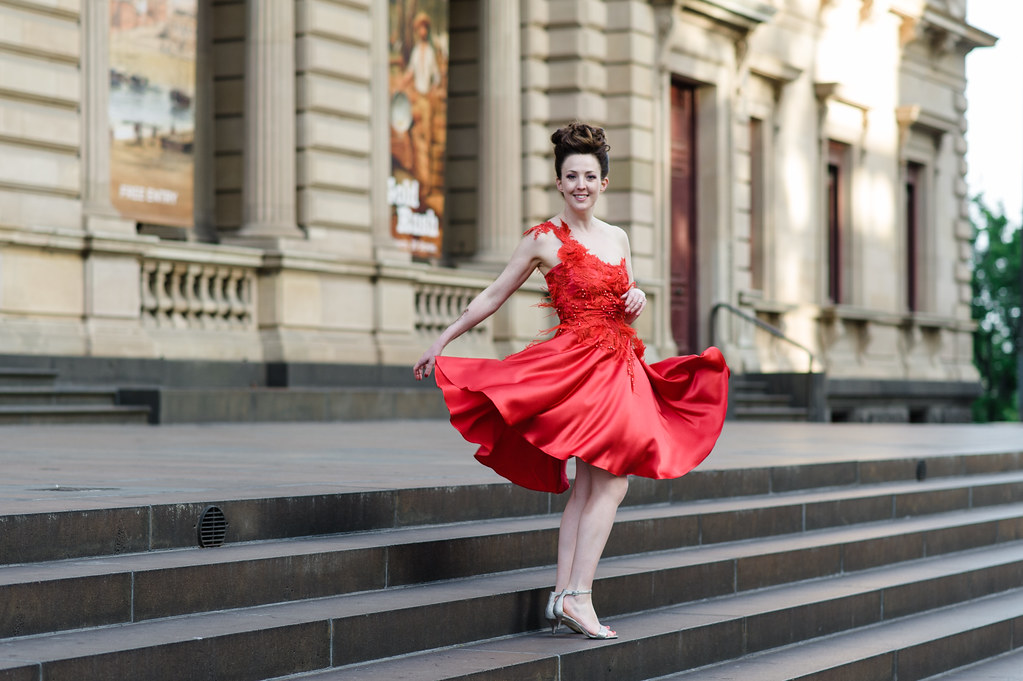
In all seriousness, though, I love a bit of messy glamour. And I love the full-skirted vintage style. So I decided to bring the two together, very much helped along with a gorgeous feathered and beaded lace tulle piece I found on Etsy. A quick trip to The Cloth Shop, and I soon had my matching fabric. The lovely owner Kim helped me match in a gorgeous red silk faille, which draped like a dream. It was like sewing with butter, but in fabric form - an absolute gem of a material.
Then the real work began. I made a muslin first to ensure my fit was good, loosely basing the bodice on an old vintage pattern I had. Then I made up the dress in the silk, boning the bodice for the perfect fit, and let it sit on my mannequin for the skirt to hang correctly.
Meanwhile I cut up my tulle piece, and then began to pin it haphazardly over the bodice and skirt of the dress until I was pleased with the result. Initially I was going to keep the bodice strapless, but I felt it looked too bare, so I fashioned a single shoulder piece out of the left over lace, which I felt worked a treat. Then I hand sewed all the applique on. It took probably 12 hours or so to do the hand sewing, but this is Frocktails, peeps - it was worth it! The dress was finished with a rolled hem.
Then, just to add to the fun, my talented pal Samara agreed to take pre-party pictures of myself and my darling friend Julia Bobbin, so our outfits could be captured by her amazing photographic talent. It was like being a movie star for a while - people stopped and gawked at us in our Frocktails finery whilst Samara expertly snapped away. I am not joking when I say that we stopped traffic - we LITERALLY did, as she made us pose in the middle of the road! The photos are incredible, and I'm so happy with them. It was worth risking being run over for!
Enough talking - let's get to these marvellous pictures!
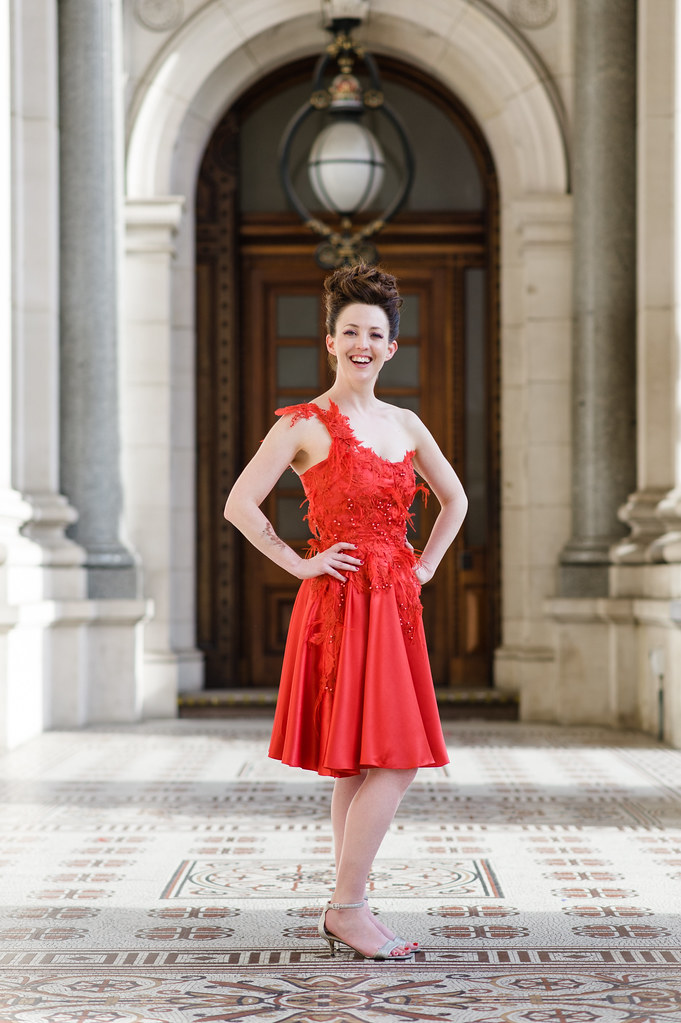
All in all it was a blooming marvellous night! Big thanks to Shelley and Lisa for organising it - so much fun was had, and it was brilliant to catch up with all the talented sewing people in their amazing outfits. Can't wait for next year!
Project Details:
Pattern - Self drafted vintage style strapless dress
Fabric - Silk faille from The Cloth Shop, lace tulle piece from MaryNotMartha on Etsy
Notions - Boning, invisible zipper
Photography - Samara Clifford Photography
Tuesday, November 13, 2018
Monday, October 08, 2018
Vintage Butterick 5033
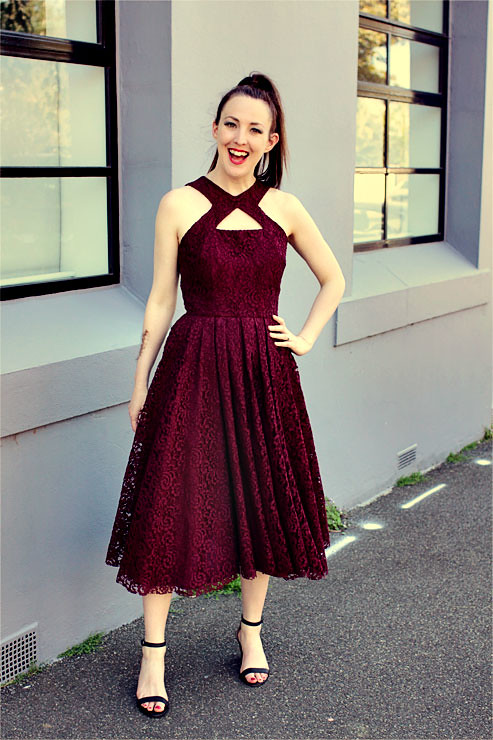
Have you ever had that feeling where you walk into a fabric store, and suddenly you are stopped in your very tracks by the most perfect fabric ever? You find yourself becoming uncharacteristically shifty, furtively looking around to make sure that no other customer has seen what you see, then you scurry over to the counter (trying, the whole while, to keep your little moans of joy quiet) and ask for an insane amount of meterage, because you must have all this fabric and you must have it now!
It's only afterwards that you realise that you never ever even looked at the price tag. Whoops!
Thankfully this gorgeous fabric from The Fabric Store didn't break the bank, but the cherry on this sewing sundae was finding the perfect colour match lining fabric to go with it! The fabric gods were certainly smiling on me that day.
I think, however, that they may have started frowning - first a little, then a lot - as this dress sat half made on my sewing mannequin for the next 5 months. I have no idea why it took me so long to finish it. Originally I wanted the skirt to hang for 48 hours to sort out any droop, and before you know it was September. Bad me!
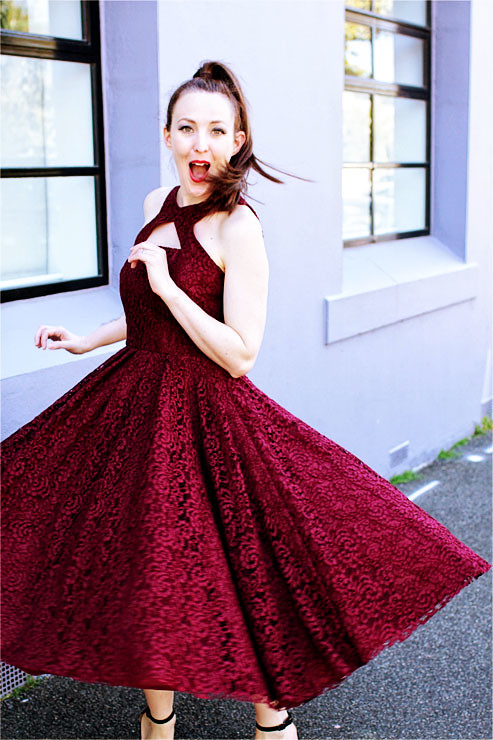
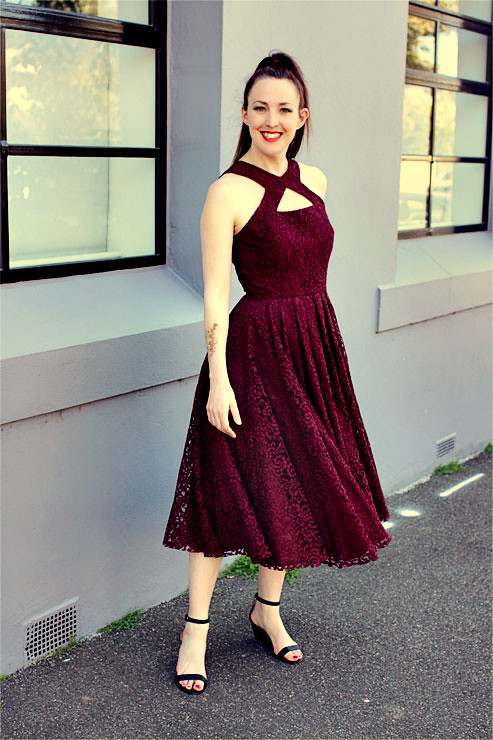
However, 'tis finished now, and none the worse for an extra long hanging period. I just love this dress so much - I love the lace, I love the coy little peep hole on the bodice, and I love the pleated super full skirt. The skirt is actually so full and heavy by itself that wearing a petticoat underneath took it to an insane level of fulldom. I doubt there are many door on earth that could accommodate that skirt with petticoat fullness added, so I'm wearing it without.
This dress wasn't too hard to make at all - obviously, having to interline each part made it twice the work it needed to be, but the right lace required that sort of commitment! I did have one rather dreadful mishap whilst making the bodice. I had just finished the peephole and was determinedly ironing it as flat as possible when I realised that the heat of the iron had actually melted some of the fine lattice work connecting the lace motifs. Keeping my cool was a MAJOR challenge, but since I had only just finished handsewing my daughter's ice skating costume I was a dab hand with ye olde hand stitching, so I cut out a wee scrap of lace fabric, inserted it into the scorch hole, then very carefully (and pretty much invisibly, I'm proud to add!) sewed it in. Voila! Magic mending!
Would I made this again? Possible, but not in lace. I think it would smashing in a light cotton for daytime wear. Not that there is anything stopping me from wearing this during the day, but it seriously does weigh a ton, and might be a bit much for day wear, even for me! Anyway, despite taking me forever to finish, I am very happy with it now it is done. Onto the next vintage adventure!
Project Details:
Pattern - Butterick 5033, view A
Fabric - 4 metres of burgundy lace fabric, and 4 metres of cotton lining from The Fabric Store
Notions - Interfacing, 55cm invisible zipper
Monday, April 23, 2018
Vintage McCalls 7920
I took my daughter to the doctor recently, in order to have a pesky wart on her knee burnt (stay with me - it does have relevance to all things sewing, I promise!). Yet lo and behold, a few weeks later the wart that had turned black and supposedly fallen off was back, looking just as good, if maybe a smidge smaller, than before.
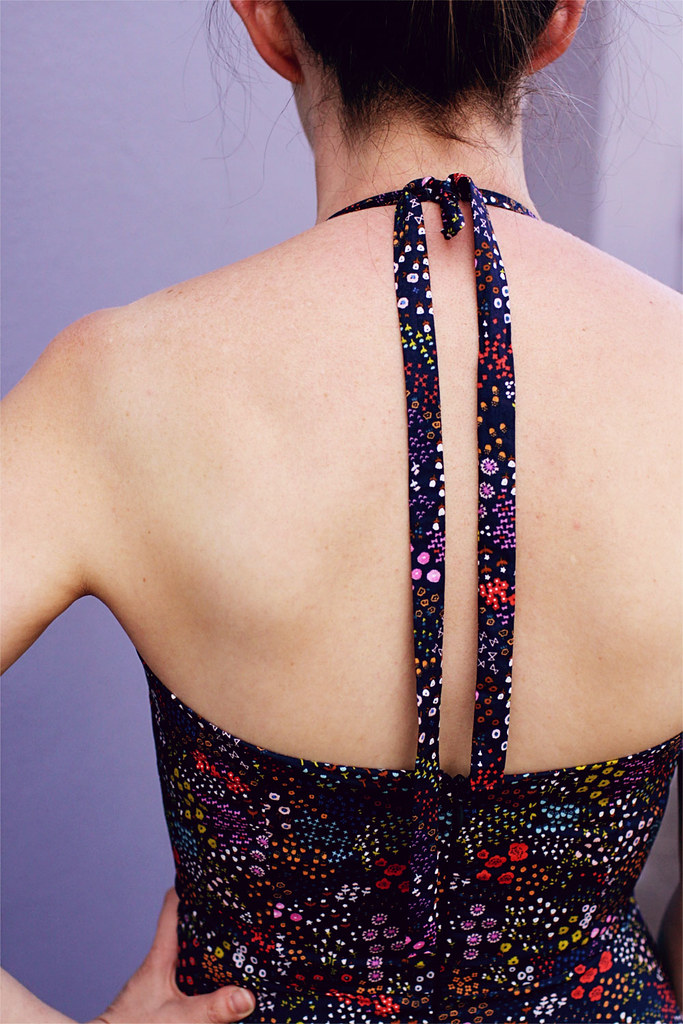
PS More thoughts on future versions of this dress: I think I'll actually connect the straps to the bodice back, as I'm not really a big fan of halter necks. Also, that skirt can definitely afford to be shortened by a few inches, although the length it currently sits is rather elegant.
So back to the doctor we went. I love my doctor. She is smart, sassy and never makes you feel like a dumbo when you ask her millions of questions. She took once look at the Lazarus wart, then ran off to get the liquid nitrogen. Just as she was about to attack the wart, she declared in her usual no-nonsense manner "I will NOT be defeated by a wart!"
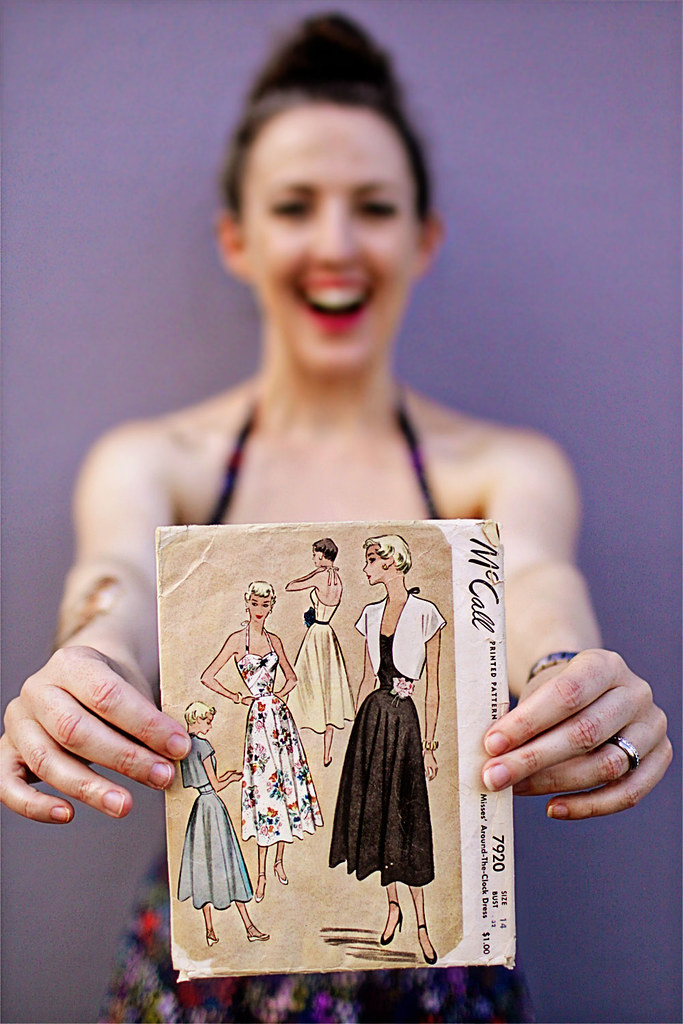
I have the same sentiments about this pattern. McCalls 7920, ye shall not defeat the mighty Jorth!
The version of this dress that you see in the pictures is actually attempt number 2. Attempt number 1 was what I believe the experts call a seriously massive unqualified disaster. I know what you are thinking - jeez, Jorth, it doesn't look so hard! That's what I thought, my friends, but then...
1 - My fabric (a gorgeous green silk/cotton blend) decided stretching and sagging was its new jam, and boy oh boy did it stretch and sag with panache. If I hadn't have been so upset, I might have admired it's stretching verve.
2 - I could NOT get the triangular section in the bodice to line up perfectly, no matter how many attempts I made. In the end it sat about 1mm out - enough to annoy me by drawing my eye to it every time I glance at the bodice, but probably not enough for anybody else to notice. I might have attempted one more go at getting it right, but I'd unpicked the fabric so many times by that stage that my seam allowance was not so much fabric as a cute fraying fringe.
3 - The zip insertion, due to the above mentioned stretching of the fabric, was a hot mess, if your version of hot messes come in (a) green and (b) are made of silk.
So in the end I gave it all up as a bad, bad job and consigned the whole darn thing to the bin. Back I went to my trusty cotton, and this time it came up a dream. Except...
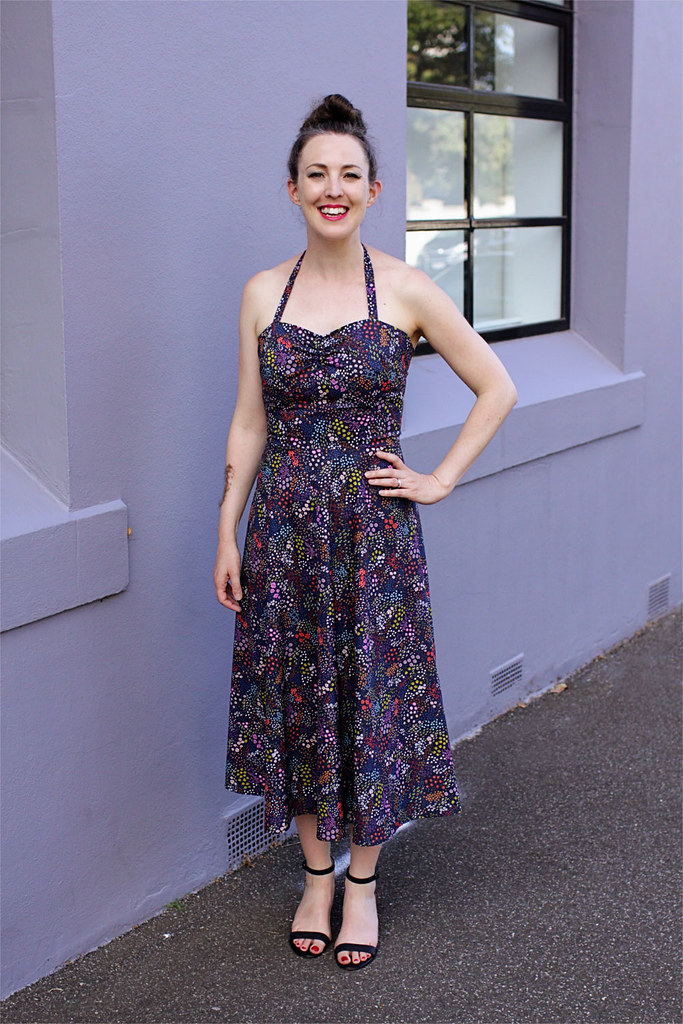
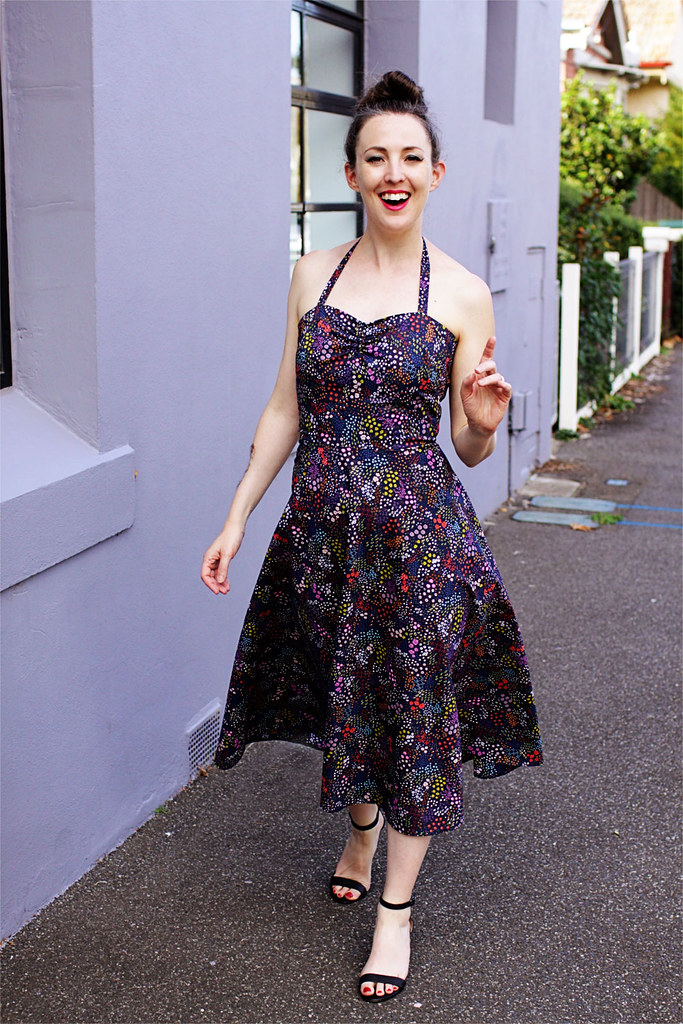
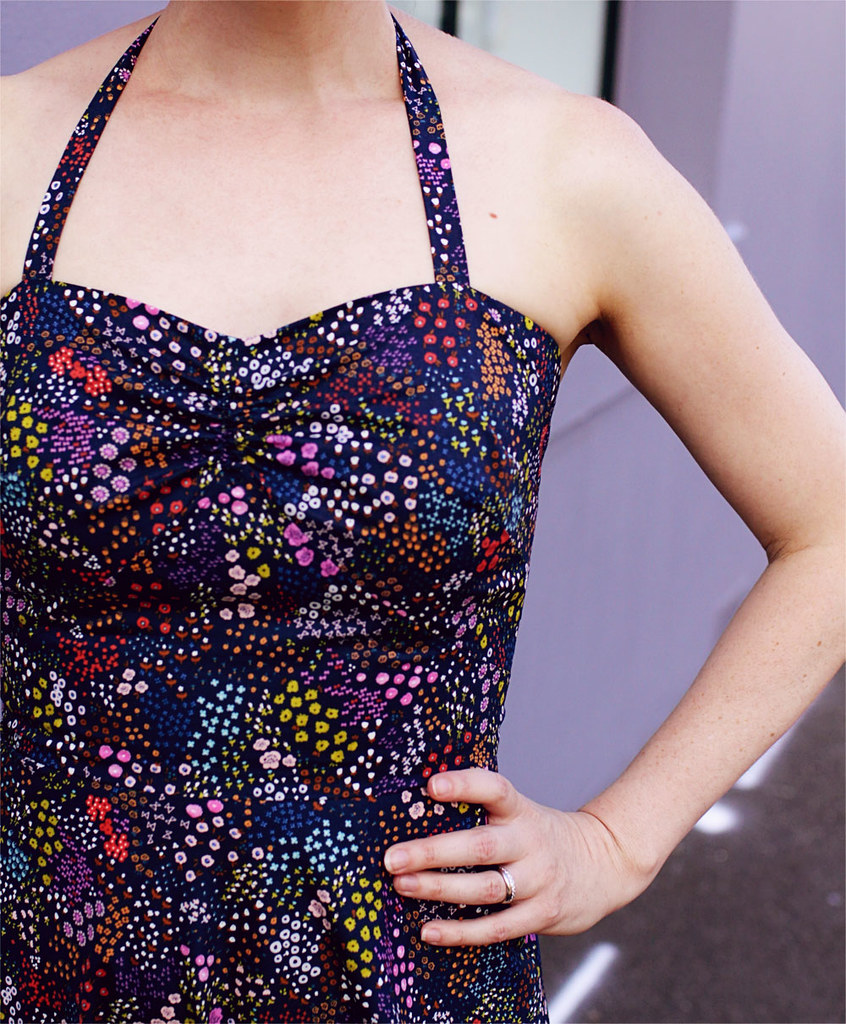
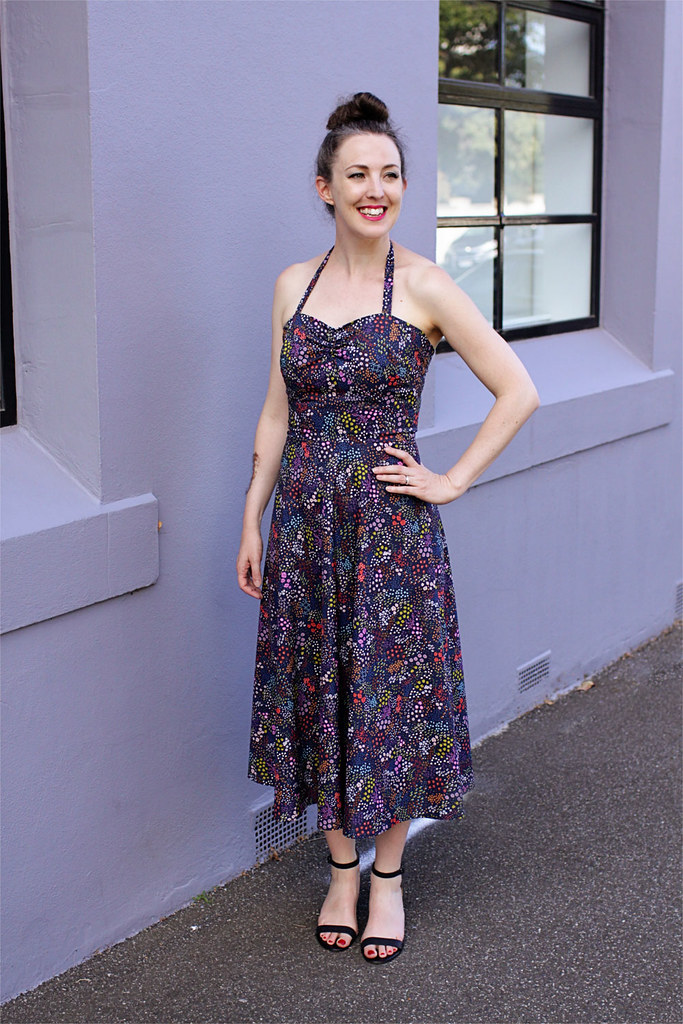
ROOKIE MISTAKE! The fabric I choose for version 2 was a light and soft Cotton + Steel cotton which I fell in love with the minute I saw it, but alas! The dark colour of the fabric means that you can't see the design features of the bodice very well. The gathering on the bust is visible, but the long side darts and the triangular bodice piece seams may as well be invisible. Waaaaah!
However, having now moaned and groaned, I do quite like this dress. It didn't turn out the way I was hoping, but it's still pretty cute. I just need to find the perfect fabric that will not only behave itself but will also show off the bodice detailing and I can call myself the Master Of McCalls 7920. In the meantime, I do have a cute new dress to add to the summer wardrobe, and I have learnt a few valuable sewing lessons in the meantime.
PS More thoughts on future versions of this dress: I think I'll actually connect the straps to the bodice back, as I'm not really a big fan of halter necks. Also, that skirt can definitely afford to be shortened by a few inches, although the length it currently sits is rather elegant.
Project Details:
Pattern - McCalls 7920
Fabric - 3m Cotton + Steel cotton lawn from GJ's Discount Fabrics
Notions - 35m invisible zipper
Monday, March 19, 2018
Monthly Menu Plan - March/April
I was rather saddened to find out that Jamie Oliver was closing his food magazine, Jamie. It was, in my opinion, one of the best food titles out there and I for one will sorely miss it. After all, this is the man who, via the medium of his written recipes, taught me how to cook. His roast chicken recipe, plus his method of making bread for pizza, have helped shape the cook I am today, and trust me - you'll always have a friend at your table if you've got those two recipes under your belt!
So in honor of Mr Oliver and his comittment to food, this month is mostly based around his recipes. Enjoy!
Week One:
Monday - Early autumn minestrone
Tuesday - Lentil spaghetti bologanise
Wednesday - Brilliant veggie burgers
Thursday - Out
Friday - Out
Saturday - Courgette and cheese borek
Sunday - Beetroot falafels with carrot salad
Week Two:
Monday - Harissa roasted cauliflower and potato bake with left-over carrot salad
Tuesday - Roasted cauliflower and coconut soup, with salad rolls
Wednesday - Beetroot and feta tart with rocket and radicchio salad
Thursday - Knitting night! Menu yet to be decided
Friday - Out
Saturday - Out
Sunday - Out
Week Three:
Monday - Out
Tuesday - Savory pancakes with paneer and spinach
Wednesday - Smoky veggie chilli
Thursday - Silverbeet soup with tomato, corn and cheese muffins
Friday - Pizza
Saturday - Roasted vegetable lasagne
Sunday - Spicy salami, ricotta and olive calzone with salad
Week Four:
Monday - Sweet potato, coconut and cardamon soup with poppadoms
Tuesday - Roast vegetable pasties with salad
Wednesday - Pumpkin and pasta bake with rocket salad
Thursday - Vegan shepherd's pie
Friday - Mexican omelette wraps with side salad
Monday, March 05, 2018
Monthly menu plan - Feb/March
It's been a while since I've posted my menu plan up here on ye olde blog. I'm still doing them religiously at home, but for reasons completely unfathomable I have not taken the next step of putting them up online. So apologies to the menu plan fans - hopefully this one makes amends somewhat!
Week One:
Monday - Silverbeet tart with currants and almonds, with salad
Tuesday - Spaghetti bolognaise
Wednesday - Vegetarian samosas with salad
Thursday - Spinach and lentil soup with garlic bread
Friday - Black bean tacos with roasted veg and all the trimmings
Saturday - Bangers and mash
Sunday - Tomato, capsicum and olive pasta with green salad
Week Two:
Monday - Butter chicken
Tuesday - Spaghetti and meatballs
Wednesday - Roasted vegetable, feta, pomegranate and quinoa salad with rocket
Thursday - Dinner at a friends
Friday - Tofu burgers
Saturday - Roast chicken
Sunday - Supergreens pasta primavera
Week Three:
Monday - Vegetable and feta tarts with onion marmalade and rocket salad
Tuesday - Lentil bolognaise
Wednesday - Cauliflower falafels
Thursday - Dinner out
Friday - Homemade pizza
Saturday - Baked potatoes with left over lentil bolognaise, and all the trimmings
Sunday - Spinach and ricotta cannelloni with garden salad
Week Four:
Monday - Vegetarian fried rice
Tuesday - Minestrone with spinach and ricotta ravioli
Wednesday - Pea, dill and rice soup with asparagus
Thursday - Feta, walnut and spinach pasties with green salad
Friday - Sweet potato and black bean burgers
Monday, February 19, 2018
Butterick 4792 (plus my Year of Vintage Sewing)
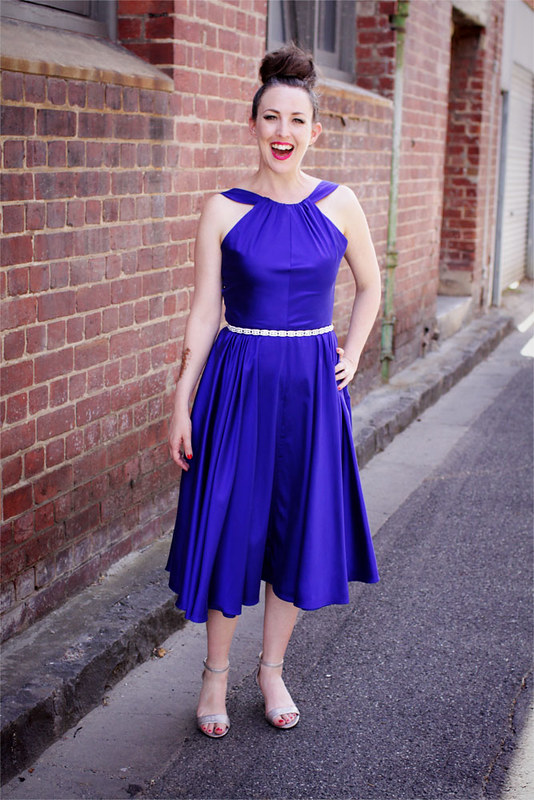
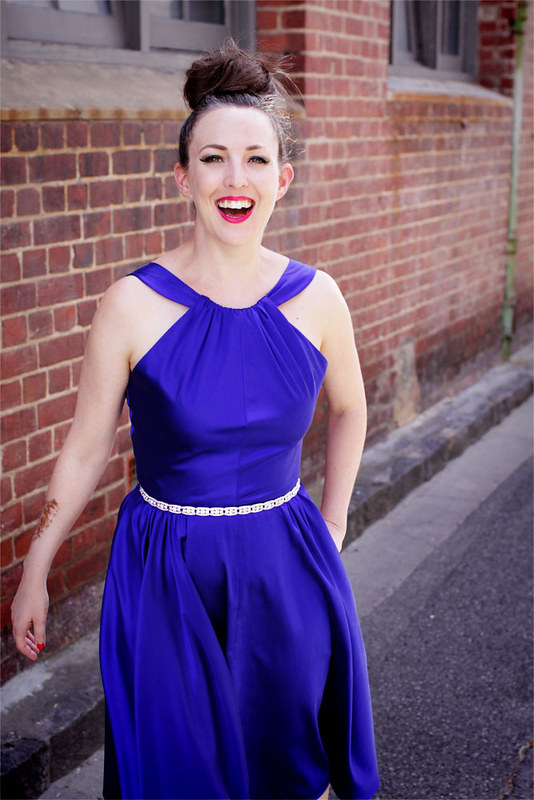
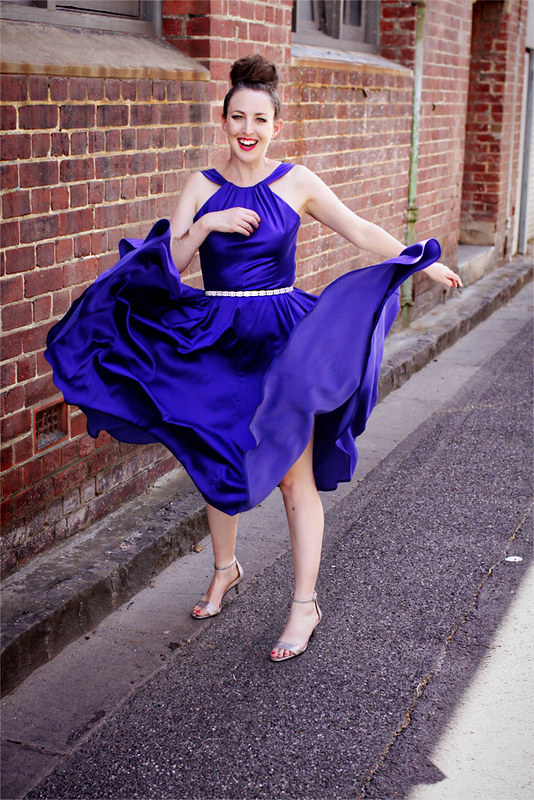
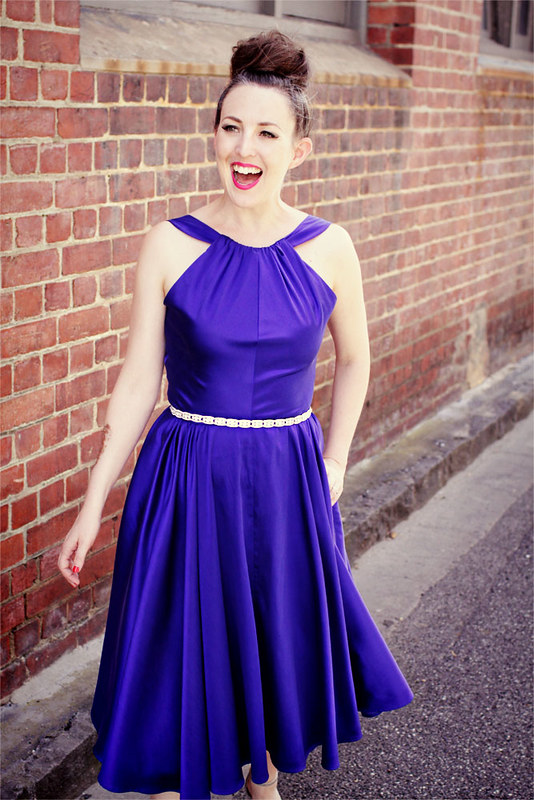
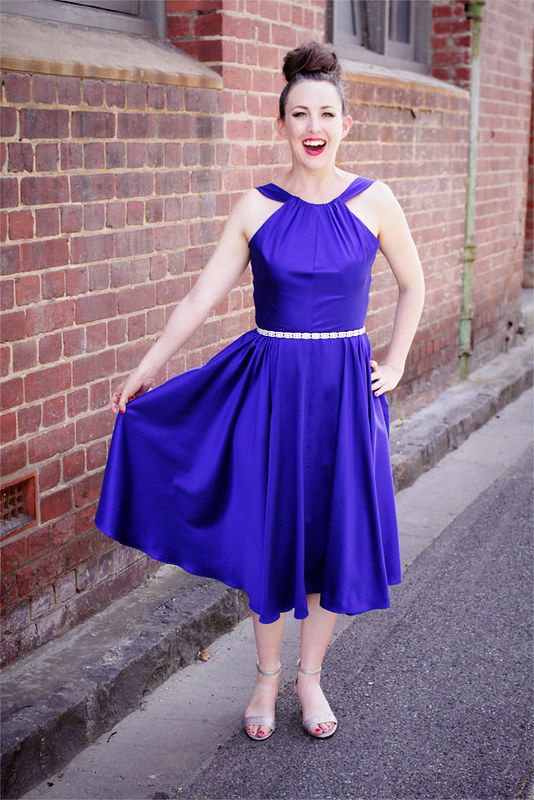
Now, it may look to the untrained eye that I am standing in some random Melbourne laneway, looking awfully dressed up with nowhere to go, but nothing, my friends, could be further from the truth. For I have embarked upon a Year of Vintage Sewing - anything I make for myself needs to be from a vintage pattern (original, reproduced or reissued, just as long as the original design is at least 30 years old), and this is my very first vintage make of the season. Sewing pals, the below pictures you see are me totally fulfilling my FASHION DESTINY!!!
Sorry about the caps - I'm just pretty darn excited about this year long experiment, and sometimes it comes bursting out! I've always been a sucker for vintage glamour. Personally, I blame the 'Midday Movie' - when I was but a wee lass growing up in the country, we only had two channels on the television. I know - poverty, right?!? Anyway, one of these stations always showed a movie at 12 noon, and I presume they chose really old movies from the 1930s through to the 1950s because the showing rights were as cheap as chips. I don't recall many of the film titles or names, but I do recall that whenever a lady strolled onto the scene she usually looked incredibly glamorous (unless she was the housekeeper. That poor dear usually just got saddled with an apron), and from there, methinks, the love of vintage glamour was planted within me.
Fast forward to my present day. I don't own a television (and haven't for 19 years now!), so I have no idea if the Midday Movie is still a thing, but what I do own is an awfully impressive pile of vintage patterns, so this is my year to celebrate them!
First cab off the rank is Butterick 4792. Normally I'm not one for halters, but halters from the 1950s have a glamour all of their own, so resistance was futile. I opted out of making the matching bolero, because it's one thing to wear a vintage silk dress in a laneway, but even I know that wearing a matchy matchy bolero is just taking things too far.
I didn't make any major modifications to this pattern, but I did omit making the petticoat layer, which was actually sewn to the skirt. The silk fabric I was using is stunning, but unforgivable - there are no hiding your indulgences with this sort of material, and I didn't want any bulky seams showing through. Plus one day in my vintage-coloured future I hope to be the proud owner of an actual skirt petticoat, so I figured that if I wanted volume in the skirt I would wear it with that. Personally, I quite like the flow the skirt has without the petticoat. The silk falls like molten metal. Ah, be still my beating heart!
I had a wee bit of hassle with the hem. I usually do a double hem, but when I tried it on this fabric it did not want to play ball. The hem was curved, and doing the double hem resulted in a very lumpy hem indeed. With a sigh I got out my old pal the quick-un-pick, and unstitched what felt like miles and miles of heming. I then repressed and did a simple narrow hem instead, which falls beautifully, so it was worth taking the extra time to get it right.
The pattern came with instructions for a belt, but I decided to up the glamour and pair it with a glittery bejewelled belt from Forever New. I love it! Normally I don't go for that much bling, but this dress, being the brightest electric blue you ever did see, was more than capable of handling hundreds of glittering faux diamonds.
Now if you'll excuse me, I need to trot off to the hairdressers to have my hair washed and set, then I might pop into town to find the perfect pair of gloves to go with this frock. Ha! I know the 1950s were not a blissful time of Rockwellesque prosperity for one and all, but in my opinion they sure got the fashion right!
Project Details
Pattern - Butterick 4792 (vintage pattern reproduction), size 8
Fabric - Silk/lycra blend from The Fabric Store
Notions - 35cm invisible zipper
Monday, February 12, 2018
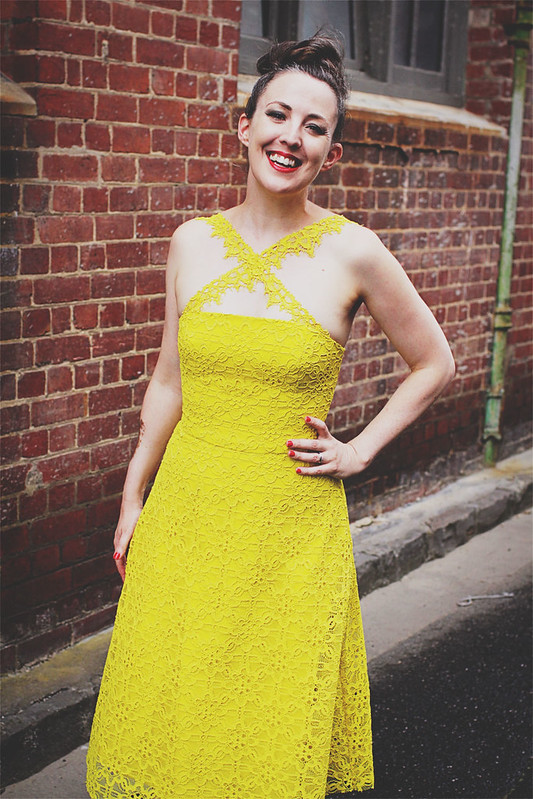
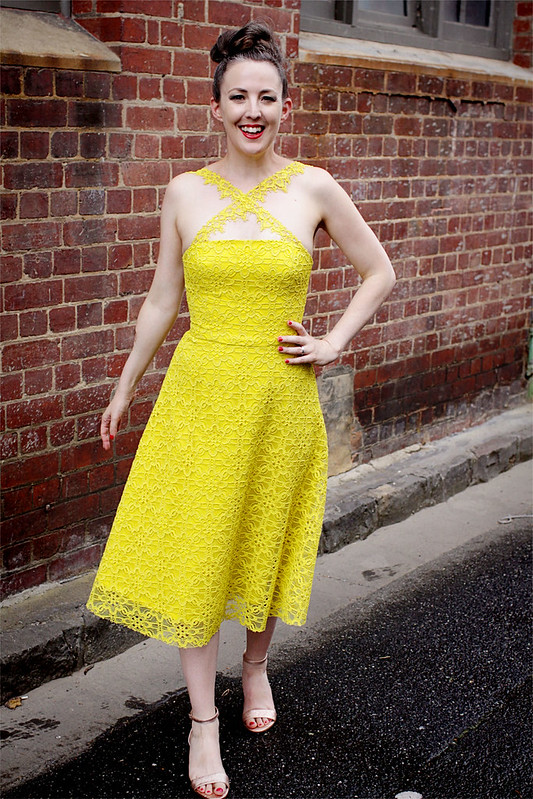
Yellow Lace Dress
I'm a bad 'un, and I'll never ever be any good. I've had this dress made for months now, and have only just got around to getting pics done!
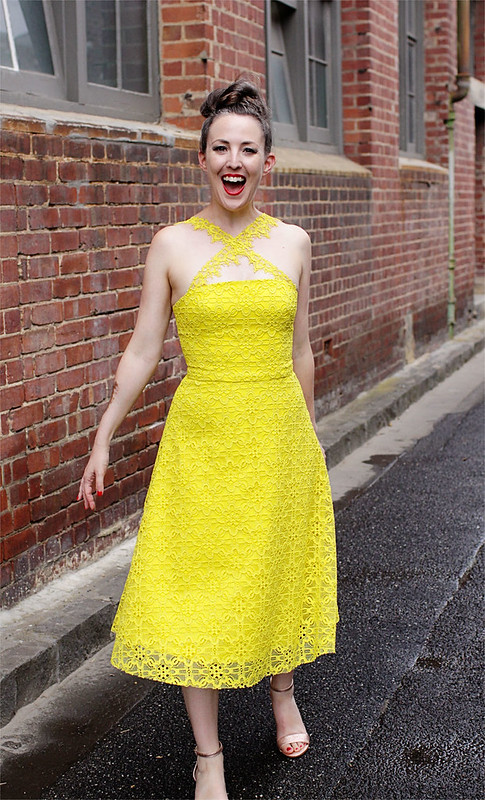
And when I say months, I mean it was actually a possible Frocktails contender - and that was way back in November - yikes! Still, better late than never, so feast your eyes, sewing peeps - just make sure you put some sunnies on first, cos this bad boy is BRIGHT!
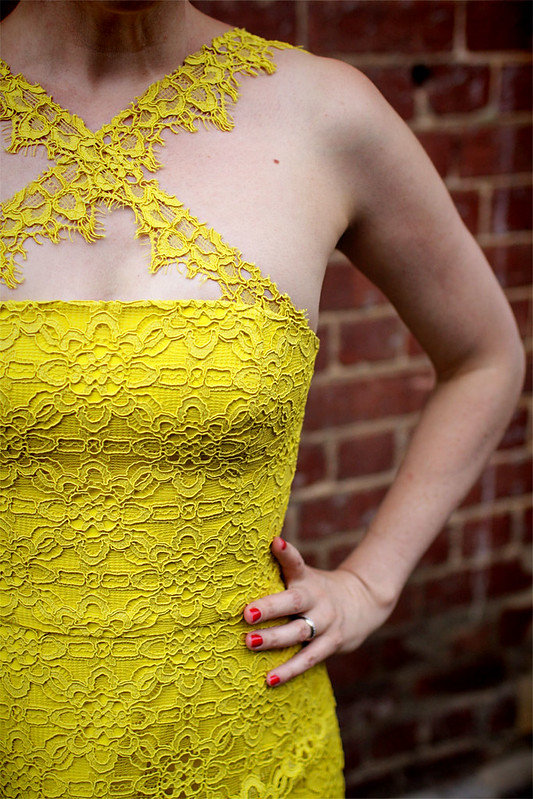
I made this dress using my trusty Vogue 8184 pattern. Figuring out how best to incorporate the lace, I decided to layer the lace pieces straight onto the bodice pieces, sewing them together using a 5mm seam allowance. For the skirt, I kept the lace pieces and skirt pieces separate, only sewing them together at the back seam, as I figured it would make inserting the zip much easier that way. I wanted the lace skirt to hang free from the base fabric skirt, so I sewed the base fabric in the usual way, but did French seams for the lace seams. It worked a treat - I'd never sewn a French seam before, and was belabouring under the illusion that it was a super tricky couture technique, but it was surprisingly easy, and rather satisfying to do.
Instead of the usual straps, I decided to create lace straps by using the scalloped edge of the lace fabric, for it was far too pretty to go to waste. I inserted one edge into the top of the bodice, then criss-crossed them over the from of the decolletage, before straightening up past the shoulders to the back bodice. If I do say so myself, it looks rather spiffy, and gives the dress an extra-glam edge! I also shortened my front bodice by 1.5cm to ensure more room for the lace cross over.
Hmm, what other alterations did I make? That's right - I also cut my lace skirt pieces about 5cm longer, as I wanted a see-through lace edging to the skirt. I left it the skirt edge raw, as the corded lace would have resulted in a lumpy thick hem, which would have ruined the whole look of the skirt. No lumpy hems around her, thank you very much!
To be perfectly honest, it's not exactly an 'everyday' dress, but I've always wanted to sew myself a fancy lace dress, so even if it never gets a lot of wear, just having it the wardrobe, ready for glam duty, is enough to make me happy. I really needn't worry about it not getting worn, though - Tyger has told me that she intends to grow into it, and fast, so that she can wear it to all her high school parties. Good grief - I've created a mini vintage-loving fashionista!
Project Details
Pattern - Vogue 8184
Fabric - Yellow lace and yellow cotton, 2m of each, both from The Fabric Store
Notions - 35cm invisible zip
Monday, January 22, 2018
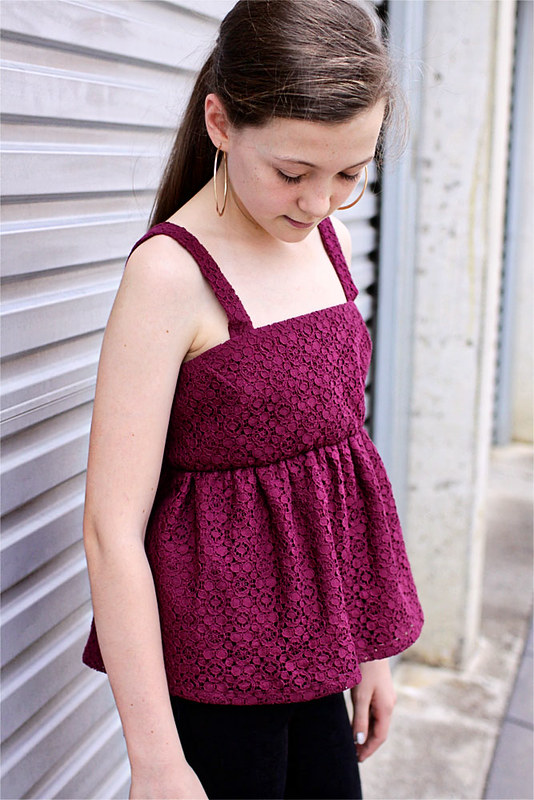
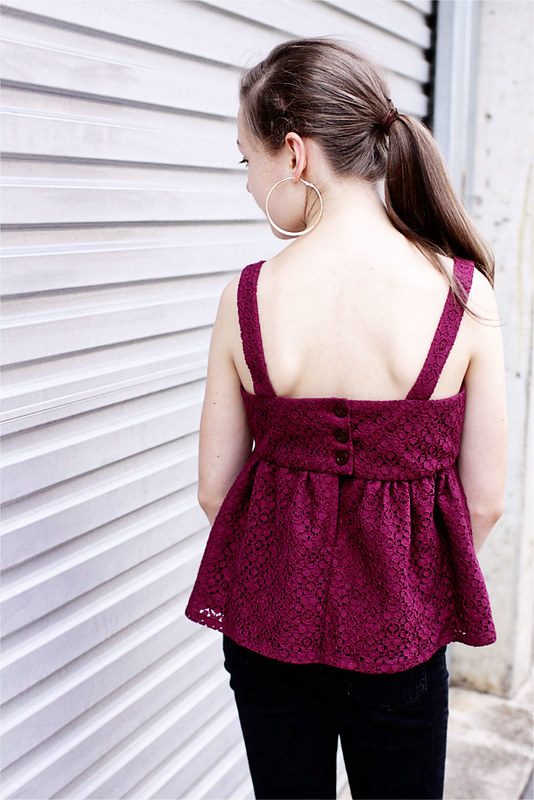
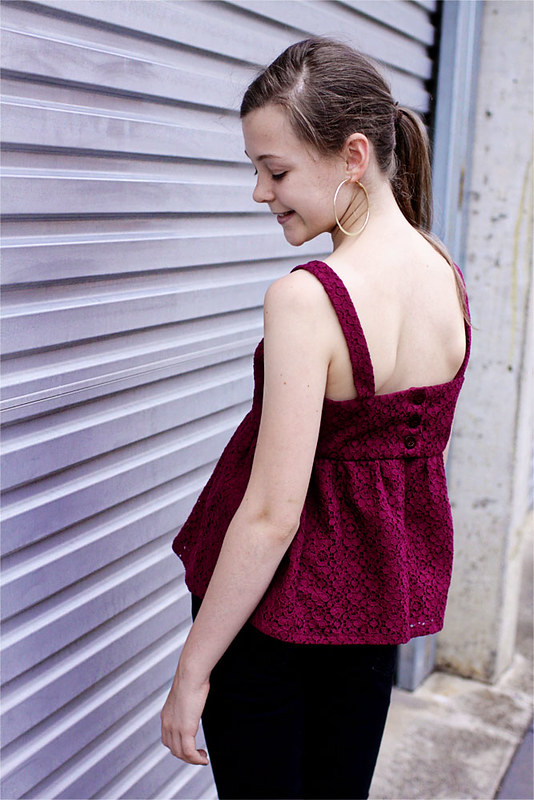
New Look 6518 Burgundy Lace Top
Happy new year! Let's ring in the changes with a wine... a wine coloured lace top, that is!
As soon as I saw this fabric at The Fabric Store, visions of lacy goodness began dancing like so many sugar plums in my head, finally crystallizing into a luxe top for Tyger. Thankfully she had accompanied me on the fabric buying jaunt, and once I confided my plan to her, she agreed to it immediately, and prompted me to go forth and purchase so her fashion needs would be met.
Seriously, am I the only mother of a teen having trouble finding clothes that are on the right side of cute and sophisticated, without stepping dangerously into skanky territory? Tyger has inherited my love of vintage (and let's face it, champagne style on a gingerbeer budget), so the current teen uniform of shorty shorts and ripped t-shirts doesn't really do it for her. Or me, for that matter. Thank goodness I can sew - and also thank goodness that The Fabric Store had 40% off both the lace and the lining fabric. This is champagne style on a seriously impressively small budget! Woo hoo!
I used New Look 6518 for the top, style A, but with a much shorter skirt length, so it would be a top rather than a dress. The pattern was very easy to follow and put together, and would have been done in a matter of hours if I hadn't had made more work for myself by sewing it out of lace that needed lining sewn to each piece beforehand. Still, it was worth it - she looks magnificent in it and has informed me that it paired with some black skinny jeans is her new 'party' outfit. I can think of no greater honour to be bestowed upon a top - those teen parties are a fashion minefield!
The only alteration I made was to bring each side seam in 2cm, after cutting out the smallest size (size 6).
Project Details
Pattern - New Look 6518, view A
Fabric - Burgundy cotton lace and lining fabric, both from The Fabric Store
Notions - 3 buttons